


Models
>
MLG19PDAWW
MLG19PDAWW Maytag Washer Dryer Combo
Jump to:
Find Part by Name
Keep searches simple, eg. "belt" or "pump".
Diagrams for MLG19PDAWW
Viewing 19 of 19 Diagram and Parts List for Maytag Washer Dryer Combo")
 Diagram and Parts List for Maytag Washer Dryer Combo")
 Diagram and Parts List for Maytag Washer Dryer Combo")
 Diagram and Parts List for Maytag Washer Dryer Combo")
 Diagram and Parts List for Maytag Washer Dryer Combo")
 Diagram and Parts List for Maytag Washer Dryer Combo")
 Diagram and Parts List for Maytag Washer Dryer Combo")
 Diagram and Parts List for Maytag Washer Dryer Combo")
 Diagram and Parts List for Maytag Washer Dryer Combo")
 Diagram and Parts List for Maytag Washer Dryer Combo")
 Diagram and Parts List for Maytag Washer Dryer Combo")

 Diagram and Parts List for Maytag Washer Dryer Combo")
 Diagram and Parts List for Maytag Washer Dryer Combo")
 Diagram and Parts List for Maytag Washer Dryer Combo")
 Diagram and Parts List for Maytag Washer Dryer Combo")
 Diagram and Parts List for Maytag Washer Dryer Combo")
.gif "WIRING INFORMATION (MLG / MUG19PDAX) Diagram and Parts List for Maytag Washer Dryer Combo")
 Diagram and Parts List for Maytag Washer Dryer Combo")
Keep searches simple, eg. "belt" or "pump".

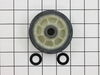
$22.91
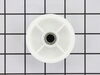
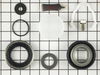
This OEM drum support roller kit contains the parts needed to replace one roller on your dryer. This kit includes one drum roller and two bearings. Most dryers use two drum rollers, and it is recommen...
In Stock
Order now and your part arrives by Jul 23

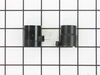
$28.91
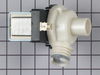
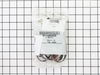
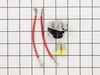
This OEM kit comes with two ignition coils (one three-terminal boost/hold coil, and one two-terminal secondary coil). Usually only one of them burns out, but you should replace them as a set as both h...
In Stock
Order now and your part arrives by Jul 23

$13.07
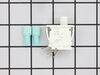
This part is located on the front bulkhead of the dryer and helps the drum to rotate smoothly and quietly. If you notice a screeching or metal-on-metal noise while your appliance is operating, you may...
In Stock
Order now and your part arrives by Jul 23

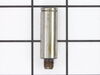
The roller shaft is also known as a support roller shaft or a drum roller axle. It is a part in your dryer that the drum rollers spin on, helping your dryer to tumble. If your appliance is noisy while...
No Longer Available

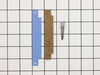
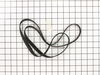
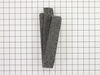
If your dryer is noisy while operating, or will not tumble at all, there may be an issue with the drum belt. Over time, the rubber can become brittle and snap, and the belt will need to be replaced. T...
In Stock
Order now and your part arrives by Jul 23

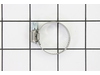
$6.51
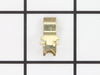
Sometimes referred to as a retaining clip, the retaining ring is used to hold the drum support roller onto the shaft in your dryer. The clip may need to be replaced if you find that your dryer is nois...
In Stock
Order now and your part arrives by Jul 23

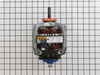
If your dryer is making excessive noise, or it will not tumble, there may be an issue with the idler pulley wheel. The idler pulley wheel is attached to the idler bracket and is used to secure the dry...
In Stock
Order now and your part arrives by Jul 23

$36.42
This genuine OEM part is a radiant flame sensor for your gas dryer. It is used to determine when the temperature of the igniter is hot enough to ignite the gas. Once the igniter is hot enough, it allo...
In Stock
Order now and your part arrives by Jul 23

$13.07
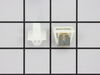
This roller shaft washer is just under an inch in diameter and is used for some of Whirlpool's brands of clothes dryers.Sold individually.
In Stock
Order now and your part arrives by Jul 23

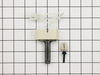
$28.91
This flat style igniter comes with a wire harness connector. This part ignites the gas within the dryer. Bracket is NOT included.
In Stock
Order now and your part arrives by Jul 23

$13.07
This idler pulley shaft washer is used with many clothes dryers. It is less than an inch long, and it is black in color.
In Stock
Order now and your part arrives by Jul 23

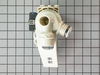
$19.63
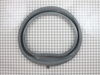
This seal can be used for the front or rear drum. Adhesive is NOT included. For adhesive search: WPY055980
In Stock
Order now and your part arrives by Jul 23
Common Problems and Symptoms for MLG19PDAWW
Viewing 17 of 17Noisy
Fixed by these parts
How to fix it
Leaking
Fixed by these parts

How to fix it
Not Heating
Fixed by these parts

How to fix it
Will not drain
Fixed by these parts
How to fix it
Door won’t close
Fixed by these parts
How to fix it
Marks left on clothes
Fixed by these parts
How to fix it
Drum Not Spinning
Fixed by these parts
How to fix it
Too hot
Fixed by these parts
How to fix it
Burning smell
Fixed by these parts
How to fix it
Won’t Start
Fixed by these parts
How to fix it
Will not agitate
Fixed by these parts
How to fix it
Spins slowly
Fixed by these parts
How to fix it
Spinning Issues
Fixed by these parts
How to fix it
Door Pops Open
Fixed by these parts
How to fix it
Running With Door Open
Fixed by these parts
How to fix it
Door latch failure
Fixed by these parts
How to fix it
Will Not Start
Fixed by these parts
How to fix it


Keep searches simple. Use keywords, e.g. "leaking", "pump", "broken" or "fit".
noisy rollers, broken latch
first, I unplug the power supply of the dryer then I removed the two screws at the bottom of the dryer then pulled out the front part of the dryer,unplugged the blue & yellow wire for the on/off switch for the door,at the back of the dryer I unscrew the pannel for the belt,disconect the belt,and I unscrew the four screws on both side of t
... Read more
he front pannel to remove the front cover of the drum. Once I removed the front cover of the drum I can now remove the drum itself to access the drum support roller. I unscrew the rollers then replace it with the new once. It was an easy job.
Thank you.
Thank you.
Read less
Was this instruction helpful to you?
Thank you for voting!
- Customer:
- gerald from park city, MT
- Parts Used:
- WP6-3129480, WP33001443, WP312535, 12001541, WP9703438
- Difficulty Level:
- Easy
- Total Repair Time:
- 1- 2 hours
- Tools:
- Pliers, Screw drivers, Socket set, Wrench set
dryer squeeking
removed front panel,lifted top, removed drum and drive belt,remove old rollers and acc and instlled new and reinstalled dryer parts.
Was this instruction helpful to you?
Thank you for voting!
- Customer:
- Gary from Haverhill, NH
- Parts Used:
- 279834
- Difficulty Level:
- Easy
- Total Repair Time:
- 30 - 60 mins
- Tools:
- Nutdriver, Screw drivers, Socket set
Dryer ran but would not heat
PartSelect showed seven different possibilities why the dryer wouldn't heat. I removed the two screws to remove the bottom panel and turned the dryer on and noticed that the heating element that ignites the gas was working fine. This meant that it was not getting gas so it could be the gas valve or one of the two gas valve coils which are
... Read more
located on top of the gas valve. I borrowed my neighbor"s ohm meter and touched the two probes on the coils terminals to check for continuity and found that one of the coils read zero. I then took both of the coils out by removing two screws and tested each coil again. One coil read 500-850 and the other read zero. This meant that it was no good so I called for the part and received it in three days. I reassembled the parts and turned the dryer on and it fired up after a few seconds. It works as good as new. The part plus shipping was less than $30. My repairman would have charged me $150-$200. While the dryer was apart I gave it a good cleaning with a vacuum and a toothbrush in delicate areas. I also removed and cleaned the lint trap housing by removing two nuts. I didn't know much about gas dryers, but thanks to PartSelect I easily fixed it myself.
Read less
Was this instruction helpful to you?
Thank you for voting!