


Models
>
41982
41982 (ABWESEU) LG Washer Dryer Combo
Jump to:
Find Part by Name
Keep searches simple, eg. "belt" or "pump".
Diagrams for 41982
Viewing 3 of 3


Keep searches simple, eg. "belt" or "pump".

$34.97
The hot water valve is found at the back of your washer and controls the flow of hot water into the machine. If the valve is defective, the washer may leak, overfill, fill slowly, or not fill with wat...
In Stock
Order now and your part arrives by Mar 22

$18.85
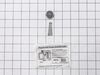
This magnetic door plunger is a genuine replacement component designed to keep the washing machine door slightly ajar when not in use. By allowing air circulation, it helps the inner door and tub seal...
In Stock
Order now and your part arrives by Mar 22

$71.77
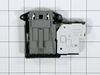
If your washing machine is leaking, slow to fill, will not stop filling with water, or is not filling at all, the cold-water inlet valve may be defective. The purpose of the valve is to open to allow ...
On Order

$54.01
This hose has bellows to allow for flexibility during the wash and spin cycles.
In Stock
Order now and your part arrives by Mar 22

In Stock
Order now and your part arrives by Mar 22

$24.10
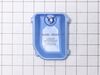
If your washer isn’t dispensing detergent or fabric softener properly, this replacement container assembly may be the fix you need. Designed to hold liquid cleaning agents and release them at the righ...
In Stock
Order now and your part arrives by Mar 22

$24.10
This replacement pump filter, also known as a filter assembly, is a genuine OEM part for your washer or washer/dryer combo. Before beginning this repair, turn off the power and water supply to your wa...
In Stock
Order now and your part arrives by Mar 22

$20.95
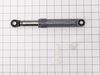
The locking pin is used to hold the shock absorber on the washer. There is a pin used at the bottom and top of the shock absorber. Sold individually.
Special Order

In Stock
Order now and your part arrives by Mar 22

Special Order

In Stock
Order now and your part arrives by Mar 22

$128.95
If your washer isn’t locking or starting like it should, this replacement door lock switch could be the fix you need. It helps your machine know when the door is closed so it can lock and begin the cy...
In Stock
Order now and your part arrives by Mar 22
Questions and Answers
We're sorry, but our Q&A experts are temporarily unavailable.
Please check back later if you still haven't found the answer you need.
Common Problems and Symptoms for 41982
Viewing 10 of 10Leaking
Fixed by these parts


How to fix it
Lid or door won’t close
Fixed by these parts
How to fix it
Water Filling Issues
Fixed by these parts

How to fix it
Does not dispense fabric softener or detergent
Fixed by these parts

How to fix it
Will not drain
Fixed by these parts


How to fix it
Locking Issues
Fixed by these parts
How to fix it
Shaking and Moving
Fixed by these parts
How to fix it
No hot or cold water
Fixed by these parts
How to fix it
Will Not Start
Fixed by these parts
How to fix it
Spinning Issues
Fixed by these parts
How to fix it


Keep searches simple. Use keywords, e.g. "leaking", "pump", "broken" or "fit".
- Customer:
- Omnitech from Warrenville, IL
- Parts Used:
- AGM73610701
- Difficulty Level:
- Really Easy
- Total Repair Time:
- Less than 15 mins
Door would not close
There is a magnet at the bottom of the door which allows the door to be held ajar when the washer is not in use to allow the tub and gaskets to dry. A tab on the plastic housing which retains the magnet broke which allowed the housing to pull free of the door and stick itself to the machine preventing the door to close. Easy fix to replac
... Read more
e the magnet was $18. Instructions were included in the box. Part number on the drawing was A165. PS3618292 Magnetic Door Plunger
Read less
Was this instruction helpful to you?
Thank you for voting!
- Customer:
- Leslie from STOWE, VT
- Parts Used:
- 4738ER1002A
- Difficulty Level:
- Easy
- Total Repair Time:
- 30 - 60 mins
- Tools:
- Screw drivers
leaking tub-to-pump drain hose
Pull washer away from wall. Unplug cord and remove drain hose from receptacle. Remove 4 screws holding panel to rear of washer. Squeeze and slide back hose clamps on each end of drain hose and loosen center clamp with screwdriver. Remove old hose. Reinstall new hose in reverse order using existing clamps. Re-install back panel.
Was this instruction helpful to you?
Thank you for voting!
- Customer:
- John from Northport, NY
- Parts Used:
- 5220FR2075L
- Difficulty Level:
- Really Easy
- Total Repair Time:
- 30 - 60 mins
- Tools:
- Pliers, Screw drivers
Inlet valve leak
Followed directions on the video and went like a charm. Very impressed with service and video
Was this instruction helpful to you?
Thank you for voting!