



Models
>
WRX735SDHV06
WRX735SDHV06 Whirlpool Refrigerator
Jump to:
Find Part by Name
Keep searches simple, eg. "belt" or "pump".
Keep searches simple, eg. "belt" or "pump".
This 18 ml bottle of white appliance touch-up paint is used to cover scratches or marks on your appliance. The white touch-up paint can be used on refrigerators, microwaves, ranges, clothes dryers, an...
No Longer Available
Need to keep your fridge’s water and ice working while the filter is out? This bypass cap lets water flow to the dispenser and ice maker without a filter. It’s easy to install and fits Whirlpool, Mayt...
In Stock
Order now and your part arrives by Oct 22
$20.72
These parts will attach to your drawer rail and are used to help the drawer glide smoothly.
In Stock
Order now and your part arrives by Oct 22
In Stock
Order now and your part arrives by Oct 22
$55.18
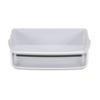
This is a replacement door bin for your refrigerator. It is made of white plastic and is approximately 13 inches wide at its longest point and is 8 inches deep and 4 inches tall. The door bin holds it...
In Stock
Order now and your part arrives by Oct 22
The board fits behind the light lens and has LED lights that illuminate the interior of the refrigerator or freezer compartments.
In Stock
Order now and your part arrives by Oct 22
$41.78
This Refrigerator Ice Maker Installation Kit connects the house water supply, to the refrigerator for ice maker and water dispenser operation. This kit includes 15-ft of copper tubing, (1) saddle valv...
In Stock
Order now and your part arrives by Oct 22
In Stock
Order now and your part arrives by Oct 22
Common Problems and Symptoms for WRX735SDHV06
Viewing 8 of 8Not dispensing water
Fixed by these parts
How to fix it
Leaking
Fixed by these parts
How to fix it
Ice maker not making ice
Fixed by these parts
How to fix it
Light not working
Fixed by these parts
How to fix it
Door won’t open or close
Fixed by these parts
How to fix it
Noisy
Fixed by these parts
How to fix it
Ice maker dispenses too little ice
Fixed by these parts
How to fix it
Frost buildup
Fixed by these parts
How to fix it
Keep searches simple. Use keywords, e.g. "leaking", "pump", "broken" or "fit".
- Customer:
- Paul from SUDBURY, MA
- Parts Used:
- W11683243
- Difficulty Level:
- A Bit Difficult
- Total Repair Time:
- 30 - 60 mins
LED Light stopped working
Removing the old unit was difficult. The light was clearly designed for installation not for ease of repair. Since I was concerned about marring the surface of the refrigerator I used a paint scraper to get under the lip of the light and another smaller paint scraper to lift the unit away from the body of the refrigerator. It does not
... Read more
just "pop off". I eventually did get it free without any damage to the wall of the refrigerator. The repair was then very easy. There was a connector that was easy to separate allowing for the removal of the old unit without cutting any wires. The new unit had a mating connector, which easily connected to the old connector in the refrigerator. After some pushing I was able to install the new unit into the hole in the refrigerator. It does not exactly "snap in".
Read less
Was this instruction helpful to you?
Thank you for voting!
- Customer:
- fred from CHESTERFIELD, MO
- Parts Used:
- W11683243
- Difficulty Level:
- Very Easy
- Total Repair Time:
- Less than 15 mins
lights out in main refrigerator
researched on line and found the wiring was in series and I the suggestion was to replace the first light in the series that was in the freezer. Ordered the replacement light board and took out the existing light and pooped in the new one. Lights now all work! 15 minutes at tops.
Was this instruction helpful to you?
Thank you for voting!
- Customer:
- Jenny from PHOENIX, AZ
- Parts Used:
- W11415785
- Difficulty Level:
- Really Easy
- Total Repair Time:
- 15 - 30 mins
- Tools:
- Screw drivers
spraying water from the connection on top of fridge
just like the video showed, removed the cover parts inside the fridge, disconnected the water tube inside and pulled out from the top of fridge, then inserted new water tube.
Was this instruction helpful to you?
Thank you for voting!