


Models
>
25337840890
25337840890 Kenmore Refrigerator
Jump to:
Find Part by Name
Keep searches simple, eg. "belt" or "pump".
Keep searches simple, eg. "belt" or "pump".

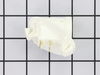
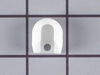
This part includes one refrigerator door shelf end cap, which is compatible with either the left or right side. This durable white plastic part is sourced directly from the original manufacturer and i...
In Stock
Order now and your part arrives by Aug 2

If your door shelf retainer bar is not staying in place you may need to replace the end cap. The end cap helps secure the bar in place on the refrigerator door. This end cap can be used for the left o...
In Stock
Order now and your part arrives by Aug 2

$27.45
This 40-watt light bulb has a standard screw-in base and is used in many different appliances. If your current bulb is burnt out or broken you will need to replace it. This light bulb is a genuine OEM...
In Stock
Order now and your part arrives by Aug 2

In Stock
Order now and your part arrives by Aug 2

$56.05
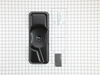
This part is attached to the compressor. It helps the compressor kick on and off while maintaining a constant temperature to keep things frozen in your freezer.
In Stock
Order now and your part arrives by Aug 2

$41.75
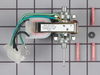
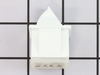
This limiter thermostat cuts out when the temperature inside your refrigerator reaches 55 degrees Fahrenheit and kicks back in when the internal temperature drops to 20 degrees Fahrenheit.
In Stock
Order now and your part arrives by Aug 2

$111.64
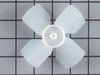
This motor runs the evaporator fan in your refrigerator. It is mounted on the center hub and has three lead wires terminals. This motor rotates in a clockwise fashion. Its shaft has a diameter of 1/8" and is 1-1/4" long.
In Stock
Order now and your part arrives by Aug 2

$31.85
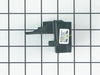
The light socket on your refrigerator houses the light bulb and connects it to the power source. If you notice that your refrigerator light does not come on when you open the door, you may need to rep...
In Stock
Order now and your part arrives by Aug 2

In Stock
Order now and your part arrives by Aug 2

In Stock
Order now and your part arrives by Aug 2

In Stock
Order now and your part arrives by Aug 2

In Stock
Order now and your part arrives by Aug 2
Common Problems and Symptoms for 25337840890
Viewing 18 of 18Fridge too warm
Fixed by these parts
How to fix it
Noisy
Fixed by these parts
How to fix it
Light not working
Fixed by these parts
How to fix it
Will Not Start
Fixed by these parts
How to fix it
Freezer section too warm
Fixed by these parts
How to fix it
Freezer not defrosting
Fixed by these parts
How to fix it
Too warm
Fixed by these parts
How to fix it
Fridge and Freezer are too warm
Fixed by these parts
How to fix it
Won’t start
Fixed by these parts
How to fix it
Fridge runs too long
Fixed by these parts
How to fix it
Door Sweating
Fixed by these parts
How to fix it
Fridge too cold
Fixed by these parts

How to fix it
Freezer too cold
Fixed by these parts
How to fix it
Leaking
Fixed by these parts
How to fix it
Frost buildup
Fixed by these parts
How to fix it
Door won’t open or close
Fixed by these parts
How to fix it
Doesn’t stop running
Fixed by these parts
How to fix it
Clicking sound
Fixed by these parts
How to fix it


Keep searches simple. Use keywords, e.g. "leaking", "pump", "broken" or "fit".
- Customer:
- Jordan from Maumee, OH
- Parts Used:
- 5308000010, 5300158289
- Difficulty Level:
- Easy
- Total Repair Time:
- 1- 2 hours
- Tools:
- Nutdriver
Noisy fan
1. Removed the 7 nuts using the nut driver from the freezer back panel inside the freezer.
2. Remove the back panel. The evaporator motor and fan are located above the coils.
3. Unplug the wiring harness.
4. Remove the two gold mounting screws holding the motor and fan in place.
5. Remove the motor and fan including th ... Read more e brackets.
6. Install the new motor and fan onto the mounting bracket.
6a. Attach the green ground to the mounting bracket.
7. Screw the two gold screws back into the freezer.
8. Attach the new wiring harness. Note, the old harness had a mounting hole/space for it to connect to the wiring harness of the freezer. The new motor's harness was not long enough for this, so it is connected freely to the freezer harness.
9. Use the hair dryer to melt any ice that may have formed on the coils and hole where the fan goes.
10. Turn the freezer on to see if the fan turns on.
11. Reinstall the back panel.
All done!
Read less
Was this instruction helpful to you?
Thank you for voting!
- Customer:
- William from Alexandria, VA
- Parts Used:
- 218906802
- Difficulty Level:
- Really Easy
- Total Repair Time:
- Less than 15 mins
- Tools:
- Screw drivers
Light socket melted around bulb
After unsuccessfully trying to change the blown light bulb I discovered that the plastic light socket had gotten so hot that it melted and permanently fused with the blown bulb. After my new socket arrived in the mail I just popped the temp control assembly out with a screw driver and removed the old socket and placed the new one in.
... Read more
Whole operation to 5 minutes.
Read less
Was this instruction helpful to you?
Thank you for voting!
- Customer:
- ROY from PENSACOLA, FL
- Parts Used:
- 5308000010, 5300158289
- Difficulty Level:
- A Bit Difficult
- Total Repair Time:
- 1- 2 hours
- Tools:
- Pliers, Screw drivers
The Evaporator Fan Burnt Up
The fan motor all but caught the inside of the freezer on fire . Had to remove then clean, and I mean clean the walls of the freezer . Then had to pry out the old fan without breaking anything . Replacement of new fan was quick and easy because all the parts that I needed were in the bag
Was this instruction helpful to you?
Thank you for voting!