


Models
>
36358047893
36358047893 Kenmore Refrigerator
Jump to:
Find Part by Name
Keep searches simple, eg. "belt" or "pump".
Keep searches simple, eg. "belt" or "pump".

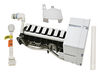
$229.80
The ice maker assembly makes ice by filling the tray with water from the inlet valve, freezing it until solid cubes are formed, and then ejecting them into the ice bucket. This process will repeat unt...
In Stock
Order now and your part arrives by Jul 31

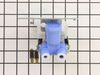
$64.95
This valve comes with 1/4" compression inlet.
NOTE: This part comes with new quick connections. To install - cut retaining nuts off of existing plastic water lines and gently push them into new valv...
In Stock
Order now and your part arrives by Jul 31

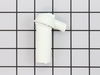
$52.95
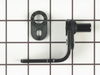
Comes with both cam risers. This hinge kit is suitable for the bottom of either the freezer door or the refrigerator door of some refrigerators.
In Stock
Order now and your part arrives by Jul 31

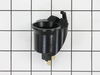
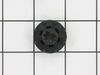
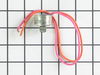
This grommet is found on both the front and back of the fan motor assembly for the condenser and the evaporator in your fridge. It is used to provide a buffer between the fan motor and the mounting br...
In Stock
Order now and your part arrives by Jul 31

$21.95
This 40-Watt light bulb is sold individually.
It is specially designed to withstand extreme temperatures, so this bulb is compatible with a variety of appliance types including refrigerators, ranges,...
In Stock
Order now and your part arrives by Jul 31

$36.42
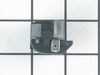
The light switch in your refrigerator is used to turn the light on and off when the fridge door opens or closes. This is considered a closed switch, which means that when the fridge door depresses the...
In Stock
Order now and your part arrives by Jul 31

In Stock
Order now and your part arrives by Jul 31

$53.85
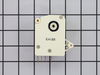
This device acts like a clock. It continually advances and alternates between activating the cooling cycle and the defrost heater.
In Stock
Order now and your part arrives by Jul 31

$58.37
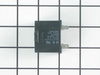
This part helps the compressor kick on and off while maintaining a constant temperature to keep things frozen in your freezer. This part has been updated by the manufacturer and may appear different t...
In Stock
Order now and your part arrives by Jul 31

$112.43
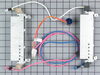
This part assembly has 2 functions: The defrost heater keeps the cooling coils from frosting over and the thermostat senses that the heat near the cooling coils has reached the desired temperature. Us...
In Stock
Order now and your part arrives by Jul 31

This is a package of twelve Phillips-head screws. They can be used as replacement screws in refrigerators, ice makers, or freezers. Be sure to check that your appliance model is compatible with these ...
No Longer Available

$20.95
This part is a replacement light socket for your refrigerator. It connects to the power source, and holds the light bulb. If the light in your refrigerator is not working, you could have a faulty sock...
In Stock
Order now and your part arrives by Jul 31
Common Problems and Symptoms for 36358047893
Viewing 21 of 21Leaking
Fixed by these parts
How to fix it
Ice maker not making ice
Fixed by these parts
How to fix it
Light not working
Fixed by these parts

How to fix it
Fridge too warm
Fixed by these parts
How to fix it
Noisy
Fixed by these parts
How to fix it
Door won’t open or close
Fixed by these parts
How to fix it
Freezer section too warm
Fixed by these parts
How to fix it
Freezer not defrosting
Fixed by these parts
How to fix it
Will Not Start
Fixed by these parts
How to fix it
Not dispensing water
Fixed by these parts
How to fix it
Ice maker won’t dispense ice
Fixed by these parts
How to fix it
Fridge runs too long
Fixed by these parts
How to fix it
Fridge and Freezer are too warm
Fixed by these parts
How to fix it
Door Sweating
Fixed by these parts
How to fix it
Clicking sound
Fixed by these parts
How to fix it
Frost buildup
Fixed by these parts
How to fix it
Freezer too cold
Fixed by these parts
How to fix it
Ice maker dispenses too little ice
Fixed by these parts
How to fix it
Ice maker dispenses too much ice
Fixed by these parts
How to fix it
Too warm
Fixed by these parts
How to fix it
Won’t start
Fixed by these parts
How to fix it


Keep searches simple. Use keywords, e.g. "leaking", "pump", "broken" or "fit".
- Customer:
- anthony from thornton, CO
- Parts Used:
- WR57X10051
- Difficulty Level:
- Really Easy
- Total Repair Time:
- 15 - 30 mins
- Tools:
- Screw drivers, Wrench (Adjustable)
Cracked housing on the vaave
1. Turn off water supply, and electrical ( unplug it) to fridge.
2. Remove water line to valve. Watch for water to pour out of the line. Have a towel handy.
3. Remove the cardboard cover on the bottom of the fridge.
4. Remove the screws that hold the valve in place.
5. Remove the valve, be careful the waterlines ar ... Read more e still attached.
6. Place a towel under valve to catch any water that leaks out from water lines.
7. Remove electrical lines, make sure to mark which went where. One is for the ice, and one is for the water. Make sure the power is off, there is 120 volts present at those connections.
- now my waterlines attached using a compression type fitting. The new valve I got used just a push in type of attachment. But, easy enough I just removed the pieces for the compression and the waterlines pushed right in and worked fine.
- the mounting harness for the valve was alittle different but the parts I need were in the right location and she fit in fine.
8. Attach water lines. They are different sizes so you can't get those mixed up.
9. Attach electrical lines.
- the new valve came with adaptors for my electrical connection. Just snapped them on and kept on going.
10. turn on watersupply for fridge. Plug it back in.
11. Test for leaks, and proper operation. ie. When you push the water does the water valve open?
12. Unplug fridge
13. Now is a good time to clean out any dust or dirt that has accumallated in under around your fridge.
14. reassemble, valve, then cover. move fridge back into place.
15. Plug fridge back in.
16. Take a clean glass.
17. Fill with water from the front.
18. Take full glass of water and go watch tv. You've earned it, and saved yourself probably $100.00 in labor costs. Good Job.
Read less
Was this instruction helpful to you?
Thank you for voting!
- Customer:
- Christian from Kearneysville, WV
- Parts Used:
- WR55X24064, WR2X9391
- Difficulty Level:
- Really Easy
- Total Repair Time:
- Less than 15 mins
- Tools:
- Screw drivers
No power to the fan and compressor
I have a fridge in my garage. I have found that a glass of ice water or a cold drink outside is very important to me. When I discovered melting ice dripping onto the garage floor I was very upset. I spun the fridge and found that the compressor and fan weren't starting. I got out my multi-meter and discovered that power was not makin
... Read more
g it to these components. I did some research and found the wiring diagram online. There really isn't too much going on with a fridge and the most likely candidate seemed to be the run capacitor. I ordered the part, replaced it in a few minutes and the fridge began working again.
Read less
Was this instruction helpful to you?
Thank you for voting!
Defroster failure
Fridge was not really cold. Fan was working at back of freezer. Romoved the drawers and back panel of freezer compartment. Melted ice with a blow dryer and collected water with a towel so that it would not overflow the drip pan. Installed the new defroster units with 4 screws and the easy plug in wiring harness. Bingo! Defrost timer
... Read more
was probably OK but new one is easy to do.
Fixed in one day vs waiting for service call & payng $$$.
Fixed in one day vs waiting for service call & payng $$$.
Read less
Was this instruction helpful to you?
Thank you for voting!