


Models
>
22314
22314 (1988) Kenmore Range
Jump to:
Find Part by Name
Keep searches simple, eg. "belt" or "pump".
Keep searches simple, eg. "belt" or "pump".

This stainless steel coil cartridge includes two burners: one 2100W and one 1250W. Designed for compatible cooktops and ranges, it offers a quick replacement for worn modules. Sold individually.
In Stock
Order now and your part arrives by Jul 27

$21.82
This is a screw and it is made for multiple appliances in your home. This model is called a sheet metal screw because it has sharp points, and the threads are closer together. This screw is designed t...
In Stock
Order now and your part arrives by Jul 27

$79.61
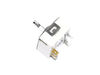
This surface burner switch, also known as an infinite switch, controls the heat level of stovetop burners. When you turn the knob, the switch adjusts the power to the burner for precise temperature co...
In Stock
Order now and your part arrives by Jul 27

$7.60
This is a multi-use screw and can be used on a variety of appliances. The measurements of the screw are: 8/18 x 3/8. *Please note: the screw is sold individually. Refer to the manual provided by the m...
In Stock
Order now and your part arrives by Jul 27

$285.85
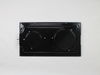
This stove cartridge assembly, also known as a cooktop module, is a manufacturer-approved replacement part for your stove. It is black in color and comes complete with burner elements. Make sure to sh...
In Stock
Order now and your part arrives by Jul 27

$950.00
Replace your cooktop’s heating module with this black radiant element cartridge, featuring two burners and a glass-ceramic surface. It plugs into compatible units and includes all necessary components...
On Order

This burner module assembly provides a convenient replacement for two surface burners on your range. Encased in a black housing, it includes the cooking elements needed for reliable performance. Measu...
In Stock
Order now and your part arrives by Jul 27


In Stock
Order now and your part arrives by Jul 27

Griddle for Jenn-Air Designer Line cooktops. Fits over electric grill elements to provide a quality, non-stick surface for pancakes, eggs, bacon and sausages. Heats food evenly, with holes for drainin...
No Longer Available

This part is used as a support for the grill element. Sold individually.
No Longer Available

This jar is a little over five inches long. It is made of glass and is used for collecting the grease drippings of gas ranges.
In Stock
Order now and your part arrives by Jul 27
Common Problems and Symptoms for 22314
Viewing 3 of 3Element will not heat
Fixed by these parts

How to fix it
Will Not Start
Fixed by these parts
How to fix it
Oven is too hot
Fixed by these parts
How to fix it

Keep searches simple. Use keywords, e.g. "leaking", "pump", "broken" or "fit".
- Customer:
- James H from Oxford, NY
- Parts Used:
- W11120791
- Difficulty Level:
- Really Easy
- Total Repair Time:
- Less than 15 mins
- Tools:
- Pliers, Screw drivers
Burner had one temperature--hot, regardless of setting
1. Killed power and removed the regulator's knob, noted the position of the old control.
2. Took off the cover for the center vent and loosened the two screw holding the housing in place--the screws didn't have to come out completely as it is a U-shaped friction hold.
3. Unscrewed the two screws holding the old control switch in ... Read more place--lifted the housing enough to get at the old switch and carefully pulled it loose--it was a front burner so the control switch was about as far back as it could be but still wasn't that hard to get at.
4. Turned the new switch to orient the wire connectors, then, using a needle-nose pliers, removed each friction connector, one at a time, and fitted them on the new switch (note: one of the wires fitted best if it went under as opposed to around the base of the new switch).
5. Replaced the control back through the housing and screwed it in place, making sure the orientation of the control matched the way it looked originally.
6. Slide the housing back over the two screws and tightened, replace vent.
7. Replaced the knob and turned on the power.
(The above took me about twice as long to write as it did to make the repair and I write professionally but am not a professional electrician.)
Also, I bought a second control switch because, given the age of the unit, I'm sure another one will go. The second one will assure that it won't happen :-).
Read less
Was this instruction helpful to you?
Thank you for voting!
- Customer:
- Lee from Crystal Beach, TX
- Parts Used:
- JEA8120ADBA
- Difficulty Level:
- Really Easy
- Total Repair Time:
- Less than 15 mins
Replaced grill with cooking elements
Bought a new house last fall. Jenn-Air range had two element cooktop with two element grill. Oven went out and while service man was here, I asked him to check on the price of another two heater element panel to replace the grill. He subsequently called to say the part I wanted was not available. I immediately got on the internet and
... Read more
did a search. Found it "ships same day" for what I thought was a very reasonable price at PartSelect. Unplugged the grill and plugged in the cooking plate. We now have four usable "burners" instead of two. Thanks PartSelect!
Read less
Was this instruction helpful to you?
Thank you for voting!
- Customer:
- Gordon from Olympia, WA
- Parts Used:
- JEA8120ADBA
- Difficulty Level:
- Really Easy
- Total Repair Time:
- Less than 15 mins
Element was cracked
Removed element and installed new one
Was this instruction helpful to you?
Thank you for voting!