


Models
>
J53AK-1
J53AK-1 General Electric Range
Jump to:
Find Part by Name
Keep searches simple, eg. "belt" or "pump".
Diagrams for J53AK-1
Viewing 4 of 4


Keep searches simple, eg. "belt" or "pump".

$37.49
This set of 3 clock timer knobs let you set and change the settings on your range clock. These genuine OEM knobs are made of black plastic and measure approximately 1-inch long.
In Stock
Order now and your part arrives by Jul 31

In Stock
Order now and your part arrives by Jul 31


$117.86
This genuine OEM oven door gasket is designed to create a tight, heat-resistant seal between the oven door and the cooking cavity. By preventing heat from escaping, it helps maintain consistent cookin...
Special Order


Special Order
Special Order

Common Problems and Symptoms for J53AK-1
Viewing 1 of 1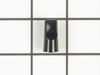
Keep searches simple. Use keywords, e.g. "leaking", "pump", "broken" or "fit".
- Customer:
- JoAnn from Auburn, WA
- Parts Used:
- WB2X2058
- Difficulty Level:
- Easy
- Total Repair Time:
- 15 - 30 mins
- Tools:
- Screw drivers
The gasket needed to be replaced in top oven, it was brittle and broken.
We took out the philips screws on the right and left side of inside of the oven and two hex head screws on the clip on the top of the oven in the front. Then using a slot screw driver pryed the oven liner out enough to remove old gasket and replace the new gasket. We did see in some online directions that we were suppose to remove enti
... Read more
re oven from cabinet and loosen bolts in the back. But, we were able to get enough space to get the old gasket out and new one installed. We did use a 1/4" thick piece of wood on face of oven to prevent any denting of oven when prying out the liner of the oven.
Read less
Was this instruction helpful to you?
Thank you for voting!
- Customer:
- Karen from Grosse Pointe Park, MI
- Parts Used:
- WB3X5699
- Difficulty Level:
- Really Easy
- Total Repair Time:
- Less than 15 mins
clock and timer knobs crACKED AND BROKEN
scissors and opened bag. determined that all three knobs were identical. aligned slots on each knob with flanges on each shaft.
snapped each knob into place.
Did a happy dance of empowerment around the kitchen. ( knobs had been broken for at least 5 years).
used timer to avoid burning christmas cookies.
Have a Merr ... Read more y one!!!
snapped each knob into place.
Did a happy dance of empowerment around the kitchen. ( knobs had been broken for at least 5 years).
used timer to avoid burning christmas cookies.
Have a Merr ... Read more y one!!!
Read less
Was this instruction helpful to you?
Thank you for voting!
- Customer:
- Karen from Yakima, WA
- Parts Used:
- WB2X2058
- Difficulty Level:
- Really Easy
- Total Repair Time:
- 15 - 30 mins
- Tools:
- Screw drivers
Oven Gasket Worn and Brittle
Took oven door off. Removed screws that were holding oven insert. Pulled out oven insert. Removed old gasket. Installed new gasket. Push oven insert back. Installed screws. Replaced oven door.
Was this instruction helpful to you?
Thank you for voting!