Models > JVM3160RFSS

JVM3160RFSS General Electric Microwave

Jump to:

Find Part by Name

Keep searches simple, eg. "belt" or "pump".
The charcoal filter in your microwave is used to remove cooking odors from the air as they circulate through the microwave vent. The filter will last between six months to one year, depending on how o...
In Stock
Order now and your part arrives by Jul 10
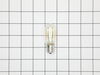
This is a genuine OEM 40-watt light bulb for your microwave. The bulb is used inside the microwave and lights up when the door is open or when operating. The bulb can also be found underneath the micr...
In Stock
Order now and your part arrives by Jul 10
Sold individually. Most appliances require 2.
In Stock
Order now and your part arrives by Jul 10
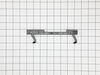
This switch monitor interlock helps your microwave detect when the door is properly closed. If it’s damaged, the microwave may not start. Replacing it restores safe operation and is a quick fix with basic tools.
In Stock
Order now and your part arrives by Jul 10
This light socket is for your microwave and is designed to hold the light bulb. If the light bulb is not working, and the bulb has not burned out, it may be a problem with the light socket. This part ...
In Stock
Order now and your part arrives by Jul 10
$20.95
In Stock
Order now and your part arrives by Jul 10
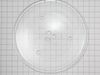
This 13.5-inch tempered glass turntable tray helps ensure even heating in your microwave. It fits securely on the rotating support thanks to three grooves underneath and is compatible with many GE and...
In Stock
Order now and your part arrives by Jul 10
Singlular Bulb
In Stock
Order now and your part arrives by Jul 10
This thermostat activates the cooling fan to prevent overheating. Shutdowns or nonfunctional fans may indicate a failing thermostat.
In Stock
Order now and your part arrives by Jul 10
This 20A, 125V fast-blow glass fuse protects your microwave from power surges and electrical faults. It fits select models from GE, Hotpoint, and Frigidaire and measures approximately 6x30mm. Replace ...
In Stock
Order now and your part arrives by Jul 10
In Stock
Order now and your part arrives by Jul 10
In Stock
Order now and your part arrives by Jul 10

Questions and Answers

Be the first to ask our experts a question about this part!

Common Problems and Symptoms for JVM3160RFSS

Viewing 4 of 4
Won’t turn on
Fixed by these parts
Fixing Fixing Fixing
How to fix it
Door not closing properly
Fixed by these parts
Fixing Fixing
How to fix it
Doesn’t shut off
Fixed by these parts
Fixing
How to fix it
No heat
Fixed by these parts
Fixing Fixing
How to fix it
Keep searches simple. Use keywords, e.g. "leaking", "pump", "broken" or "fit".
Customer:
Margaret from TOANO, VA
Parts Used:
WB25X10030
Difficulty Level:
Easy
Total Repair Time:
Less than 15 mins
Tools:
Screw drivers
bulb burned out under the microwave that lights the cooktop underneath
got a screwdriver and opened the glass door over the light bulb - changed the bulb and put the glass door back with the screwdriver.
32 of 63 people found this instruction helpful.
Was this instruction helpful to you?
Thank you for voting!
Customer:
michelle from virginia beach, VA
Parts Used:
WB20X10048
Difficulty Level:
Difficult
Total Repair Time:
1- 2 hours
Tools:
Screw drivers
Original part was fried
Had to remove microwave from the wall. Then disassemble entire top assembly to get to the part. Easy enough to replace after that. Then just reassemble and reinstall. About 2hrs. total
20 of 34 people found this instruction helpful.
Was this instruction helpful to you?
Thank you for voting!
Customer:
Charles from CLAYTON, NJ
Parts Used:
WB06X10610
Difficulty Level:
Really Easy
Total Repair Time:
30 - 60 mins
Tools:
Screw drivers
Tripping circuit breaker, broken micro switch locking pin
1. Unplug unit
2. Open door, remove two screws above the top trim piece, slide and remove trim.
3. Remove screw behind control board and top left corner, then release from position.
3b. Unplug all wire terminations and set control panel aside.
4. Remove two screws securing latch board, lift and rotate board out of position, remove three micro switches, xfer monitor switch actuator from lower pin in old board and insert in new. Install new door switches and reverse procedure to complete repair.

Note 1. Take care to located new latch board so holding tabs line up, pass through frame, and openings for door tangs line up with openings in frame before securing with screws.

Note 2. A long magnetic screwdriver is helpful.
16 of 25 people found this instruction helpful.
Was this instruction helpful to you?
Thank you for voting!