


Models
>
MDE16PDAZW
MDE16PDAZW Maytag Dryer
Jump to:
Find Part by Name
Keep searches simple, eg. "belt" or "pump".
Diagrams for MDE16PDAZW
Viewing 3 of 3


Keep searches simple, eg. "belt" or "pump".

$22.91
This OEM drum support roller kit contains the parts needed to replace one roller on your dryer. This kit includes one drum roller and two bearings. Most dryers use two drum rollers, and it is recommen...
In Stock
Order now and your part arrives by Apr 25

$13.07
This part is located on the front bulkhead of the dryer and helps the drum to rotate smoothly and quietly. If you notice a screeching or metal-on-metal noise while your appliance is operating, you may...
In Stock
Order now and your part arrives by Apr 25

The roller shaft is also known as a support roller shaft or a drum roller axle. It is a part in your dryer that the drum rollers spin on, helping your dryer to tumble. If your appliance is noisy while...
No Longer Available

If your dryer is noisy while operating, or will not tumble at all, there may be an issue with the drum belt. Over time, the rubber can become brittle and snap, and the belt will need to be replaced. T...
In Stock
Order now and your part arrives by Apr 25

$6.51
Sometimes referred to as a retaining clip, the retaining ring is used to hold the drum support roller onto the shaft in your dryer. The clip may need to be replaced if you find that your dryer is nois...
In Stock
Order now and your part arrives by Apr 25

$13.07
This roller shaft washer is just under an inch in diameter and is used for some of Whirlpool's brands of clothes dryers.Sold individually.
In Stock
Order now and your part arrives by Apr 25

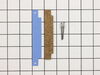
$19.63
This seal can be used for the front or rear drum. Adhesive is NOT included. For adhesive search: WPY055980
In Stock
Order now and your part arrives by Apr 25

$29.98
This part moves the clothes around inside your dryer and helps to direct the flow of hot air during the drying cycle.
NOTE: Screws are NOT included.
In Stock
Order now and your part arrives by Apr 25

$33.20
This part moves the clothes around inside your dryer and helps to direct the flow of hot air during the drying cycle.
In Stock
Order now and your part arrives by Apr 25

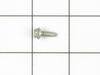
$7.60
This is a multi-use screw and can be used on a variety of appliances. The measurements of the screw are: 8/18 x 3/8. *Please note: the screw is sold individually. Refer to the manual provided by the m...
In Stock
Order now and your part arrives by Apr 25
 – Part Number: WP303396")
This high-limit thermostat helps protect your dryer from overheating by cutting power to the heating element at 200°F and resetting at 170°F. It features two 1/4-inch male terminals and is compatible ...
In Stock
Order now and your part arrives by Apr 25

$7.60
This roller shaft hex nut measures well under an inch long. It is made of metal and is used for Maytag brand clothes dryers.
In Stock
Order now and your part arrives by Apr 25
Questions and Answers
We're sorry, but our Q&A experts are temporarily unavailable.
Please check back later if you still haven't found the answer you need.
Common Problems and Symptoms for MDE16PDAZW
Viewing 7 of 7Noisy
Fixed by these parts


How to fix it
Marks left on clothes
Fixed by these parts

How to fix it
Drum Not Spinning
Fixed by these parts

How to fix it
Too hot
Fixed by these parts

How to fix it
Not Heating
Fixed by these parts
How to fix it
Touchpad does not respond
Fixed by these parts

How to fix it
Door latch failure
Fixed by these parts
How to fix it


Keep searches simple. Use keywords, e.g. "leaking", "pump", "broken" or "fit".
- Customer:
- gerald from park city, MT
- Parts Used:
- WP6-3129480, WP33001443, WP312535, 12001541, WP9703438
- Difficulty Level:
- Easy
- Total Repair Time:
- 1- 2 hours
- Tools:
- Pliers, Screw drivers, Socket set, Wrench set
dryer squeeking
removed front panel,lifted top, removed drum and drive belt,remove old rollers and acc and instlled new and reinstalled dryer parts.
Was this instruction helpful to you?
Thank you for voting!
- Customer:
- Teresa from Pace, FL
- Parts Used:
- WP33002032, WP33001755
- Difficulty Level:
- Easy
- Total Repair Time:
- 15 - 30 mins
- Tools:
- Nutdriver, Screw drivers
dried too many shoes and broke the baffles
removed door, removed screws to lift top panel, removed screws that held old baffles, replaced with new baffles, took off front panel and cleaned out excess lint while I was in there.
Was this instruction helpful to you?
Thank you for voting!
- Customer:
- Edward from Pike Road, AL
- Parts Used:
- WP6-3129480, WP33002535, WP33001807, 12001541
- Difficulty Level:
- Easy
- Total Repair Time:
- 15 - 30 mins
- Tools:
- Nutdriver, Screw drivers, Wrench (Adjustable)
The dryer was making a terrible noise that sounded like bearings squealing.
I've never even opened this dryer before so I looked at one of the installation videos PartSelect has. I found one using my model, which made it really easy. I removed the front panel and door, then lifted the top of the dryer up on it's hinges: that's a great feature because you need the top out of the way to remove the drum. I took t
... Read more
he belt off the drum, lifted it up and pulled it straight out. I did buy a pair of snap ring pliers to remove the snap ring off the drum support shaft. I think you really must have those to remove and replace the rings. Be careful when removing the snap rings. I shot the first one across the room like it was a rubber band. We had a good laugh. I used a wrench to hold the nut on the backside of the roller shaft and unscrewed it. I screwed the new roller shafts on, slipped the drum rollers on them, then carefully used the snap ring pliers to place the rings on the front of the shaft to hold the rollers on. While I had the unit opened up, I figured I should go ahead and replace the multi rib belt. I put the ribbed side on the drum and sat the drum on the rollers . The tricky part is now getting down on the ground, reaching under the drum for the belt. Make sure the belt isn't twisted anywhere on the drum or in your hands while you pull the belt under the idler pulley. Hold the belt ribbed sides together while feeding the belt under the pulley. It takes a good deal of strength to move the pulley over so you can hook the end of the belt on the shaft. Once you've gotten that attached, put your hand inside the drum and rotate it a few times to make sure you connected it properly and that you placed the belt in the right spot on the drum. It was easy to see the black stripe around the drum where I'd taken off the old one.
Read less
Was this instruction helpful to you?
Thank you for voting!