


Models
>
25328262806
25328262806 Kenmore Freezer
Jump to:
Find Part by Name
Keep searches simple, eg. "belt" or "pump".
Diagrams for 25328262806
Viewing 3 of 3


Keep searches simple, eg. "belt" or "pump".

$137.50
The gasket for your freezer door is used to provide a tight seal, preventing the cold air from escaping and warm room-temperature air from getting inside the freezer. If the gasket becomes torn, crack...
In Stock
Order now and your part arrives by Aug 2

$49.45
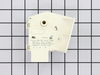
If your refrigerator is not maintaining a consistent temperature, or there is frost building up, you may need to replace the defrost timer. The 120V defrost timer is a genuine OEM part that acts like ...
In Stock
Order now and your part arrives by Aug 2

$63.75
Ensure proper lighting inside your refrigerator with this 3.8W LED bulb, designed for use in various models. It provides clear, energy-efficient illumination to help you easily see stored items. If yo...
In Stock
Order now and your part arrives by Aug 2
 – Part Number: 297309000")
$61.68
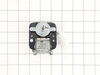
The 115-volt evaporator fan motor is in the back of the freezer section and circulates air over the coils. These coils will convert the heat into cool air, which is then circulated. If your freezer is...
In Stock
Order now and your part arrives by Aug 2

In Stock
Order now and your part arrives by Aug 2

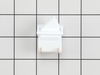
This is an adjustable foot for your freezer, refrigerator, and dryer. This part supports your unit by screwing into one of the bottom four corners, and adjusting the height of your machine. If your ap...
Special Order

In Stock
Order now and your part arrives by Aug 2

This genuine OEM hinge mounting screw is designed for use in Frigidaire and Electrolux refrigerators, providing a secure and reliable way to fasten door hinges to the cabinet. Built with a durable hex...
In Stock
Order now and your part arrives by Aug 2

$20.01
This multi-use screw fits various appliances and tools such as, freezers, refrigerators, wall ovens, washers, ranges, dishwashers, dryers, microwave oven combos, combos, wine and beverage coolers. *Pl...
In Stock
Order now and your part arrives by Aug 2

$20.85
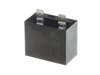
This run capacitor supports the compressor by storing and releasing electrical energy for smooth startup and operation. It helps maintain consistent cooling performance and efficiency. Replacing a fau...
In Stock
Order now and your part arrives by Aug 2

In Stock
Order now and your part arrives by Aug 2

$20.01
This hinge bearing supports smooth door movement while maintaining proper alignment. Reduced friction helps prevent wear and ensures easy opening and closing. Replacing a worn bearing restores smooth ...
In Stock
Order now and your part arrives by Aug 2
Common Problems and Symptoms for 25328262806
Viewing 10 of 10Frost buildup
Fixed by these parts


How to fix it
Too warm
Fixed by these parts
How to fix it
Noisy
Fixed by these parts

How to fix it
Won’t start
Fixed by these parts
How to fix it
Fridge too warm
Fixed by these parts
How to fix it
Light not working
Fixed by these parts
How to fix it
Will Not Start
Fixed by these parts

How to fix it
Doesn’t stop running
Fixed by these parts
How to fix it
Clicking sound
Fixed by these parts
How to fix it
Door won’t open or close
Fixed by these parts
How to fix it
")


Keep searches simple. Use keywords, e.g. "leaking", "pump", "broken" or "fit".
- Customer:
- Thomas from RIXEYVILLE, VA
- Parts Used:
- 5304507199
- Difficulty Level:
- A Bit Difficult
- Total Repair Time:
- 30 - 60 mins
- Tools:
- Screw drivers
Gasket old and leaking
This freezer has many screws that hold the cover on the back of the door and assist clamping the edge of the gasket in place. Be sure to just loosen the screws 3/4 the way out, use a flat head screw driver to pry the cover from the door in case over time it is stuck to the door. The new gasket will come in a creative box trying not to kin
... Read more
k the gasket itself, but there will be some distortion of the gasket when you get it. Put it in the sun or in hot water. I put it in my dryer for 10 minutes. Remove the old gasket, and start at the top of the door to replace the gasket. TIPS: If the screws are backed out enough, there should not be any problem sliding the back part of the gasket under the cover. When on the sides, do not pull the gasket down to make it easier to slide the gasket underneath the cover. This will distort and lengthen the gasket so it will not fit and thin it out so it will not function well. Once the gasket is in place, tighten the screws being sure to feel along the outside edge of the gasket for any bulging that would indicate that portion of the gasket is NOT under the cover properly.
Read less
Was this instruction helpful to you?
Thank you for voting!
- Customer:
- Wayne from Forest Hill, MD
- Parts Used:
- 5304518034
- Difficulty Level:
- Easy
- Total Repair Time:
- Less than 15 mins
- Tools:
- Screw drivers
Temp alarm sounding and food on top shelves partially thawed
After silencing the alarm, it seemed to be running as normal without any unusual noises, but food was starting to thaw from the top shelf on down and condensation was dripping from the roof. We were able to place most of the food in 2 large ice chests and then the rest in the freezer compartments of 2 fridges we have in the house. I the
... Read more
n turned down the temp dial to the coldest setting and let it run for an hour or so; no change.
After researching on the internet, it sounded like our symptoms could be pointing to a defrost timer issue. I pulled the freezer away from the wall, located the timer and used a large screwdriver to slowly advance it. While doing this, at one point I could hear the compressor kick in. I pushed the quick freeze button and let it run for a while. When I checked it in a few hours, the alarm light had gone out and water that I had placed inside was frozen. We took a chance and put the food we placed in the ice chests back in the freezer. Everything was fine several hours later.
I ordered a new defrost timer, it arrived in a couple of days, and replaced the old one with it in a matter of minutes by disconnecting the wire harness from the old timer, removing the 2 screws holding it onto the bracket, screwing the new timer to the bracket, reconnecting the wires harness, and done. It's been a week or so and no problems.
Read less
Was this instruction helpful to you?
Thank you for voting!
- Customer:
- Eric from SEVIERVILLE, TN
- Parts Used:
- 5304507199
- Difficulty Level:
- Easy
- Total Repair Time:
- 15 - 30 mins
- Tools:
- Screw drivers
Frost inside freezer.. Old door gasket leaking.
Pretty straight forward. Loosen all screws "but do not remove" pry door panel from door just enough to slip gasket behind panel. Make sure gasket is seated properly around door.. Tighten all screws snug...
Gasket may not seal right away due to being kinked from packaging, use a little heat on gasket witth hairdryer and push so ... Read more mething heavy against door over night. The gasket will straighten out over night.
Gasket may not seal right away due to being kinked from packaging, use a little heat on gasket witth hairdryer and push so ... Read more mething heavy against door over night. The gasket will straighten out over night.
Read less
Was this instruction helpful to you?
Thank you for voting!