


Models
>
FSGC447GHS1
FSGC447GHS1 Frigidaire Dryer
Jump to:
Find Part by Name
Keep searches simple, eg. "belt" or "pump".
Diagrams for FSGC447GHS1
Viewing 3 of 3


Keep searches simple, eg. "belt" or "pump".

In Stock
Order now and your part arrives by Aug 2

$10.95
The drum support bearing is an authentic OEM replacement part for your dryer. The bearing is used to support the drum and allow it to rotate smoothly and quietly. If your dryer is excessively noisy wh...
In Stock
Order now and your part arrives by Aug 2

In Stock
Order now and your part arrives by Aug 2

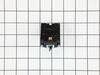
$74.46
This part is used to start the dryer once you have selected a setting on the timer.
In Stock
Order now and your part arrives by Aug 2

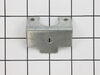
$23.05
This drum bearing bracket is for dryers. Drum bearing bracket holds and supports the drum bearing
In Stock
Order now and your part arrives by Aug 2

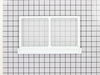
$37.35
This white dryer lint filter screen collects lint as it passes through the dryer vent.
In Stock
Order now and your part arrives by Aug 2

$25.25
This screw is designed to fit washers and dryers. Refer to the diagram provided by the manufacturer for further installation instructions and accurate application of screw in your tool.
In Stock
Order now and your part arrives by Aug 2

$61.62
This part is the replacement door handle for your dryer. It is made of white plastic and measures about 2 ½ inches long and 4 inches wide. The door handle allows you to open and close the dryer door. ...
In Stock
Order now and your part arrives by Aug 2

In Stock
Order now and your part arrives by Aug 2

In Stock
Order now and your part arrives by Aug 2

In Stock
Order now and your part arrives by Aug 2

Common Problems and Symptoms for FSGC447GHS1
Viewing 3 of 3Noisy
Fixed by these parts

How to fix it
Marks left on clothes
Fixed by these parts
How to fix it
Won’t Start
Fixed by these parts
How to fix it


Keep searches simple. Use keywords, e.g. "leaking", "pump", "broken" or "fit".
- Customer:
- Jeff from Bethalto, IL
- Parts Used:
- 131450300
- Difficulty Level:
- Easy
- Total Repair Time:
- Less than 15 mins
lint filter did not fit "squarely" into its place
replaced old filter, only to find that the new one had the same issue. After closer examination, I determined the filter guide that screws into place, which I had removed earlier to clean lint out, did not hold the lint casing correctly. I removed and reinstalled the piece that has the metal moisture sensors, and replaced it, ensure bot
... Read more
h screws held the lint casing as it should. Now I have two lint filters that fit perfectly! So, if you ever remove the piece wtih the metal sensors, make sure that the lint casing is screwed in correctly when replacing.
Read less
Was this instruction helpful to you?
Thank you for voting!
- Customer:
- Ebery from Bartlett, IL
- Parts Used:
- 131965300
- Difficulty Level:
- Really Easy
- Total Repair Time:
- Less than 15 mins
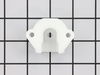
Dryer rotary plastic knob broke
This was really easy, the part is not identical to the one the dryer comes with however; it works just fine. I called the other places for repair knobs and they told me they had to have the serial number to get my part and the cost would be $20-$25 for the part plus shipping. Here it cost a whooping $13 with shipping included. I will n
... Read more
ever call those other places again!!
Read less
Was this instruction helpful to you?
Thank you for voting!
- Customer:
- Grover from Kennett Square, PA
- Parts Used:
- 5303937141
- Difficulty Level:
- Easy
- Total Repair Time:
- 15 - 30 mins
- Tools:
- Screw drivers
needed to stack dryer on top of washer
The directions provided were excellent. I just had to remove the washer top, two brackets on the front of the washer and replace with the provided brackets, and finally put back brackets back on the washer. Getting help, I than placed the dryer on top of the washer lining up the brackets and screwed the front brackets together.
Was this instruction helpful to you?
Thank you for voting!