


Models
>
MAC500
MAC500 Makita Compressor
Jump to:
Find Part by Name
Keep searches simple, eg. "belt" or "pump".
Diagrams for MAC500
Viewing 1 of 1
Keep searches simple, eg. "belt" or "pump".

$7.91
This is a single OEM drain valve for an air compressor. A drain valve is a small device that is usually located at the bottom of the compressor air receiver. The drain valve can be opened or closed, a...
In Stock
Order now and your part arrives by Apr 9

$33.98
Genuine OEM replacement parts kit. This Gasket Kit is used to prevent air leaks in the compressors listed below. Over time the gaskets will become compressed or cracked and you will hear an air leak c...
In Stock
Order now and your part arrives by Apr 9

$56.02
This is a Genuine OEM replacement part designed for use with Air Compressors. This kit Includes: Piston Rod, Compression Ring , Cylinder Sleeve & Bearing. Please note that this kit does not include t...
In Stock
Order now and your part arrives by Apr 9

$49.57
This is an Original Manufacturer Approved replacement part used on some Air Compressors. This Kit Includes: Cylinder Sleeve, Compression Ring, Piston Rod Cap Screw. This is the is a hollow, round cavi...
In Stock
Order now and your part arrives by Apr 9

This is an original Makita replacement part. The timing belt is found in an air compressor. This part is made of flexible rubber, and is used to transfer power between the motor and the pump. You w...
No Longer Available


Special Order

This regulator is an OEM part direct from Makita for air compressors and lubricated air compressors. This part allows the user to regulate the pressure for the air that comes from the tank. This regul...
No Longer Available

Questions and Answers
We're sorry, but our Q&A experts are temporarily unavailable.
Please check back later if you still haven't found the answer you need.
Common Problems and Symptoms for MAC500
Viewing 1 of 1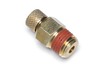


Keep searches simple. Use keywords, e.g. "leaking", "pump", "broken" or "fit".
- Customer:
- Donald from BRYAN, TX
- Parts Used:
- N036518
- Difficulty Level:
- Really Easy
- Total Repair Time:
- 30 - 60 mins
- Tools:
- Nutdriver, Screw drivers
Worn piston rod and sleeve
Disassemble plastic housing around compressor unit using appropriate tools. Remove the four bolts from the compressor head using a 5/16 nut driver. Carefully remove head assembly including airline. Remove bolt through rod bearing with Allen wrench.
Reassemble with new rod and piston assembly. Best to use blue locktite on bolt ... Read more through rod bearing when reassembling. Make sure to torque all bolts to specs listed.
Reassemble with new rod and piston assembly. Best to use blue locktite on bolt ... Read more through rod bearing when reassembling. Make sure to torque all bolts to specs listed.
Read less
Was this instruction helpful to you?
Thank you for voting!