


Models
>
AMV2404AAQ
AMV2404AAQ Amana Microwave
Jump to:
Find Part by Name
Keep searches simple, eg. "belt" or "pump".
Keep searches simple, eg. "belt" or "pump".

In Stock
Order now and your part arrives by Apr 24

In Stock
Order now and your part arrives by Apr 24

$14.16
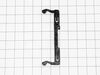
The locker, or door latch assembly fits to the inside of the microwave door, and keeps the door closed. If the door on your microwave oven doesn’t appear to close properly, you may have a problem with...
In Stock
Order now and your part arrives by Apr 24

$14.16
This metal vent damper door closes off the exhaust duct when the fan is not running to stop outside air from entering the microwave unit, and opens when the fan turns on to allow air to vent away from...
In Stock
Order now and your part arrives by Apr 24

In Stock
Order now and your part arrives by Apr 24

$21.82
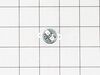
This genuine OEM light socket provides power to the light bulb in your microwave while holding it in place. This light socket is two pronged and the bulb should screw easily into it. If your light bul...
In Stock
Order now and your part arrives by Apr 24

Special Order

In Stock
Order now and your part arrives by Apr 24

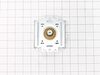
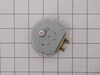
If the turntable on your microwave does not rotate, or you can hear a grinding noise, the problem may be with the motor. The motor is typically located below the floor of the oven, and is accessed thr...
In Stock
Order now and your part arrives by Apr 24
 – Part Number: 6851W1A002E")
In Stock
Order now and your part arrives by Apr 24

$14.16
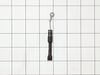
This spring provides tension or controlled movement within the appliance mechanism. Engineered for durability, it supports smooth operation and helps maintain proper alignment of connected components.
In Stock
Order now and your part arrives by Apr 24

Questions and Answers
We're sorry, but our Q&A experts are temporarily unavailable.
Please check back later if you still haven't found the answer you need.
Common Problems and Symptoms for AMV2404AAQ
Viewing 11 of 11Door not closing properly
Fixed by these parts

How to fix it
No heat
Fixed by these parts

How to fix it
Little to no heat when baking
Fixed by these parts
How to fix it
Tray won’t turn
Fixed by these parts

How to fix it
Element will not heat
Fixed by these parts
How to fix it
Oven not heating evenly
Fixed by these parts
How to fix it
Door won’t open after self cleaning cycle
Fixed by these parts
How to fix it
Won’t turn on
Fixed by these parts
How to fix it
Noisy
Fixed by these parts
How to fix it
Oven is too hot
Fixed by these parts
How to fix it
Will Not Start
Fixed by these parts
How to fix it
Keep searches simple. Use keywords, e.g. "leaking", "pump", "broken" or "fit".
- Customer:
- Joseph from WILTON, NH
- Parts Used:
- 6324W1A001L
- Difficulty Level:
- A Bit Difficult
- Total Repair Time:
- 1- 2 hours
- Tools:
- Screw drivers
Magnitron failed
Over the stove microwave installed in top cabinet row.
1. Unplug device.
2. Two people to remove from wall/cabinet (remove two, large, top mounting screws and rotate entire microwave down and off the wall mount). Should be some wood spacers between top of device and bottom of cabinet.
3. Remove screws from sheet metal cover ... Read more .
4. Remove one screw holding blowers in place and rotate out of the way, in order to gain access to 2 of 5 screws that hold the magnetron in place.
5. Unplug magnetron and remove the 5 screws.
6. Drop in new magnetron and re-assemble microwave in reverse order (steps 5-3).
7. Two people restore micro to wall/cabinet. Replace wood spacers, re-install two, large mounting screws (finger-tight). Test device. Secure the two large screws.
Read less
Was this instruction helpful to you?
Thank you for voting!
- Customer:
- Dave from FOREST, VA
- Parts Used:
- 4026W2A019A
- Difficulty Level:
- Easy
- Total Repair Time:
- 15 - 30 mins
Door locker snapped off
Unplugged the microwave. I opened the door. I used a butter knife to pop the bezel off the inside of the door. I pushed the locker up and to the left and used the butter knife to pry it loose. Disconnected the locker from the spring, and reversed for the installation.
Was this instruction helpful to you?
Thank you for voting!
- Customer:
- Susan from HENDERSON, NV
- Parts Used:
- 6549W1S013H
- Difficulty Level:
- Really Easy
- Total Repair Time:
- 15 - 30 mins
- Tools:
- Screw drivers
microwave dish would not move back and forth
unscrewed the bottom of the microwave and unplugged old part then took the screw out and put new one in. Super easy!
Was this instruction helpful to you?
Thank you for voting!