


Models
>
6365
6365
Jump to:
Find Part by Name
Keep searches simple, eg. "belt" or "pump".
Models for 6365
Click on the best match to narrow your results.
- 6365 (SER 546-731342) Milwaukee Circular Saw (7-1/4" Circular Saw)
- 6365 (SER 546B) Milwaukee Circular Saw (Circular Saw)
- 6365 (SER 546-1001) Milwaukee Circular Saw (7-1/4" 34 Circular Saw)
- 6365 (SER 546-191000) Milwaukee Circular Saw (7-1/4" Circular Saw)
- 6365 (SER 546-59000) Milwaukee Circular Saw (Circular Saw)
- 6365 (SER 546-31000) Milwaukee Circular Saw (7-1/4" Circular Saw)
- 6365 (SER 546-154000) Milwaukee Circular Saw (7-1/4" Circular Saw)
- 6365 (SER 546-470501) Milwaukee Circular Saw (7-1/4" Circular Saw)
- 6365 (SER 546-887048) Milwaukee Circular Saw (7-1/4" Circular Saw)
- 6365 (SER 546-374000) Milwaukee Circular Saw (Circular Saw)
- 6365 (SER 546A) Milwaukee Circular Saw (7-1/4" Circular Saw)
- 6365 (SER 546-242291) Milwaukee Circular Saw (Circular Saw)
- 6365-2 (SER 546-86264) Milwaukee Circular Saw (Circular Saw)
- 6365-2 (546A) Milwaukee Circular Saw (7-1/4 Inch Circle Saw 240v)
- 6365-2 (546B) Milwaukee Circular Saw (7-1/4 Inch Circle Saw 240v)
- 6365-2 (546-86000) Milwaukee Circular Saw (7-1/4 Inch Circle Saw 240v)
- 63652 (AW1ESEA) LG Range (Oven-Range)
- 63652 LG Range (Oven-Range)
- 63653 (AS1ESEA) LG Range (Oven-Range)
- 63653 (ASBESEA) LG Range (Oven-Range)
- 63654 (AB6ESEA) LG Range (Oven-Range)
- 63654 (ABSESEA) LG Range (Oven-Range)
- 63656 ( J00000001 - J99999999 1990 ) Lawn Boy Dethatcher (Dethatcher)
- 63656 ( K00000001 - K99999999 1991 ) Lawn Boy Dethatcher (Dethatcher)
- 63656 ( G00000001 - G99999999 1988 ) Lawn Boy Dethatcher (Dethatcher)
- 63656 ( 900000001 - 999999999 1989 ) Lawn Boy Dethatcher (Dethatcher)
- 63659 (AB1ESEA) LG Range (Oven-Range)
- 63659 (ABKESEA) LG Range (Oven-Range)
Exact Part matches for your search term
Viewing 2 of 2
Special Order
Special Order
Keep searches simple, eg. "belt" or "pump".

$6.25
This cord protector is created to slide onto your cord and fit tightly at the end to protect the base of the cord from getting damaged. If the wires are exposed it can a be a safety hazard, so make su...
In Stock
Order now and your part arrives by Mar 26

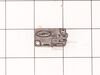
$26.07
This is an OEM trigger switch with four internal terminals. The switch controls the on/off and varying speed functions. It is common for the switch of a power tool to wear and malfunction over the use...
In Stock
Order now and your part arrives by Mar 26

Genuine Milwaukee replacement part. Includes 1 Carbon Brush with wire lead, brush spring and bracket attached. Two brushes are needed for the tools shown below. • Worn brushes are often the cause b...
No Longer Available

In Stock
Order now and your part arrives by Mar 26

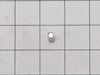
$6.25
This is a screw and it is used on a variety of power tools. This part has a slotted pan head, and needs a Torx screwdriver to tighten or loosen. The measurements of the screw are #8 in diameter, with ...
In Stock
Order now and your part arrives by Mar 26

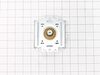
$20.95
This is a genuine OEM replacement switch for the door of your microwave. When the door is closed and the switch depressed, it allows the microwave to run and the turntable to rotate. When the door ope...
Special Order
 – Part Number: 22-64-1632")
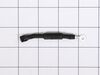
$42.00
This is a Genuine Manufacturer Approved replacement part designed for some Milwaukee Power Tools. This item is sold individually. Due to the use or other factors a cord can crack or get damaged otherw...
In Stock
Order now and your part arrives by Mar 26

$6.25
Manufacturer sourced replacement part designed for use with Milwaukee power tools. It is a standard hardware which will have multiple applications based on your tool. This part is made out of metal an...
In Stock
Order now and your part arrives by Mar 26

$6.25
This is a Genuine OEM replacement Protector Grommet which is used on Milwaukee Power Tools. This part is made out of Rubber and is Sold Individually. It is important to have a cord protector on your t...
In Stock
Order now and your part arrives by Mar 26

This Torx screw fits a variety of lawn and gardening tools. The screw has a diameter of 8, 16 thread counts, and 5/8 inches for the length. Refer to diagram provided by the manufacturer for further in...
In Stock
Order now and your part arrives by Mar 26

$16.75
This bracket holds the metal or plastic flapper that closes off the exhaust duct when the fan is not running and opens when the fan turns on. If the exhaust fan on your microwave does not appear to be...
Special Order

$11.43
It is a genuine OEM sourced item that is designed for use with Milwaukee power tools. This special bearing allows spindle shaft to rotate freely with minimal friction, over time the rollers of the bea...
In Stock
Order now and your part arrives by Mar 26
Common Problems and Symptoms for 6365
Viewing 5 of 5No heat
Fixed by these parts
How to fix it
Won’t turn on
Fixed by these parts

How to fix it
Tray won’t turn
Fixed by these parts


How to fix it
Door not closing properly
Fixed by these parts


How to fix it
Doesn’t shut off
Fixed by these parts
How to fix it

Keep searches simple. Use keywords, e.g. "leaking", "pump", "broken" or "fit".
- Customer:
- JAMES from BILLINGS, MT
- Parts Used:
- 3B73362F
- Difficulty Level:
- Very Easy
- Total Repair Time:
- 30 - 60 mins
- Tools:
- Screw drivers
Broken door micro switch. (unit does not start heating)
Unplug the unit before servicing. Need phillips screwdriver. Open door. Use step ladder to access and remove 2 small screws from top of the room air diffuser at top of unit. Slide diffuser slightly to the left to align the diffuser's plastic tab on the left side to rotate toward you. (The wires for the front control panel are at the far l
... Read more
eft side of this difuser, but difuser is slotted for easy removal). Once the difuser is removed you will see 1 screw at the top that secures the pannel cover on the left side of the unit. Remove screw and slide this panel slightly up and out. This exposes the plastic frame that holds the upper and lower door switches. To locate the door switches and observe how they work, close and open the door and watch the door (bayonets) open and close the micro switches. Do the (red) buttons on top of the switches move up and down when the door bayonets push and release? If the buttons do not "pop" up when opened the switch is defective. The switch frame is secured with 2 screws. Remove screws and rotate the unit out for easy access to the micro switch(s). The internal (spring?) on my unit that is suposed to allow the red (visible) button on top of the switch to "pop" up when the door is opened was broken. Carefully pry the switch outward while being careful to lift the plastic holder-piece that holds the switch in place. Be careful, there is a small pin on the frame, so rotate the switch OUT toward you while lifting (carefully) the plastic holder-piece (you will see it on top of the switch). You can use an ohm meter to test the continuity of the switches. But if the buttons don't "pop" they are defective. Replace switch and reassemble.
Read less
Was this instruction helpful to you?
Thank you for voting!
- Customer:
- Randall from ARCADIA, CA
- Parts Used:
- 3B73362F
- Difficulty Level:
- A Bit Difficult
- Total Repair Time:
- 1- 2 hours
- Tools:
- Pliers, Screw drivers
Door sensor switch went bad. Microwave would not operate.
Watched a couple of repair videos on Youtube by searching for the model number. Found out what to do in order not to get shocked by the powerful capacitor.
Ordered the two switches (To be sure, I could have ordered a third switch as suggested in the videos.)
Bought a tamper-proof star bit to get the cover off. Followed the dir ... Read more ections to replace the switches. - I broke the harness and had to use some super glue, but it's all good. I should have removed the harness instead of trying to get a switch out while it was still in place.
It's all back together, and the wife is happy!!
Read less
Was this instruction helpful to you?
Thank you for voting!
- Customer:
- Joseph from WILTON, NH
- Parts Used:
- 6324W1A001L
- Difficulty Level:
- A Bit Difficult
- Total Repair Time:
- 1- 2 hours
- Tools:
- Screw drivers
Magnitron failed
Over the stove microwave installed in top cabinet row.
1. Unplug device.
2. Two people to remove from wall/cabinet (remove two, large, top mounting screws and rotate entire microwave down and off the wall mount). Should be some wood spacers between top of device and bottom of cabinet.
3. Remove screws from sheet metal cover ... Read more .
4. Remove one screw holding blowers in place and rotate out of the way, in order to gain access to 2 of 5 screws that hold the magnetron in place.
5. Unplug magnetron and remove the 5 screws.
6. Drop in new magnetron and re-assemble microwave in reverse order (steps 5-3).
7. Two people restore micro to wall/cabinet. Replace wood spacers, re-install two, large mounting screws (finger-tight). Test device. Secure the two large screws.
Read less
Was this instruction helpful to you?
Thank you for voting!