Maytag/Maytag_Thumb/37272.gif
See part 21 in the diagram
Replacing your Maytag Washer Mounting Stem/Tub Seal Kit play video
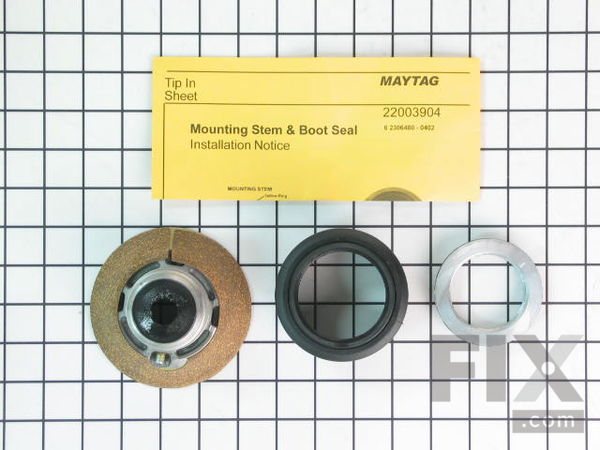
( Grid squares measure 1x1 inch )

Mounting Stem/Tub Seal Kit

★★★★★
★★★★★
1 Review

Rated by 19 customers 

?

Easy 

More than 2 hours 

Ratings submitted by customers like you who bought this part.

?
$103.34
Fix Number: FIX2351899
Manufacturer #: 6-2095720
Manufactured by: Whirlpool

Product Description

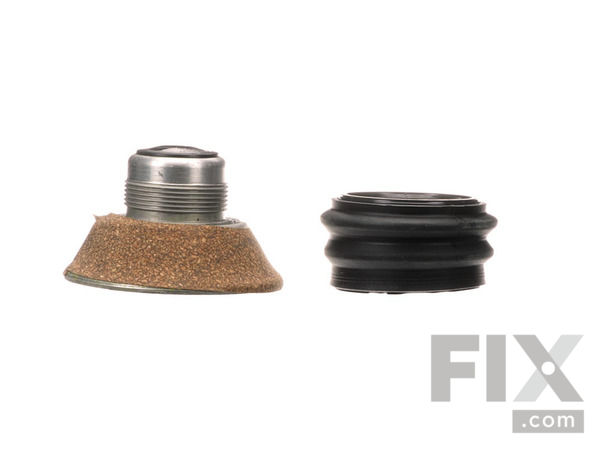
This kit comes with hub assembly, agitator seal and spanner nut. If your washer leaks once full (with or without clothes in it) or leaks during agitation, then you should replace the seal.

Videos For installing this part.

Replacing your Mounting Stem/Tub Seal Kit

Replacing your Mounting Stem/Tub Seal Kit play video
Questions and Answers

Questions and Answers

Be the first to ask our experts a question about this part!

Installation Instructions Provided by Fix customers like you.

Average Repair Rating: 2.5 / 5.0, 19 reviews.
Sort by:
Sorry, we couldn't find any existing installation instruction that matched.
  • Customer:
    Deborah from Earlsboro, OK
  • Parts Used:
    6-2095720, 6-2040130
  • Difficulty Level:
    Really Easy
  • Total Repair Time:
    30 - 60 mins
  • Tools:
    Nutdriver, Pliers, Screw drivers, Socket set, Wrench set
Washer suddenly leakedr.
Upon removing the front cover, I could see that the bottom of the outer tub, just above the transmission had water around it. Based on the age of the machine, I went ahead and replaced the tub bearing also.I followed the repair videos. The tub seal kit video had a tub with the plastic tub cover like my model, and the tub bearing kit video used a older model machine. Both videos were EXCELLENT! If you need a part very quickly though, be sure to pay extra for the guaranteed 2-3 day shipping. The website stated that most parts only take 2 days to be delivered. Mine took a week. You will also need to order the spanner wrench; luckily we had one from servicing a family members machine several years ago.
7 of 8 people found this instruction helpful.
Was this instruction helpful to you?
Thank you for voting!
  • Customer:
    CHIN from Yonkers, NY
  • Parts Used:
    6-2095720, WP6-2110472
  • Difficulty Level:
    Difficult
  • Total Repair Time:
    More than 2 hours
  • Tools:
    Nutdriver, Pliers, Screw drivers, Socket set, Wrench (Adjustable), Wrench set
Noise during spin
I just follow the step by step procedures from the video provided by this site Since my washer is more than 20 years old the inner tub clamping nut was impossible to remove even with specific spanner wrench purchased online through ebay. So don't bother to spend any time trying to remove it just cut it into two pieces and move on. The rest was easier just follow the excellent video. One thing the video did not mention was there is a spring to be installed before inserting the Mounting Stem. Finally my washer was given a second life.
2 of 2 people found this instruction helpful.
Was this instruction helpful to you?
Thank you for voting!
  • Customer:
    Terry from Chesterfield, MO
  • Parts Used:
    6-2095720
  • Difficulty Level:
    Easy
  • Total Repair Time:
    More than 2 hours
  • Tools:
    Pliers, Screw drivers, Socket set
grease leaking inside tub
I followed the instructions provided in the best tutorial I've ever seen for repairs. This guy did an excellent job and there is nothing I can add. I do strongly recommend buying the spanner wrench shown or rent one if possible. No other tool will do the job especially on an older model t hat has a heavy buildup of lime and soap compound.
2 of 2 people found this instruction helpful.
Was this instruction helpful to you?
Thank you for voting!
  • Customer:
    James from CLAWSON, MI
  • Parts Used:
    6-2095720, 6-2040130
  • Difficulty Level:
    Easy
  • Total Repair Time:
    More than 2 hours
  • Tools:
    Socket set
The washer was leaking at the tub seal.
I just followed the instructions given in the website video associated with the parts. The instructions were clear and concise. They were all I required.
1 person found this instruction helpful.
Was this instruction helpful to you?
Thank you for voting!
  • Customer:
    Robert from Charlottesville, VA
  • Difficulty Level:
    A Bit Difficult
  • Total Repair Time:
    More than 2 hours
  • Tools:
    Nutdriver, Pliers, Screw drivers, Socket set, Wrench set
Big time leak from tub seal central bearing / transmission area
I found the instruction video very helpful important and pretty much went by that. Of course, the special wrench/tool to get the spindle apart after removing the agitator is essential, I'd say. Curiously, this was not available from the site (or I may have missed it?) -- I got it elsewhere. The thing was leaking from the tub seal / central bearing area, so I thought while it was apart I'd replace the seal and the bearing too. However, I was unable to get the bearing sleeve off the transmission -- it was stuck/corroded on very tightly. The chap on the video warned about this and suggested it would come off after treatment with a chisel. I went at it for a while but was afraid of destroying the transmission, so I stopped chiseling, and decided to leave it. I sanded down the top area that had accumulated a bit of rust, checked that the new bearing half on the rubber housing would slip on to the old bearing sleeve, and installed the new bearing with rubber housing in the tub. Another comment I would have is that the bearing kit should come with new rubber seals (in addition to spring washers) for the 3 bolts that hold the outer tub to the sprung frame supports. Quite a bit of cleaning involved / fairly dirty job but not too bad. Very doable for anyone with the slightest interest, a few tools, and a bit of time. I spent $200 on tools and parts and if this gives this 15 year old machine a new lease of life, Kudos to the company (video Steve) and Maytag. (Saved me having to dump the thing down by the creek.) Oh, yes, I'm having to replace the hookup hoses because having removed them the seals no longer seat properly and are leaking at the wall and the machine. I've done 2 washes -- so far so good.
1 person found this instruction helpful.
Was this instruction helpful to you?
Thank you for voting!
  • Customer:
    Luke from Brooklyn, NY
  • Parts Used:
    6-2095720
  • Difficulty Level:
    Easy
  • Total Repair Time:
    1- 2 hours
  • Tools:
    Screw drivers, Socket set
Leak at tub seal
Pretty routine as described elsewhere, although initial loosening of the locking nut with the spanner wrench was tough, due to corrosion. 15 minutes of WD-40 eventually did the trick, and the rest was pretty easy.
1 person found this instruction helpful.
Was this instruction helpful to you?
Thank you for voting!
  • Customer:
    John from Los Angeles, CA
  • Parts Used:
    6-2095720, 6-2040130
  • Difficulty Level:
    Very Easy
  • Total Repair Time:
    More than 2 hours
  • Tools:
    Nutdriver, Pliers, Screw drivers, Socket set
Washer was leaking water from very old tub seal
The repair was simple. Just CAREFULLY follow the video instructions that are on the site. The videos are extremely easy to understand, you simply need to follow the procedure precisely. I found it absolutely necessary to buy a Maytag wrench to remove the retaining washers from both the Stem Seal and Bearing Kit. Replacing both at the same time makes sense since leaking seems to be a problem that could arise from the failure of either part, and once you get the Seal removed, the steps and logic to replace the Bearing are a no brainer. Repairing an old Maytag is a very smart decision. My machine is more than 20 years old, but the quality of the original parts will probably keep it running for another 20 years.
1 of 2 people found this instruction helpful.
Was this instruction helpful to you?
Thank you for voting!
  • Customer:
    Susan from Grants Pass, OR
  • Parts Used:
    6-2095720
  • Difficulty Level:
    Difficult
  • Total Repair Time:
    More than 2 hours
  • Tools:
    Screw drivers, Socket set, Wrench (Adjustable), Wrench set
Tub was leaking when spinning and draining.
We watched the tutorial on your site 5 times and put everything in the way it showed. After we put everything in and started up the machine we had a leak and it made a lot of noise. We took it back apart and found we did not have the drum set on the base tightened down enough. We redid the repair and made sure everything was tight and the machine ran perfect. Remember to put the hoses back on right we had a little leak but it was just a hose loose.
0 of 1 people found this instruction helpful.
Was this instruction helpful to you?
Thank you for voting!
  • Customer:
    steve from camp verde, AZ
  • Parts Used:
    6-2095720
  • Difficulty Level:
    Easy
  • Total Repair Time:
    1- 2 hours
  • Tools:
    Nutdriver, Screw drivers, Socket set
water leak around tub seal.
1. unplug the machine. 2. remove front of machine (two security torx screws). 3. remove the two 7/16 metal screws which hold down the top of the machine. 4. lift top of machine out of the way. 5.remove the hose clamp securing the water hose on the fill solenoids. 6. remove the plastic top of the tub being careful with the clips so you don't over flex them. 7. locate and remove the screw which holds the agitator on (1/4 inch hex). 8. lift out the agitator. 9. remove the nut holding the inner tub. (left hand threads) Use a spanner wrench available where you get parts. 10. lift out the inner tub. 11.remove the half moon shaped part on the transmission shaft. 12. remove the allen screw from the side of the mounting stem. 13. remove the mounting stem using the spanner wrench( left hand threads). 14. remove the three bolts holding the tub to the machine. 15. lift the tub up and remove the bleach fill hose and the pump hose. 16. place the tub up on blocks to protect the bottom where the pump hose attaches. 17. remove the old tub seal and clean the tub to prep for new tub seal. 18. install new tub seal and replace tub in the washer. 19. install new mounting stem but don't over tighten it. 20. put in the new allen screw. 21. replace all the other parts in reverse order of disassembly.
0 of 1 people found this instruction helpful.
Was this instruction helpful to you?
Thank you for voting!
  • Customer:
    Shelly from Fountain Valley, CA
  • Parts Used:
    6-2095720
  • Difficulty Level:
    Really Easy
  • Total Repair Time:
    30 - 60 mins
  • Tools:
Water leaking from under the washing machine tub. Broken Seal
A friend of mine did the repair after we watched a video on you tube that was very informative. Plus my friend is a mister fix-it-all type so the repair and installation of the parts I ordered from your website made it easy. I am a satisfied customer with the level of service I have received from your website.Thank you. My washing machine runs like brand new.
0 of 1 people found this instruction helpful.
Was this instruction helpful to you?
Thank you for voting!
Customer Reviews
Average Rating: (1 Review)
5.0
★★★★★
★★★★★
Filter By Rating:
  • 5
    1
  • 4
    0
  • 3
    0
  • 2
    0
  • 1
    0
Sort by:
Sorry, we couldn't find any existing reviews that matched. Try using some different or simpler keywords.
Model Compatibility
This part works with the following models:
Fix Number: FIX2351899
Manufacturer Part Number: 6-2095720
Brand
Model Number
Description
Maytag
6329
Washer - MAYTAG AUTOMATIC WASHER
Maytag
6349
Washer - MAYTAG AUTOMATIC WASHER
Maytag
6359
Washer - MAYTAG AUTOMATIC WASHER
Maytag
A100S
Washer - Top Loading
Maytag
A101
Washer - Top Loading
Maytag
A102
Washer - Top Loading
Maytag
A102S
Washer - Top Loading
Maytag
A103
Washer - Top Loading
Maytag
A103S
Washer - Top Loading
Maytag
A104
Washer - Top Loading
Maytag
A105
Washer - Top Loading
Maytag
A106
Washer - Top Loading
Maytag
A106S
Washer - Residential
Maytag
A107
Washer - Top Loading
Maytag
A107S
Washer - Residential
Maytag
A108
Washer - Top Loading
Maytag
A108S
Washer - Residential
Maytag
A110
Washer - Top Loading
Maytag
A112
Washer - Top Loading
Maytag
A15CA
Washer
Maytag
A15CM
Washer
Maytag
A15CT
Washer
Maytag
A16CA
Washer
Maytag
A16CM
Washer
Maytag
A16CT
Washer
Maytag
A17CA
Washer
Maytag
A17CM
Washer
Maytag
A17CT
Washer
Maytag
A180
Washer - Top Loading
Maytag
A181
Washer - Top Loading