Some of the parts we sell are eligible for mail-in rebates since we can recycle them. We will display any applicable rebates in your shopping cart. To redeem your rebate, contact Customer Service after you have received your part.
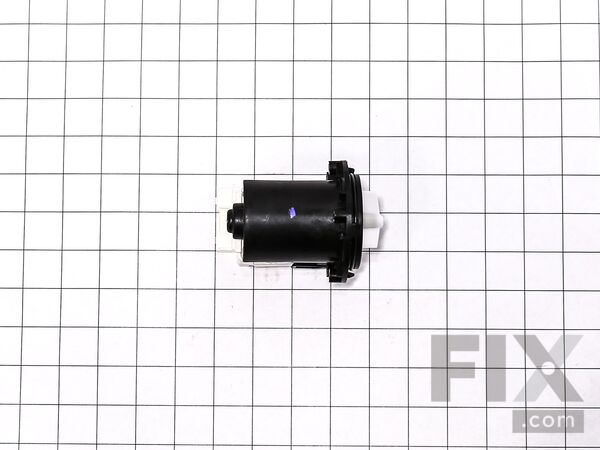
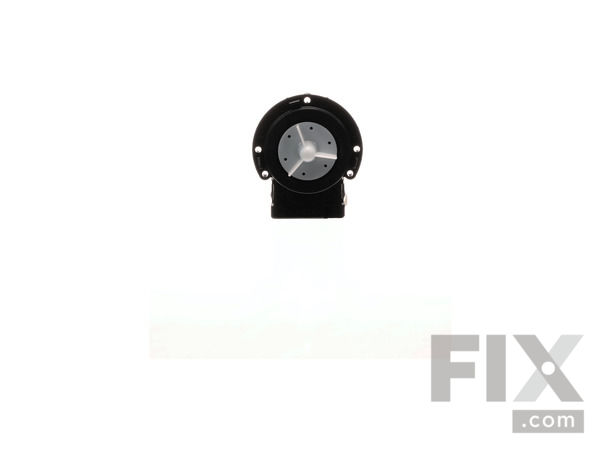
Washing Machine Drain Pump
- Fix Number:
- FIX3579318
- Manufacturer #:
- 4681EA2001T
- Manufactured by:
- LG
- Product Description
- This is a drain pump motor assembly for washers. This OEM part is responsible for removing water from the washer during the drain part of the cycle. When this part is clogged, damaged or defective it can cause the washer to not drain properly. Keep in mind that the pump casing is sold separately. This repair is rated medium-difficulty and can vary depending on the model. For this repair you will need a Philips screwdriver, a small flat blade screwdriver, needle nose pliers, and slip joint pliers. Do not forget to disconnect the power before you begin this repair. In general, this repair can be started by removing the top of the washer followed by the front panel. Moving down the front of the appliance, remove the door, latch, tub gasket, and drainer cover. The drain hoses and clip will need to be disconnected from under the drain assembly. To install the new pump motor, reassemble parts in the reverse order. We recommend taking photos while disassembling and keeping screws and parts neatly organized.
- Works with the following brands:
- LG, Kenmore
- Works with the following products
- Washer, Washer Dryer Combo
- Fixes the following symptoms
- Will not drain, Leaking, Draining Issues, Engine runs but does not pump water
- Part# 4681EA2001T replaces these:
- AP5328388, 2003273, 4681EA2001T, 4681EA1007D, 4681EA1007G, 4681EA2001D, 4681EA2001N, 4681EA2001U
Product Description
This is a drain pump motor assembly for washers. This OEM part is responsible for removing water from the washer during the drain part of the cycle. When this part is clogged, damaged or defective it can cause the washer to not drain properly. Keep in mind that the pump casing is sold separately. This repair is rated medium-difficulty and can vary depending on the model. For this repair you will need a Philips screwdriver, a small flat blade screwdriver, needle nose pliers, and slip joint pliers. Do not forget to disconnect the power before you begin this repair. In general, this repair can be started by removing the top of the washer followed by the front panel. Moving down the front of the appliance, remove the door, latch, tub gasket, and drainer cover. The drain hoses and clip will need to be disconnected from under the drain assembly. To install the new pump motor, reassemble parts in the reverse order. We recommend taking photos while disassembling and keeping screws and parts neatly organized.
-
Works with the following brands:LG, Kenmore
-
Works with the following products:Washer, Washer Dryer Combo
-
Fixes the following symptoms:Will not drain, Leaking, Draining Issues, Engine runs but does not pump water
-
Part# 4681EA2001T replaces these:AP5328388, 2003273, 4681EA2001T, 4681EA1007D, 4681EA1007G, 4681EA2001D ... Show more , 4681EA2001N, 4681EA2001U Show less
Videos For installing this part.
Replacing your Washing Machine Drain Pump

Questions and Answers
We're sorry, but our Q&A experts are temporarily unavailable.
Please check back later if you still haven't found the answer you need.
- < Prev
- 1
- Next >
Try using some different or simpler keywords, or submit your new question by using the "Ask a Question" button above!

2 people found this helpful.

Installation Instructions Provided by Fix customers like you.
- < Prev
- 1
- 2
- 3
- Next >
- Customer:
- Michael from Oconomowoc, WI
- Parts Used:
- 4681EA2001T
- Difficulty Level:
- Really Easy
- Total Repair Time:
- 1- 2 hours
- Tools:
- Pliers, Screw drivers
- Customer:
- Betty from monticello, GA
- Parts Used:
- 4681EA2001T
- Difficulty Level:
- Really Easy
- Total Repair Time:
- 30 - 60 mins
- Tools:
- Pliers, Screw drivers
- Customer:
- George from Encinitas, CA
- Parts Used:
- 4681EA2001T
- Difficulty Level:
- A Bit Difficult
- Total Repair Time:
- 1- 2 hours
- Tools:
- Nutdriver, Pliers, Screw drivers, Socket set
- Customer:
- Adisak from Brooklyn, NY
- Parts Used:
- 4681EA2001T
- Difficulty Level:
- Difficult
- Total Repair Time:
- More than 2 hours
- Tools:
- Pliers, Screw drivers, Wrench (Adjustable)
1.0 Trouble developed:
For awhile about 8 weeks, when I did the laundry (about 5 times a month), I smelled some thing was burning, it wasn’t strong, so I waited mind fully, a few times later before the LG3455WH failed, the burning smell was gone but I heard the ... Read more noise that sound liked bearing was grinding pretty loud but the washing cycle was working ok. That was my last load before repair. The LG3455WH running abnormally for the load the water seemed was not drained properly then finally the error code “OE” appeared the water was not drained properly and finally the water pump gave up with out draining and no grinding noise. I drained the water out manually, and tried again. The error code “OE” popped up a few more times. That’s it!
2. Time to looked up for troubles and solutions.
I found Steve’s repair video, it helped quite a bid in general. My LG3455WH was a newer model and things are quite different. I bought the new drain pump and replaced the bad pump. For me as an experience PCs technician not washing machines repair man, I managed to replace the drain pump any way! It was not easy at all! It took me about 4 hours. Of course, next time it will be much quicker and easier!
3. Here were the two (2) difficult repair procedures:
3.1 Removing the big hose that connected between the drain pump and the drum. The clamp was not easy to reach at all, the two ends of the clamp were positioned at 9:00 o’clock (parallel to the floor). In order to reach the two ends of the clamp and removed the hose, I had to remove the white bracket from the pump first so I could have more room to reach the two ends of the clamp. Finally I managed to loosen the clamp and remove the hose. Note: When I reinstalled the host back, I made sure that the clamp ends was at 12 o’clock so it will be easy to reach/remove the clamp in the future!
3.2 To reinstall the band clamp back was not easy, it require quite a bit of patient. Again, it was my first time! Just follow Steve/s video carefully, please! I managed to do it any way.
4. CONCLUSION.
It was worth it for DIY like me and the rest of you!
- Customer:
- Elaine from Edison, NJ
- Parts Used:
- 4681EA2001T
- Difficulty Level:
- Really Easy
- Total Repair Time:
- 30 - 60 mins
- Tools:
- Pliers, Screw drivers
- Customer:
- Denise from San Antonio, FL
- Parts Used:
- 4681EA2001T
- Difficulty Level:
- Really Easy
- Total Repair Time:
- 30 - 60 mins
- Tools:
- Pliers, Screw drivers
- Customer:
- Gregory from TARPON SPRINGS, FL
- Parts Used:
- 4681EA2001T
- Difficulty Level:
- Easy
- Total Repair Time:
- More than 2 hours
- Tools:
- Pliers, Screw drivers
- Customer:
- Joel from Tomball, TX
- Parts Used:
- 4681EA2001T, EAU61383518
- Difficulty Level:
- Really Easy
- Total Repair Time:
- 1- 2 hours
- Tools:
- Nutdriver, Pliers, Screw drivers, Wrench (Adjustable)
- Customer:
- NANCY from CEDAR HILL, TX
- Parts Used:
- 4681EA2001T
- Difficulty Level:
- Really Easy
- Total Repair Time:
- 1- 2 hours
- Tools:
- Nutdriver, Pliers
- Customer:
- Robert J. from Middletown, CT
- Parts Used:
- 4681EA2001T
- Difficulty Level:
- Easy
- Total Repair Time:
- 1- 2 hours
- Tools:
- Pliers, Screw drivers
- < Prev
- 1
- 2
- 3
- Next >
- < Prev
- 1
- Next >
Model Compatibility
Manufacturer Part Number: 4681EA2001T


