Some of the parts we sell are eligible for mail-in rebates since we can recycle them. We will display any applicable rebates in your shopping cart. To redeem your rebate, contact Customer Service after you have received your part.
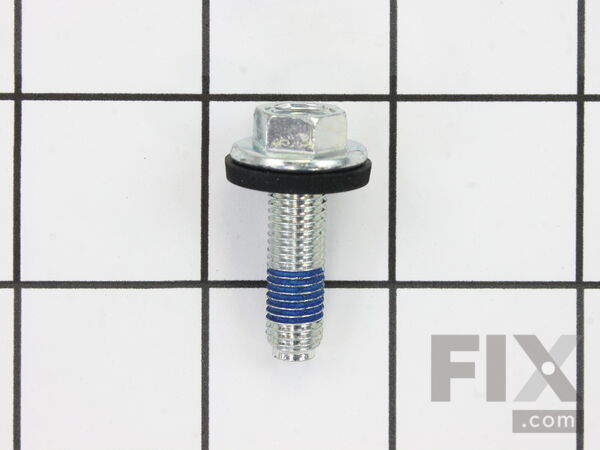
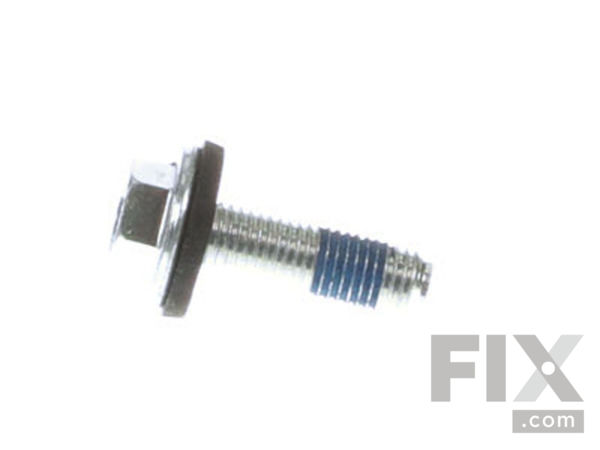
Agitator Bolt
$7.04
In Stock
- Fix Number:
- FIX11741866
- Manufacturer #:
- WP358237
- Manufactured by:
- Whirlpool
- Product Description
- This bolt is a genuine OEM replacement part, used to secure the agitator in your washing machine. Overtime the bolt can become worn out due to the vibrations of the washer, and will need to be replaced. The size of the screw head is 7/16 inch, so you will need the appropriately sized socket to complete this repair. The new bolt comes with a rubber gasket and a threaded sealant.
- Works with the following brands:
- Kenmore, Whirlpool, KitchenAid, Roper
- Works with the following products
- Washer, Washer Dryer Combo
- Fixes the following symptoms
- Will not agitate, Leaking, Spins slowly, Marks left on clothes
- Part# WP358237 replaces these:
- AP6008726, 285009, 357082, 357083, 357231, 358237, 358500, 359198, 97831, WP358237VP
Part Number Cross Reference
Product Description
This bolt is a genuine OEM replacement part, used to secure the agitator in your washing machine. Overtime the bolt can become worn out due to the vibrations of the washer, and will need to be replaced. The size of the screw head is 7/16 inch, so you will need the appropriately sized socket to complete this repair. The new bolt comes with a rubber gasket and a threaded sealant.
-
Works with the following brands:Kenmore, Whirlpool, KitchenAid, Roper
-
Works with the following products:Washer, Washer Dryer Combo
-
Fixes the following symptoms:Will not agitate, Leaking, Spins slowly, Marks left on clothes
-
Part# WP358237 replaces these:AP6008726, 285009, 357082, 357083, 357231, 358237 ... Show more , 358500, 359198, 97831, WP358237VP Show less
Videos For installing this part.
Replacing your Agitator Bolt

Questions and Answers
We're sorry, but our Q&A experts are temporarily unavailable.
Please check back later if you still haven't found the answer you need.
- < Prev
- 1
- Next >
Sort by:
Search filter:
Clear Filter
Your search term must have 3 or more characters.
Keep searches simple. Use keywords, e.g. "leaking", "pump", "broken" or "fit".
Sorry, we couldn't find any existing answers that matched.
Try using some different or simpler keywords, or submit your new question by using the "Ask a Question" button above!
Try using some different or simpler keywords, or submit your new question by using the "Ask a Question" button above!
Marissa
October 20, 2021
The agitator I have needs to be replaced for damage resulting from the agitator popping up while washing a load and I believe a bolt would solve the issue, but from what I am seeing, there is no hole for a bolt to hold down the agitator. Am I just overlooking something? The parts manual shows it takes one..
For model number LTE5243DQ9

Hello Marissa, Thank you for the question. There is a hold in the center of the Agitator for the Bolt. You will need to remove the Cap from the top of the Agitator to expose the Bolt Hole. We hope this helps!
2 people found this helpful.
Was this helpful?
Thank you for voting!
Related Parts:
Related Parts Additional or alternate parts to consider.
Installation Instructions Provided by Fix customers like you.
- < Prev
- 1
- 2
- Next >
Sort by:
Search filter:
Clear Filter
Your search term must have 3 or more characters.
Keep searches simple. Use keywords, e.g. "leaking", "pump", "broken" or "fit".
Sorry, we couldn't find any existing installation instruction that matched.
- Customer:
- Jerry from Aransas Pass, TX
- Parts Used:
- WPW10074580, WPW10072840, 285753A, WP8546127, WP358237, WP3363394, 285871, 285811
- Difficulty Level:
- Easy
- Total Repair Time:
- 1- 2 hours
- Tools:
- Pliers, Screw drivers, Socket set
Agitator not working correctly and leaking from somewhere underneath.
I watched the videos before I ordered the part and when the order arrived I replaced the parts with no problems. The most time consuming part of the job was cleaning the washer. You will be surprised to find what will accumulate down there after years of service. The order came in in record time so this site gets an A+ for being fast a
... Read more
nd accurate. No back-orders either. I will surely use for any-other parts I need in the future.
Read less
22 of 23 people
found this instruction helpful.
Was this instruction helpful to you?
Thank you for voting!
would not spin
well i replaced a lot of parts..but i think it was the the lid switch. but now its brand new..Thanks
16 of 19 people
found this instruction helpful.
Was this instruction helpful to you?
Thank you for voting!
- Customer:
- Brenda from Mt. Holly, NJ
- Parts Used:
- WPW10072840, WP358237, 80040
- Difficulty Level:
- Very Easy
- Total Repair Time:
- Less than 15 mins
- Tools:
- Wrench set
Cogs were worn down, thus the top of the agitator would not move
Removed fabric softener cover, inner cover and removed screw and washer. Replaced cogs, changed the inner seal ring and changed out screw and washer. Put it all back together and done. This is the 2nd time I've had to replace cogs since I've had the washer.
5 of 5 people
found this instruction helpful.
Was this instruction helpful to you?
Thank you for voting!
agitator stopped working
Follow the videos and it's easy to do the repair. Spent more time cleaning the appliance than it took to do the repair, (shredded rubber from large washer part of the motor coupling and many years of dust). My only suggestion would be to turn down the front legs (feet) so it's easier to get the cabinet body under the front steel spreader
... Read more
piece of the cabinet frame. Also, breaking off the plastic tabs under the thrust spacer, as suggested in video, will prevent them from getting in the way when you reassemble the parts. First attempt one folded under the thrust spacer and prevented it from seating properly. A socket extension is a must to remove/install agitator bolt.
Read less
2 of 2 people
found this instruction helpful.
Was this instruction helpful to you?
Thank you for voting!
Right oven door spring broke.
I ordered two new WHIRLPOOL Hinge Assembly's. There were no video's to watch regarding this repair, so it was a slow process figuring out what needed to be removed to access the hinges. The oven has to be completely removed to access thee sides and back, so a second person may be necessary to do this safely. I placed the oven on a workmat
... Read more
e platform to make the repair. Removing and replacing the hinges was the easy part. My suggestion....take photos and make notes on what screws go where during the dis-assembly. The repair was a success and the door works as advertised.
Read less
1 person
found this instruction helpful.
Was this instruction helpful to you?
Thank you for voting!
- Customer:
- Jennie from Fairborn, OH
- Parts Used:
- WPW10072840, WP358237, 350849, 285811, 285587
- Difficulty Level:
- Really Easy
- Total Repair Time:
- 30 - 60 mins
- Tools:
- Socket set
Top Agitator was not moving
We watched the video and kept the instructions close by. We did not have any problems with doing everything that the video showed and once it was all back together, it ran like it did in the past. Everything working good at this time.
1 person
found this instruction helpful.
Was this instruction helpful to you?
Thank you for voting!
Top agitator wasn't working.
I remover the top of the agitator by pulling straight up. Then used a 7/16 socket, extension, and ratchet to remove the bolt that held the agitator in place. Then pulled the complete assembly out of the washer. Separated the upper and lower sections, and cleaned all parts. then installed the new parts, and reassembled the agitator. Then r
... Read more
einstalled the agitator in the washer, and installed the new retaining bolt. Snapped the top back on the agitator, and the job was finished. The most time was spent on cleaning up the agitator and drum, as this washer is 8 years old. Appliance grease is to be used between the upper and lower parts, this also Should be included in the repair kit.
Read less
1 of 2 people
found this instruction helpful.
Was this instruction helpful to you?
Thank you for voting!
- Customer:
- Richard from Valley Center, CA
- Parts Used:
- WPW10072840, 80040, WP358237
- Difficulty Level:
- Very Easy
- Total Repair Time:
- 15 - 30 mins
- Tools:
- Nutdriver
Agitator cogs needed to be replaced
Removed agitator bolt pulled apart agitator and replaced cogs
0 of 1 people
found this instruction helpful.
Was this instruction helpful to you?
Thank you for voting!
- Customer:
- Lauriston from Errol, NH
- Parts Used:
- WPW10072840, WP358237, 285811, 285587
- Difficulty Level:
- Really Easy
- Total Repair Time:
- Less than 15 mins
- Tools:
- Socket set
top agitator was not turning properly
I watched the available video and then it was easy-peasy!
0 of 1 people
found this instruction helpful.
Was this instruction helpful to you?
Thank you for voting!
Noisy during operation. I found oil on the floor under the washing machine.
Slow gear case leak was at the input shaft seal. I followed the gear case video instructions which are quite good. However the video says you can buy the needed spanner for the tub nut here on this site. I sure couldn't find it and had to order from elsewhere. In this case a TB123A fit well. Upon testing I had a noise when the pump was ru
... Read more
nning. I discovered that I missed aligning one pump leg to the recess. After I released the pump clamps, and slightly repositioned and re-clamped it was fine. The upper agitator was replaced due to slight wear on the internal teeth. The original agitator bolt's intrinsic rubber seal (bolt, washer/seal all one piece) was worn so I replaced that too.
Read less
0 of 1 people
found this instruction helpful.
Was this instruction helpful to you?
Thank you for voting!
- < Prev
- 1
- 2
- Next >
Model Compatibility
This part works with the following models:
Fix Number: FIX11741866
Manufacturer Part Number: WP358237
Manufacturer Part Number: WP358237
Brand
Model Number
Description
Kenmore
10682872600
Washer
- Kenmore Washing Machine Model 106.82872600 (10682872600, 106 82872600) Parts
Kenmore
1101050299
Washer
- Kenmore Washing Machine Model 110.1050299 (1101050299, 110 1050299) Parts
✖
Mail-In Recycling Rebate


