Some of the parts we sell are eligible for mail-in rebates since we can recycle them. We will display any applicable rebates in your shopping cart. To redeem your rebate, contact Customer Service after you have received your part.
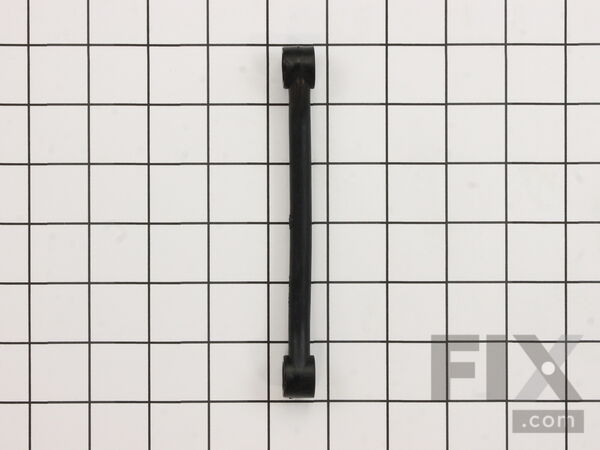
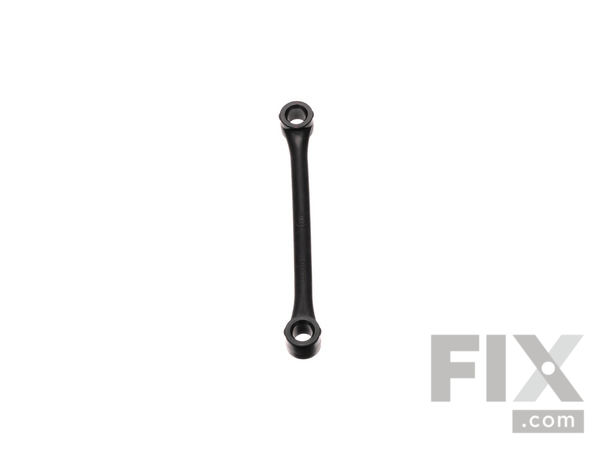
Tub Dampening Strap
- Fix Number:
- FIX271100
- Manufacturer #:
- WH1X2727
- Manufactured by:
- GE
- Product Description
- This is a single tub dampening strap for a washer. It is recommended to replace all 4 tub dampening straps at the same time, to ensure even wear. This part supports the tub and minimizes vibration by keeping it centered in the cabinet. If you notice loud banging or excessive vibration, this could be due to an off-balanced tub caused by a worn or damaged tub dampening strap. While inspecting this part, also check that the tub itself is not damaged where the straps mount. This manufacturer-approved replacement part is black in color and measures 5.875-inches by 0.625-inches.
- Works with the following brands:
- General Electric, Hotpoint
- Works with the following products
- Washer
- Fixes the following symptoms
- Leaking, Will not agitate, Shaking and Moving, Burning smell
- Part# WH1X2727 replaces these:
- AP2044899, 2289, WH1X2727, WH01X10028, WH01X10046, WH01X2727, WH1X10028, WH1X10046
Product Description
This is a single tub dampening strap for a washer. It is recommended to replace all 4 tub dampening straps at the same time, to ensure even wear. This part supports the tub and minimizes vibration by keeping it centered in the cabinet. If you notice loud banging or excessive vibration, this could be due to an off-balanced tub caused by a worn or damaged tub dampening strap. While inspecting this part, also check that the tub itself is not damaged where the straps mount. This manufacturer-approved replacement part is black in color and measures 5.875-inches by 0.625-inches.
-
Works with the following brands:General Electric, Hotpoint
-
Works with the following products:Washer
-
Fixes the following symptoms:Leaking, Will not agitate, Shaking and Moving, Burning smell
-
Part# WH1X2727 replaces these:AP2044899, 2289, WH1X2727, WH01X10028, WH01X10046, WH01X2727 ... Show more , WH1X10028, WH1X10046 Show less
Videos For installing this part.
Replacing your Tub Dampening Strap

Questions and Answers
We're sorry, but our Q&A experts are temporarily unavailable.
Please check back later if you still haven't found the answer you need.
Installation Instructions Provided by Fix customers like you.
- < Prev
- 1
- Next >
- Customer:
- Leslie from ROCKY FORD, CO
- Parts Used:
- WH1X2727
- Difficulty Level:
- Really Easy
- Total Repair Time:
- 30 - 60 mins
- Tools:
- Screw drivers, Socket set
- Customer:
- jose from cleveland, OH
- Parts Used:
- WH1X2727
- Difficulty Level:
- Really Easy
- Total Repair Time:
- 15 - 30 mins
- Tools:
- Nutdriver, Wrench set
- Customer:
- Dean from Parker, CO
- Parts Used:
- WH02X10383, WH02X10265, WH49X10042, WH2X1197, WH1X2727
- Difficulty Level:
- A Bit Difficult
- Total Repair Time:
- 30 - 60 mins
- Tools:
- Pliers, Screw drivers, Socket set, Wrench (Adjustable)
- Customer:
- Pat from Dandridge, TN
- Parts Used:
- WH1X2727
- Difficulty Level:
- Very Easy
- Total Repair Time:
- 15 - 30 mins
- Tools:
- Screw drivers, Socket set
- Customer:
- Tom from Caledonia, WI
- Parts Used:
- WH41X22935, WH1X2727
- Difficulty Level:
- Very Easy
- Total Repair Time:
- 30 - 60 mins
- Tools:
- Pliers, Screw drivers, Socket set
- Customer:
- clifford from new london, NC
- Parts Used:
- WH1X2727
- Difficulty Level:
- Easy
- Total Repair Time:
- 30 - 60 mins
- Tools:
- Nutdriver, Socket set
- Customer:
- Gary from Apache Junction, AZ
- Parts Used:
- WH1X2727
- Difficulty Level:
- Really Easy
- Total Repair Time:
- 30 - 60 mins
- Tools:
- Nutdriver, Screw drivers, Socket set
- Customer:
- Mark from Sacramento, CA
- Parts Used:
- WH1X2727
- Difficulty Level:
- Easy
- Total Repair Time:
- 30 - 60 mins
- Tools:
- Nutdriver, Screw drivers, Socket set
- < Prev
- 1
- Next >
Model Compatibility
Manufacturer Part Number: WH1X2727


