Some of the parts we sell are eligible for mail-in rebates since we can recycle them. We will display any applicable rebates in your shopping cart. To redeem your rebate, contact Customer Service after you have received your part.
Agitator Cam Kit
$15.10
In Stock
- Fix Number:
- FIX334624
- Manufacturer #:
- 285751
- Manufactured by:
- Whirlpool
- Product Description
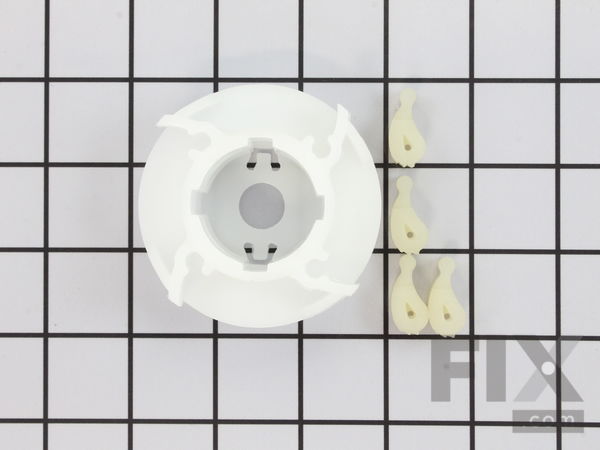
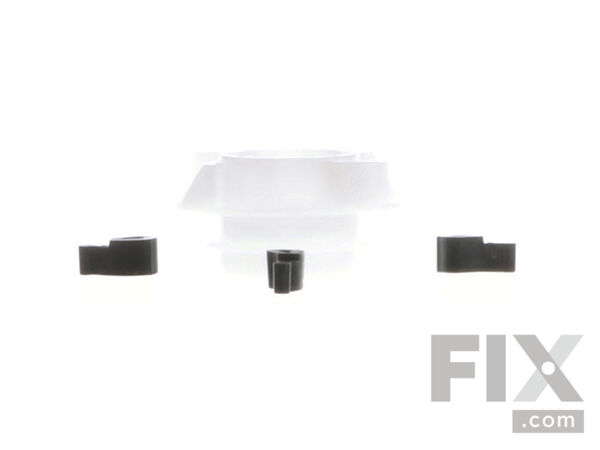
- This agitator cam kit contains an almost three inch white retainer and four agitator dog ears. This kit is used to move the upper agitator and it connects the base of the agitator with the agitator top (mover).
- Works with the following brands:
- Kenmore, Whirlpool, Maytag, Crosley
- Works with the following products
- Washer Dryer Combo, Washer
- Fixes the following symptoms
- Will not agitate
- Part# 285751 replaces these:
- AP3094521, 2837, 285751, 3351019, 387092, 3947410
Part Number Cross Reference
Product Description
This agitator cam kit contains an almost three inch white retainer and four agitator dog ears. This kit is used to move the upper agitator and it connects the base of the agitator with the agitator top (mover).
-
Works with the following brands:Kenmore, Whirlpool, Maytag, Crosley
-
Works with the following products:Washer Dryer Combo, Washer
-
Fixes the following symptoms:Will not agitate
-
Part# 285751 replaces these:AP3094521, 2837, 285751, 3351019, 387092, 3947410
Questions and Answers
We're sorry, but our Q&A experts are temporarily unavailable.
Please check back later if you still haven't found the answer you need.
- < Prev
- 1
- Next >
Sort by:
Search filter:
Clear Filter
Your search term must have 3 or more characters.
Keep searches simple. Use keywords, e.g. "leaking", "pump", "broken" or "fit".
Sorry, we couldn't find any existing answers that matched.
Try using some different or simpler keywords, or submit your new question by using the "Ask a Question" button above!
Try using some different or simpler keywords, or submit your new question by using the "Ask a Question" button above!
Loralee
December 19, 2022
The top of my agitator is cracked and split at the top and will not agitate, the washer will drain and spin. Since the agitator split and broke at the top, will I need the agitator coupler in addition to a new agitator?
For model number 417.91702000

Hello Loralee, thank you for your question. The Agitator for your model is part PS446533. The agitator cap is part PS446528. However, if by coupler, you meant the trunnion, part PS418105, this would only need to be replaced if it shows signs of breakage as well. We look forward to hearing from you.
Was this helpful?
Thank you for voting!
Related Parts:
Installation Instructions Provided by Fix customers like you.
- < Prev
- 1
- Next >
Sort by:
Search filter:
Clear Filter
Your search term must have 3 or more characters.
Keep searches simple. Use keywords, e.g. "leaking", "pump", "broken" or "fit".
Sorry, we couldn't find any existing installation instruction that matched.
Right oven door spring broke.
I ordered two new WHIRLPOOL Hinge Assembly's. There were no video's to watch regarding this repair, so it was a slow process figuring out what needed to be removed to access the hinges. The oven has to be completely removed to access thee sides and back, so a second person may be necessary to do this safely. I placed the oven on a workmat
... Read more
e platform to make the repair. Removing and replacing the hinges was the easy part. My suggestion....take photos and make notes on what screws go where during the dis-assembly. The repair was a success and the door works as advertised.
Read less
1 person
found this instruction helpful.
Was this instruction helpful to you?
Thank you for voting!
no heat
tare dryer apart to change blower wheel
1 of 5 people
found this instruction helpful.
Was this instruction helpful to you?
Thank you for voting!
- < Prev
- 1
- Next >
Model Compatibility
This part works with the following models:
Fix Number: FIX334624
Manufacturer Part Number: 285751
Manufacturer Part Number: 285751
Brand
Model Number
Description
✖
Mail-In Recycling Rebate


