Some of the parts we sell are eligible for mail-in rebates since we can recycle them. We will display any applicable rebates in your shopping cart. To redeem your rebate, contact Customer Service after you have received your part.
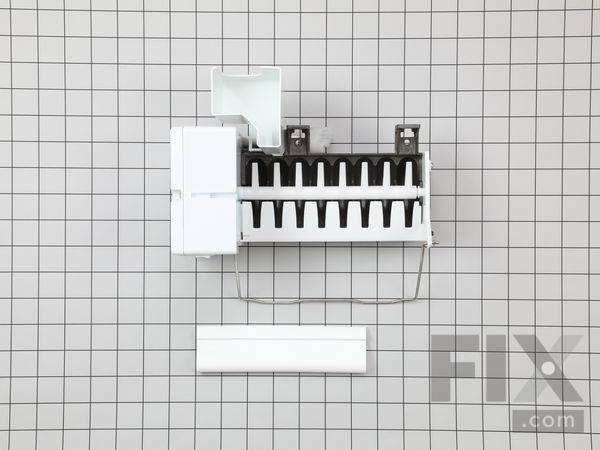
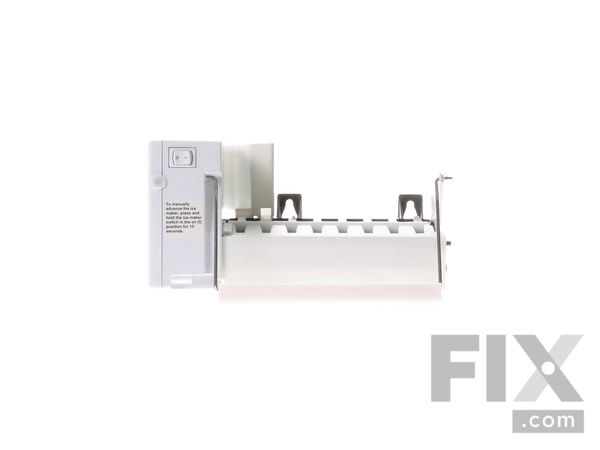
Rear-Mount Ice Maker Assembly
- Fix Number:
- FIX1992700
- Manufacturer #:
- 5303918344
- Manufactured by:
- Frigidaire
- Product Description
- This kit includes the ice maker, power cord, bail arm, and fill cup. If your ice maker is not making or dispensing ice, or you notice a leak, you may need to replace the rear-mount ice maker assembly. This ice maker mounts to the back panel in the freezer section of the side-by-side refrigerator. If you are having an issue with the arm of this kit hitting the shelf, you will have to replace the shelf. You can find the shelf by searching FIX1152582. To complete this repair, you will need a 1/4-inch nut driver and a small flat blade screwdriver.
- Works with the following brands:
- Frigidaire, Kenmore, Electrolux, Westinghouse
- Works with the following products
- Refrigerator
- Fixes the following symptoms
- Ice maker not making ice, Ice maker won’t dispense ice, Leaking, Ice maker dispenses too little ice
- Part# 5303918344 replaces these:
- AP4299334, 1260019, 5303918344, 240599901, 241627701, 241680601, 241696501, 241709801, 5304436617, 75303918344
Product Description
This kit includes the ice maker, power cord, bail arm, and fill cup. If your ice maker is not making or dispensing ice, or you notice a leak, you may need to replace the rear-mount ice maker assembly. This ice maker mounts to the back panel in the freezer section of the side-by-side refrigerator. If you are having an issue with the arm of this kit hitting the shelf, you will have to replace the shelf. You can find the shelf by searching FIX1152582. To complete this repair, you will need a 1/4-inch nut driver and a small flat blade screwdriver.
-
Works with the following brands:Frigidaire, Kenmore, Electrolux, Westinghouse
-
Works with the following products:Refrigerator
-
Fixes the following symptoms:Ice maker not making ice, Ice maker won’t dispense ice, Leaking, Ice maker dispenses too little ice
-
Part# 5303918344 replaces these:AP4299334, 1260019, 5303918344, 240599901, 241627701, 241680601 ... Show more , 241696501, 241709801, 5304436617, 75303918344 Show less
Questions and Answers
We're sorry, but our Q&A experts are temporarily unavailable.
Please check back later if you still haven't found the answer you need.
Installation Instructions Provided by Fix customers like you.
- < Prev
- 1
- Next >
- Customer:
- Ken from Lewisville, TX
- Parts Used:
- 5303918344
- Difficulty Level:
- Very Easy
- Total Repair Time:
- Less than 15 mins
- Tools:
- Nutdriver
- Customer:
- William from LANSING, MI
- Parts Used:
- 5303918344
- Difficulty Level:
- Very Easy
- Total Repair Time:
- Less than 15 mins
- Tools:
- Nutdriver
- Customer:
- Michael from NORCO, CA
- Parts Used:
- 5303918344
- Difficulty Level:
- Very Easy
- Total Repair Time:
- 15 - 30 mins
- Tools:
- Pliers, Socket set
- Customer:
- Jim from Parma, OH
- Parts Used:
- 5303918344
- Difficulty Level:
- Really Easy
- Total Repair Time:
- Less than 15 mins
- Tools:
- Nutdriver
- Customer:
- Patricia from Fresno, CA
- Parts Used:
- 5303918344
- Difficulty Level:
- Very Easy
- Total Repair Time:
- Less than 15 mins
- Tools:
- Nutdriver
- Customer:
- RONNY from BARKSDALE, TX
- Parts Used:
- 5303918344
- Difficulty Level:
- Very Easy
- Total Repair Time:
- Less than 15 mins
- Tools:
- Screw drivers
- Customer:
- John from North Richland Hills, TX
- Parts Used:
- 5303918344
- Difficulty Level:
- Very Easy
- Total Repair Time:
- Less than 15 mins
- Tools:
- Nutdriver
- < Prev
- 1
- Next >
Model Compatibility
Manufacturer Part Number: 5303918344


