Some of the parts we sell are eligible for mail-in rebates since we can recycle them. We will display any applicable rebates in your shopping cart. To redeem your rebate, contact Customer Service after you have received your part.
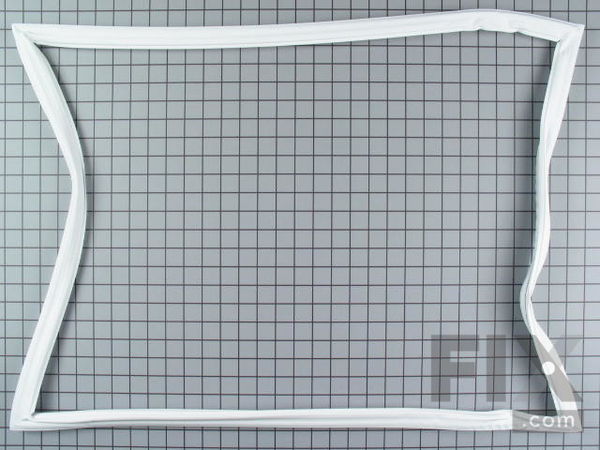
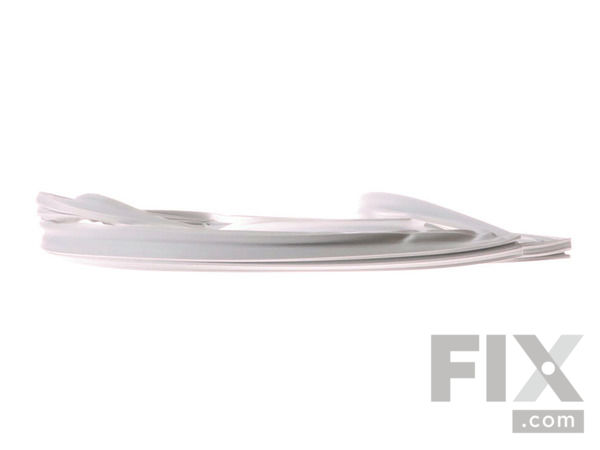
Freezer Door Gasket
$106.12
In Stock
- Fix Number:
- FIX11738527
- Manufacturer #:
- WP12550116Q
- Manufactured by:
- Whirlpool
- Product Description
- This freezer door gasket is white and made of rubber. It measures approximately 23-3/4 inches wide by thirty-one and a half inches long.
- Works with the following brands:
- Amana, Whirlpool, KitchenAid, Kenmore
- Works with the following products
- Refrigerator
- Fixes the following symptoms
- Door Sweating, Frost buildup, Freezer section too warm, Leaking
- Part# WP12550116Q replaces these:
- AP6005478, 10456810, 10456810Q, 10456838, 10456838Q, 10456860, 10456860Q, 12529016, 12550116, 12550116Q, 4344354, 8170398, 8170510, 8170633, 8170646, 8170655, Y10456838Q
Part Number Cross Reference
Product Description
This freezer door gasket is white and made of rubber. It measures approximately 23-3/4 inches wide by thirty-one and a half inches long.
-
Works with the following brands:Amana, Whirlpool, KitchenAid, Kenmore
-
Works with the following products:Refrigerator
-
Fixes the following symptoms:Door Sweating, Frost buildup, Freezer section too warm, Leaking
-
Part# WP12550116Q replaces these:AP6005478, 10456810, 10456810Q, 10456838, 10456838Q, 10456860 ... Show more , 10456860Q, 12529016, 12550116, 12550116Q, 4344354, 8170398, 8170510, 8170633, 8170646, 8170655, Y10456838Q Show less
Videos For installing this part.
Replacing your Freezer Door Gasket

Questions and Answers
We're sorry, but our Q&A experts are temporarily unavailable.
Please check back later if you still haven't found the answer you need.
- < Prev
- 1
- Next >
Sort by:
Search filter:
Clear Filter
Your search term must have 3 or more characters.
Keep searches simple. Use keywords, e.g. "leaking", "pump", "broken" or "fit".
Sorry, we couldn't find any existing answers that matched.
Try using some different or simpler keywords, or submit your new question by using the "Ask a Question" button above!
Try using some different or simpler keywords, or submit your new question by using the "Ask a Question" button above!
Lynden
November 29, 2022
Once we installed the new freezer gasket, we could not tell if the very inside edge of the gasket is to lay flat or fold back under. Laying flat seems it might help seal the door to the freezer body but it is so flimsy some of the edge wants to fold under thus, some flat and some puckered under not making a good seal and possibly keeping the door from making a good seal. So, lay flat or allow to fold under! (The edge I'm referring to is the very inner flange you need to first get hold of to lift the gasket out to expose the screws. Thin & flimsy.)
For model number WHI WP12550116Q

Hello Lynden, thank you for contacting us. Our research shows that you may need to lay it flat. We have attached a related video for your assistance. Let us know if you have further questions!

5 people found this helpful.
Was this helpful?
Thank you for voting!
Related Parts Additional or alternate parts to consider.
Installation Instructions Provided by Fix customers like you.
- < Prev
- 1
- Next >
Sort by:
Search filter:
Clear Filter
Your search term must have 3 or more characters.
Keep searches simple. Use keywords, e.g. "leaking", "pump", "broken" or "fit".
Sorry, we couldn't find any existing installation instruction that matched.
- Customer:
- Thomas from South Holland, IL
- Parts Used:
- WP12550116Q
- Difficulty Level:
- Really Easy
- Total Repair Time:
- 15 - 30 mins
- Tools:
- Nutdriver
Freezer Door Gasket crack and dried out
Once I got on You Tube it was piece of cake .Bring on the next problem
2 of 2 people
found this instruction helpful.
Was this instruction helpful to you?
Thank you for voting!
- Customer:
- Moshe from San Ramon, CA
- Parts Used:
- WP12550116Q
- Difficulty Level:
- Easy
- Total Repair Time:
- More than 2 hours
The freezer door gasket was disintegrating.
Removing the freezer door inside panel was straightforward, though it was not too easy to access the lower row of screws since they were close to floor level. There was a lot of ice buildup in the insulation of the panel, and I had to wait overnight for it to melt and then had to dry the insulation in a drier. Attaching the new gasket to
... Read more
the panel did not require heating it to shape, and the seal is good. Reattaching the panel to the door was the hardest part, and I made the mistake of tightening screws before they were all in.
Read less
2 of 2 people
found this instruction helpful.
Was this instruction helpful to you?
Thank you for voting!
- Customer:
- Scott from MEDFORD, OR
- Parts Used:
- WP12550116Q
- Difficulty Level:
- Easy
- Total Repair Time:
- 30 - 60 mins
- Tools:
- Screw drivers, Socket set
Freezer door gasket was broken
Watch your Utube video and it was very useful!
1 person
found this instruction helpful.
Was this instruction helpful to you?
Thank you for voting!
- Customer:
- Paul from Mountain View, CA
- Parts Used:
- WP12550116Q
- Difficulty Level:
- A Bit Difficult
- Total Repair Time:
- 1- 2 hours
- Tools:
- Nutdriver
Torn freezer door gasket (leaked cold air)
My wife and I did not take the door off, but we taped a 24"x32" piece of insulating foam over the opening, so our food would stay cold. We removed all the screws holding the inner liner on, and took off the old gasket. As others have noted, there was ice on the lower half of the fiberglass insulation that's in the slot going around the ou
... Read more
tside of the inner liner, so we carefully pried out the ice (using a hairdryer to melt a stubborn section), then cut a 4" wide strip of fiberglass insulation and tucked it in the slot to replace the part we removed. Then we carefully stretched the new gasket around the inner liner, making sure the edge of the liner "snapped" into the inner slot of the gasket. Finally, we carefully held the inner liner up to the door, inserted three screws part way in to keep it aligned, then installed all the rest of the screws and tightened them, making sure the gasket didn't slide off. Then we removed the foam from the opening and closed the door. It has a good seal all the way around.
Read less
1 of 2 people
found this instruction helpful.
Was this instruction helpful to you?
Thank you for voting!
- Customer:
- Rebecca from Chapel Hill, NC
- Parts Used:
- WP12550116Q
- Difficulty Level:
- A Bit Difficult
- Total Repair Time:
- More than 2 hours
- Tools:
- Nutdriver
water leaking from old split gasket where ice formed then melted
we did not take door off as some suggested, but could see how that would help....we defrosted, then followed the following YouTube excellent directions with complication of a very rusted screw which we torqued out with a vice grip after applying Liquid Wrench
0 of 1 people
found this instruction helpful.
Was this instruction helpful to you?
Thank you for voting!
- < Prev
- 1
- Next >
★
Customer Reviews
Filter By Rating:
- < Prev
- 1
- Next >
Sort by:
Search filter:
Clear Filter
Your search term must have 3 or more characters.
Keep searches simple. Use keywords, e.g. "leaking", "pump", "broken" or "fit".
Sorry, we couldn't find any existing reviews that matched. Try using some different or simpler keywords.
GERAVIS B - October 30, 2021
Verified Purchase
Perfect
Part was exactly what was needed
Model Compatibility
This part works with the following models:
Fix Number: FIX11738527
Manufacturer Part Number: WP12550116Q
Manufacturer Part Number: WP12550116Q
Brand
Model Number
Description
✖
Mail-In Recycling Rebate


