Some of the parts we sell are eligible for mail-in rebates since we can recycle them. We will display any applicable rebates in your shopping cart. To redeem your rebate, contact Customer Service after you have received your part.
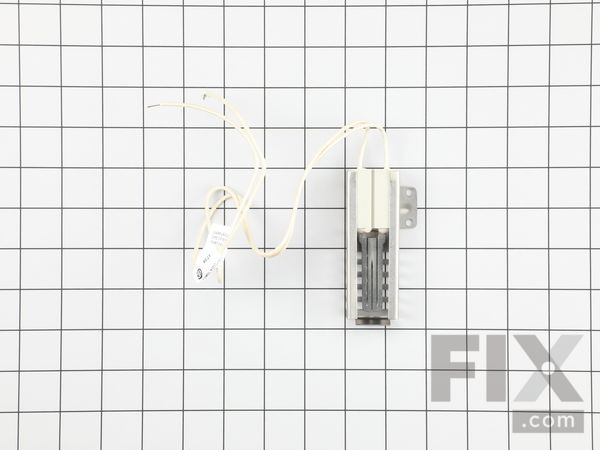
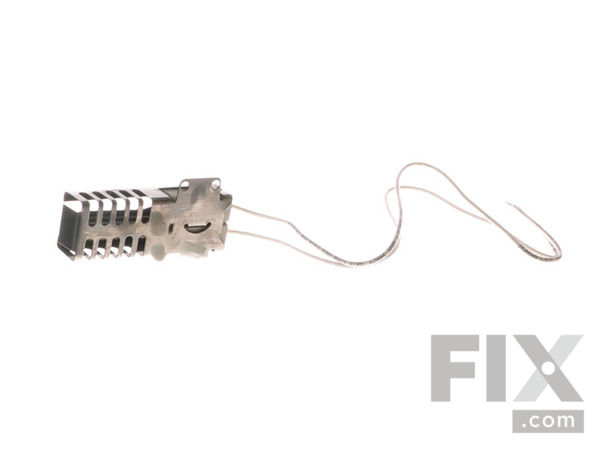
Flat Style Oven Igniter
- Fix Number:
- FIX470129
- Manufacturer #:
- 5303935066
- Manufactured by:
- Frigidaire
- Product Description
- If your gas range will not heat up, is not coming up to temperature, the igniter is not glowing, or it glows but will not light, you may need to replace the igniter. This part is a genuine OEM flat style oven igniter and includes two ceramic wire nuts to assist with installation. The igniter is used to light the oven burner in your range by igniting the gas. Before beginning this repair, please be sure to disconnect the power and gas supply to your range. When handling this part, be careful not to touch the black element on the igniter, as this section is very fragile. The igniter measures approximately 3.72 inches in length, with 18 inches of wire lead, and has an amperage range of 3.2 to 3.6.
- Works with the following brands:
- Tappan, Frigidaire, Kenmore, Gibson
- Works with the following products
- Range, Wall Oven, Microwave Oven Combo
- Fixes the following symptoms
- Gas igniter glows, but will not light, Little to no heat when baking, Will Not Start
- Part# 5303935066 replaces these:
- AP2150412, 12872, 5303935066, 08009420, 08013883, 08067971, 10064, 10222, 12400035, 3131090, 3131300, 316030600, 316T031P01, 316T031P02, 318177720, 3203706, 5303131300, 5303207520, 5303207521, 5303210788 ... Show more , 5303935066, 5303937521, 5308009420, 8009420, 8013883, 8067971, AP00205013, AP205013, AP205016, P205013, P205016, P205034 Show less
Product Description
If your gas range will not heat up, is not coming up to temperature, the igniter is not glowing, or it glows but will not light, you may need to replace the igniter. This part is a genuine OEM flat style oven igniter and includes two ceramic wire nuts to assist with installation. The igniter is used to light the oven burner in your range by igniting the gas. Before beginning this repair, please be sure to disconnect the power and gas supply to your range. When handling this part, be careful not to touch the black element on the igniter, as this section is very fragile. The igniter measures approximately 3.72 inches in length, with 18 inches of wire lead, and has an amperage range of 3.2 to 3.6.
-
Works with the following brands:Tappan, Frigidaire, Kenmore, Gibson
-
Works with the following products:Range, Wall Oven, Microwave Oven Combo
-
Fixes the following symptoms:Gas igniter glows, but will not light, Little to no heat when baking, Will Not Start
-
Part# 5303935066 replaces these:AP2150412, 12872, 5303935066, 08009420, 08013883, 08067971 ... Show more , 10064, 10222, 12400035, 3131090, 3131300, 316030600, 316T031P01, 316T031P02, 318177720, 3203706, 5303131300, 5303207520, 5303207521, 5303210788, 5303935066, 5303937521, 5308009420, 8009420, 8013883, 8067971, AP00205013, AP205013, AP205016, P205013, P205016, P205034 Show less
Questions and Answers
We're sorry, but our Q&A experts are temporarily unavailable.
Please check back later if you still haven't found the answer you need.
Installation Instructions Provided by Fix customers like you.
- < Prev
- 1
- 2
- 3
- Next >
- Customer:
- Daniel from Birdsboro, PA
- Parts Used:
- 5303935066
- Difficulty Level:
- Really Easy
- Total Repair Time:
- 30 - 60 mins
- Tools:
- Screw drivers, Socket set
- Customer:
- Mary from Ticonderoga, NY
- Parts Used:
- 5303935066
- Difficulty Level:
- Really Easy
- Total Repair Time:
- Less than 15 mins
- Tools:
- Screw drivers
- Customer:
- SHAWN from PITTSBURGH, PA
- Parts Used:
- 5303935066
- Difficulty Level:
- Easy
- Total Repair Time:
- 30 - 60 mins
- Tools:
- Nutdriver, Pliers
- Customer:
- Robert from Beckley, WV
- Parts Used:
- 5303935066
- Difficulty Level:
- Really Easy
- Total Repair Time:
- 15 - 30 mins
- Tools:
- Screw drivers, Socket set
- Customer:
- Joel from Boyne City, MI
- Parts Used:
- 5303935066
- Difficulty Level:
- Really Easy
- Total Repair Time:
- 15 - 30 mins
- Tools:
- Screw drivers, Socket set
- Customer:
- Jerry from Portland, TN
- Parts Used:
- 5303935066
- Difficulty Level:
- Very Easy
- Total Repair Time:
- Less than 15 mins
- Tools:
- Nutdriver
- Customer:
- Jorge from El Paso, TX
- Parts Used:
- 5303935066
- Difficulty Level:
- Really Easy
- Total Repair Time:
- 15 - 30 mins
- Tools:
- Pliers, Socket set
- Customer:
- thomas from Staten Island, NY
- Parts Used:
- 5303935066
- Difficulty Level:
- Very Easy
- Total Repair Time:
- 15 - 30 mins
- Tools:
- Nutdriver, Pliers
- Customer:
- Kathryn from Sherman Oaks, CA
- Parts Used:
- 5303935066
- Difficulty Level:
- Really Easy
- Total Repair Time:
- 15 - 30 mins
- Tools:
- Nutdriver
- Customer:
- Allen from Bryan, TX
- Parts Used:
- 5303935066
- Difficulty Level:
- Easy
- Total Repair Time:
- 30 - 60 mins
- Tools:
- Wrench (Adjustable)
- < Prev
- 1
- 2
- 3
- Next >
Model Compatibility
Manufacturer Part Number: 5303935066


