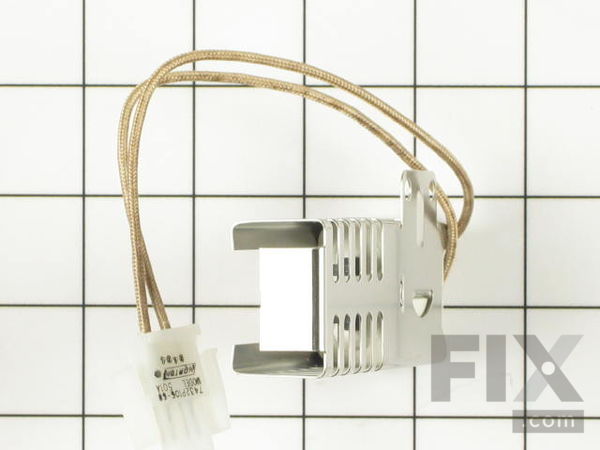
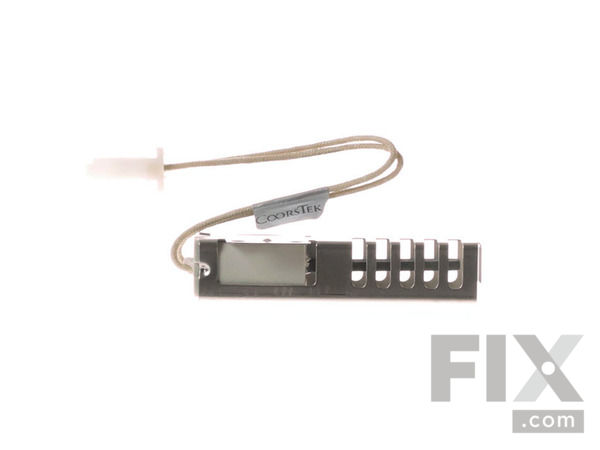
Part Location Diagram of 74007498 Whirlpool Oven Igniter - Vertical Mount Bake and Broil
See part 6 in the diagram
( Grid squares measure 1x1 inch )

Oven Igniter - Vertical Mount Bake and Broil 74007498

★★★★★
★★★★★
5 Reviews

Rated by 18 customers 

?

Really Easy 

15 - 30 mins 

Ratings submitted by customers like you who bought this part.

?
$93.22
In Stock
Fix Number:
FIX2085070
Manufacturer #:
74007498
Manufactured by:
Whirlpool

Product Description

If your gas range is not lighting or coming up to temperature, there may be an issue with the igniter. The igniter is used to create a spark that lights the gas, and if it is glowing but will not light then the igniter will need to be replaced. This part is an authentic OEM replacement oven igniter for your gas range. The part comes with a metallic mounting bracket, and a dual wire lead that is 7-inches in length. Before beginning this repair, please be sure to disconnect both the power and gas supply to your range.

Questions and Answers

We're sorry, but our Q&A experts are temporarily unavailable.
Please check back later if you still haven't found the answer you need.

Affresh Washing Machine Cleaner - 3 pack
$12.58
In Stock
Produce Preserver Filter
$21.50
In Stock
Affresh Dishwasher Cleaner Tablets - 6
$19.09
In Stock
Cooktop Cleaning Cream
$15.57
In Stock
Cooktop Cleaner
$17.74
In Stock
Affresh Cleaner
$19.09
In Stock

Installation Instructions Provided by Fix customers like you.

Average Repair Rating: 4.3 / 5.0, 18 reviews.
  • 1
  • 2
Sort by:
Sorry, we couldn't find any existing installation instruction that matched.
Customer:
John from Sterling Heights, MI
Parts Used:
74007498
Difficulty Level:
Really Easy
Total Repair Time:
15 - 30 mins
Tools:
Socket set
Oven was taking twice as long to preheat.
I first removed the oven door by opening it slightly and lifting it straight up. This gives you easier access to inside the oven. Remove the inside grates and bottom of oven floor- (2 tabs in back slide toward you then lift up).Carefully slide oven away from the wall. Disturb the gas line as little as possible. Unplug the appliance. Now y ou have access to the igniter (inside of oven), and the igniter plug (behind the oven). I then removed 2 hex nut bolts (5/16") on igniter bracket, unplugged the igniter- (back of oven), and fished the wires back through the oven wall. For installation of the new igniter, reverse this procedure. Note that the hole in the back of the oven where the wires run through has heat resistant cotton-like material to help seal that hole. This is where I used the needle nose pliers to shift that material around.
7 of 7 people found this instruction helpful.
Was this instruction helpful to you?
Thank you for voting!
Customer:
David from Menomonee, WI
Parts Used:
74007498
Difficulty Level:
Really Easy
Total Repair Time:
Less than 15 mins
Tools:
Nutdriver
Oven would not light.
The repair could not have been easier. No surprises. The thing that really stands out about installing a new igniter was the efficient service I received from this site. There were other igniters for sale on the internet, and many were cheaper, but I was lucky enough to select a part distributor who is honest and efficient. This next part is amazing. I ordered the part on Thursday afternoon and the part was delivered Saturday morning at 9:00 AM. I installed the part, gave the oven a good cleaning, my wife started cooking. I also called and thanked them. I like good work.
2 of 2 people found this instruction helpful.
Was this instruction helpful to you?
Thank you for voting!
Customer:
Jackie from HUNTINGTON, UT
Parts Used:
74007498
Difficulty Level:
A Bit Difficult
Total Repair Time:
30 - 60 mins
Tools:
Nutdriver, Screw drivers, Socket set
Original screws not easily removed
Had to use the reciprocating saw to remove original screws. Then had to use other nuts/bolts to install new igniter.
1 person found this instruction helpful.
Was this instruction helpful to you?
Thank you for voting!
Customer:
Norris from Glenn Dale, MD
Parts Used:
WP7432P136-60, 74007498
Difficulty Level:
Very Easy
Total Repair Time:
30 - 60 mins
Tools:
Screw drivers
The oven and broilet igniter would not ignite
First I disconnect the power to the range and turn off the gas. I then Removed the defective parts with a phillips screw driver and replace with the new parts
1 person found this instruction helpful.
Was this instruction helpful to you?
Thank you for voting!
Customer:
Edward from Montague, MI
Parts Used:
74007498
Difficulty Level:
Really Easy
Total Repair Time:
30 - 60 mins
Tools:
Nutdriver, Screw drivers
Oven would not heat up
Searched YouTube and found a video of the procedure. Followed it and oven now works.
0 of 1 people found this instruction helpful.
Was this instruction helpful to you?
Thank you for voting!
Customer:
Peter from Philadelphia, PA
Parts Used:
74007498
Difficulty Level:
Really Easy
Total Repair Time:
15 - 30 mins
Tools:
Nutdriver
Oven lights up and never when over 160' even after 1/2 hour still just warm !!
Removed the door,then removed the bottom plate .2 little bolt that hold the igniter in place ..
0 of 1 people found this instruction helpful.
Was this instruction helpful to you?
Thank you for voting!
Customer:
James from sewell, NJ
Parts Used:
74007498
Difficulty Level:
A Bit Difficult
Total Repair Time:
30 - 60 mins
Tools:
Pliers, Screw drivers
was not lighting and smelled gas when trying to light
At first I tried replacing the thermostat, because the igniter was glowing. Did not work, so I had to change the igniter. Job was not hard except I could not back the two screws out that held the part in place. I tried everything and ended up cutting the head off the two screws. Once they were off replacing thepart was simple and works p perfectly now. I did have to buy two new screws to hold the part in place.
0 of 1 people found this instruction helpful.
Was this instruction helpful to you?
Thank you for voting!
Customer:
Cynthia from Houston, PA
Parts Used:
74007498
Difficulty Level:
Very Easy
Total Repair Time:
Less than 15 mins
Tools:
Screw drivers
Oven would not come on, light
Watched video and did what it said to solve problem. The video made all very easy. I ordered wrong part and had to order correct part but I was pleased on how easy you made it to do return. I have been telling all about this site for self repairs. So glad we found you. Thank you very much.
0 of 1 people found this instruction helpful.
Was this instruction helpful to you?
Thank you for voting!
Customer:
Joseph from Grand Rapids, MI
Parts Used:
74007498
Difficulty Level:
Very Easy
Total Repair Time:
30 - 60 mins
Tools:
Nutdriver, Screw drivers, Socket set
Uneven oven temperature
I removed the oven door. Then removed the burner cover exposing the shield. There is a wingnut holding that on. After removing that I pulled the igniter wires up through a opening and disconnected them.i then used a ratchet and socket to remove the two screws holding the igniter in place. One came out easily but the second stripped the ho le. I positioned the new igniter and installed the one screw holding it in place. I then tapped the stripped hole and used a new screw to complete the installation. I finished by reinstalling the removed shield,cover and door. Oven now works great!
0 of 1 people found this instruction helpful.
Was this instruction helpful to you?
Thank you for voting!
Customer:
Steven from great bend, KS
Parts Used:
74007498
Difficulty Level:
Really Easy
Total Repair Time:
Less than 15 mins
Tools:
Screw drivers
Oven was heating up very slowly and noticed a slight gas odor
Opened the oven door, and removed the oven racks. Took out two screws that held the bottom plate of the oven, which were located towards the back of the oven. Removed the bottom plate. Unscrewed the two screws that held in the igniter. On the back of the oven there is a small inspection plate located in the center of the back of the ove n, removed one screw to remove inspection plate. Unplugged the igniter, then removed it from the front of the oven. The igniter on my oven had a different connector than the one I ordered, so I cut off the connector from the old one and spliced it to the new one using electrical twist nuts. After putting the oven back together the oven worked great. It took about ten minutes to do the repair
0 of 1 people found this instruction helpful.
Was this instruction helpful to you?
Thank you for voting!
  • 1
  • 2
Customer Reviews
Average Rating: (5 Reviews)
5.0
★★★★★
★★★★★
Filter By Rating:
  • 5
    5
  • 4
    0
  • 3
    0
  • 2
    0
  • 1
    0
  • 1
Sort by:
Sorry, we couldn't find any existing reviews that matched. Try using some different or simpler keywords.

Model Compatibility

This part works with the following models:
Fix Number: FIX2085070
Manufacturer Part Number: 74007498
Brand
Model Number
Description
Magic Chef
31001SAT
Range - Freestanding, Gas
Magic Chef
31203PAQ
Range - Freestanding, Gas
Magic Chef
9112WUT
Range - Built-in, Gas
Admiral
A31713XATL
Range - Freestanding, Gas
Amana
AGR4400ADW
Range - Freestanding, Gas
Amana
AGR4412ADB
Range - Freestanding, Gas
Amana
AGR4412ADQ
Range - Freestanding, Gas
Amana
AGR4412ADS
Range - Freestanding, Gas
Amana
AGR4412ADW
Range - Freestanding, Gas
Amana
AGR5712ADB
Range - Freestanding, Gas
Amana
AGR5712ADQ
Range - Freestanding, Gas
Amana
AGR5712ADS
Range - Freestanding, Gas
Amana
AGR5712ADW
Range - Freestanding, Gas
Amana
AGR5712ADZ
Range - Freestanding, Gas
Amana
AGR5712BDB
Range - Freestanding, Gas
Amana
AGR5712BDQ
Range - Freestanding, Gas
Amana
AGR5712BDW
Range - Freestanding, Gas
Amana
AGR5712BDZ
Range - Freestanding, Gas
Amana
AGR5715QDB
Range - Freestanding, Gas
Amana
AGR5715QDQ
Range - Freestanding, Gas
Amana
AGR5715QDS
Range - Freestanding, Gas
Amana
AGR5715QDW
Range - Freestanding, Gas
Amana
AGR5725QDB
Range - Freestanding, Gas
Amana
AGR5725QDQ
Range - Freestanding, Gas
Amana
AGR5725QDS
Range - Freestanding, Gas
Amana
AGR5725QDW
Range - Freestanding, Gas
Amana
AGR5725RDB
Range - Freestanding, Gas
Amana
AGR5725RDB12
Range
Amana
AGR5725RDB13
Range
Amana
AGR5725RDB14
Range