Some of the parts we sell are eligible for mail-in rebates since we can recycle them. We will display any applicable rebates in your shopping cart. To redeem your rebate, contact Customer Service after you have received your part.
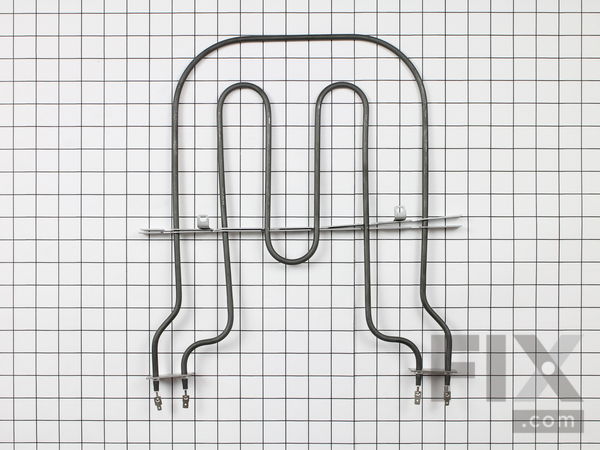
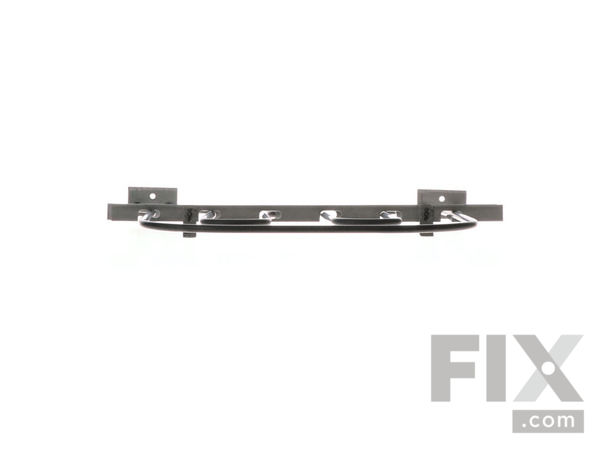
Element, Broil
$191.89
In Stock
- Fix Number:
- FIX11747304
- Manufacturer #:
- WP9760774
- Manufactured by:
- Whirlpool
- Product Description
- This broil element is found on the roof of the oven. The broil element is at the top of the oven and supplies the heat to broiling. 14" x 15" with 1-3/8" inserts. This part works with the following brands: Whirlpool, Roper, Admiral, Maytag, Hardwick, Jenn-Air, Estate, Magic Chef, Crosley, Inglis, Norge, Modern Maid, Amana, Kenmore, KitchenAid, Caloric.
- Works with the following brands:
- KitchenAid, Crosley, General Electric, Maytag
- Works with the following products
- Range, Wall Oven, Microwave Oven Combo
- Fixes the following symptoms
- Element will not heat, Little to no heat when broiling, Little to no heat when baking, Oven not heating evenly
- Part# WP9760774 replaces these:
- AP6014070, 8301514, 9760774
Part Number Cross Reference
Product Description
This broil element is found on the roof of the oven. The broil element is at the top of the oven and supplies the heat to broiling. 14" x 15" with 1-3/8" inserts. This part works with the following brands: Whirlpool, Roper, Admiral, Maytag, Hardwick, Jenn-Air, Estate, Magic Chef, Crosley, Inglis, Norge, Modern Maid, Amana, Kenmore, KitchenAid, Caloric.
-
Works with the following brands:KitchenAid, Crosley, General Electric, Maytag
-
Works with the following products:Range, Wall Oven, Microwave Oven Combo
-
Fixes the following symptoms:Element will not heat, Little to no heat when broiling, Little to no heat when baking, Oven not heating evenly
-
Part# WP9760774 replaces these:AP6014070, 8301514, 9760774
Videos For installing this part.
Replacing your Element, Broil

Questions and Answers
We're sorry, but our Q&A experts are temporarily unavailable.
Please check back later if you still haven't found the answer you need.
- < Prev
- 1
- Next >
Sort by:
Search filter:
Clear Filter
Your search term must have 3 or more characters.
Keep searches simple. Use keywords, e.g. "leaking", "pump", "broken" or "fit".
Sorry, we couldn't find any existing answers that matched.
Try using some different or simpler keywords, or submit your new question by using the "Ask a Question" button above!
Try using some different or simpler keywords, or submit your new question by using the "Ask a Question" button above!
Ellis
June 10, 2022
Top broler element front loop section is saging maybe 1 1/2 in.. element works fine but burn hazard to hand.. was thinking a additional support is needed to hold up element when red hot.. pretty long span.. thanks Ellis
For model number Kems378sbl04

Hello Ellis, Thank you for your inquiry. We have researched the model number you have provided and the support is only available as part of the element itself, part# FIX11747304, and is held to the top of the oven by a screw, part# FIX11742539. We hope this helps and if you need help placing an order, customer service is open 7 days a week. Please feel free to give us a call. We look forward to hearing from you!
Was this helpful?
Thank you for voting!
Related Parts:
Installation Instructions Provided by Fix customers like you.
- < Prev
- 1
- Next >
Sort by:
Search filter:
Clear Filter
Your search term must have 3 or more characters.
Keep searches simple. Use keywords, e.g. "leaking", "pump", "broken" or "fit".
Sorry, we couldn't find any existing installation instruction that matched.
- Customer:
- Randy from Katy, TX
- Parts Used:
- WP9760774
- Difficulty Level:
- A Bit Difficult
- Total Repair Time:
- 30 - 60 mins
- Tools:
- Pliers, Screw drivers
Replacement of top baking and broiler element
Instead of removing the whole oven unit from the cabinet, I was able to replace the element from inside the oven. From video instructions, I removed the old element as directed, but detached the electric connections to the old element from inside the oven and taped the wires to the inside of the oven so the wire connections would not slip
... Read more
back behind the back wall of the oven. I think this saved a lot of time. Connecting the new element to the wire connections was a little tricky, but I was able to do it and fasten in the new element as shown in the video.
Read less
3 of 3 people
found this instruction helpful.
Was this instruction helpful to you?
Thank you for voting!
- Customer:
- Robert from WEST LINN, OR
- Parts Used:
- WP9760774
- Difficulty Level:
- Easy
- Total Repair Time:
- 30 - 60 mins
- Tools:
- Screw drivers
Replace broiler element
Turn off circuit breaker; remove oven door; remove racks; 4 Phillips screws (2 at oven top, 2 oven back wall). Remove top 2 first to free element brackets and top reflector pan then reinsert screws to hold top reflector pan in place; Remove 2 back wall screws and wriggle element to expose wiring (2 pairs wiring tabs red and blue wires per
... Read more
pair); fasten wires w/tape to prevent their retracting into rear oven; remove wiring tabs from old element; taking care to have new element in correct orientation fasten wiring tabs; remove tape and wriggle new element in place; align element and top reflector pan and reinsert tighten back wall screws; Remove top screws, align element and reflector and reinsert screws and tighten; replace racks; mount oven door; power on; check new element.
Read less
1 person
found this instruction helpful.
Was this instruction helpful to you?
Thank you for voting!
- Customer:
- Jeanette from ORLANDO, FL
- Parts Used:
- WP9760774
- Difficulty Level:
- Easy
- Total Repair Time:
- 30 - 60 mins
- Tools:
- Screw drivers
scews were hard to remove to release broiler coil
Easy installation
1 person
found this instruction helpful.
Was this instruction helpful to you?
Thank you for voting!
- < Prev
- 1
- Next >
★
Customer Reviews
Filter By Rating:
- < Prev
- 1
- Next >
Sort by:
Search filter:
Clear Filter
Your search term must have 3 or more characters.
Keep searches simple. Use keywords, e.g. "leaking", "pump", "broken" or "fit".
Sorry, we couldn't find any existing reviews that matched. Try using some different or simpler keywords.
Stephen B - August 1, 2022
Verified Purchase
Perfect Fit
The element was a perfect fit. We are back to baking cookies. Thanks
Jimmy F - March 31, 2022
Verified Purchase
As expected!!
Part was correct, installation very easy. Completely met expectations!!
Jeanette L - February 8, 2021
Verified Purchase
Kitchen Aid
glad to be able to find the part for a 10 year old appliance. Had a repair person do the installation and it went very smoothly.
Model Compatibility
This part works with the following models:
Fix Number: FIX11747304
Manufacturer Part Number: WP9760774
Manufacturer Part Number: WP9760774
Brand
Model Number
Description
✖
Mail-In Recycling Rebate


