Some of the parts we sell are eligible for mail-in rebates since we can recycle them. We will display any applicable rebates in your shopping cart. To redeem your rebate, contact Customer Service after you have received your part.
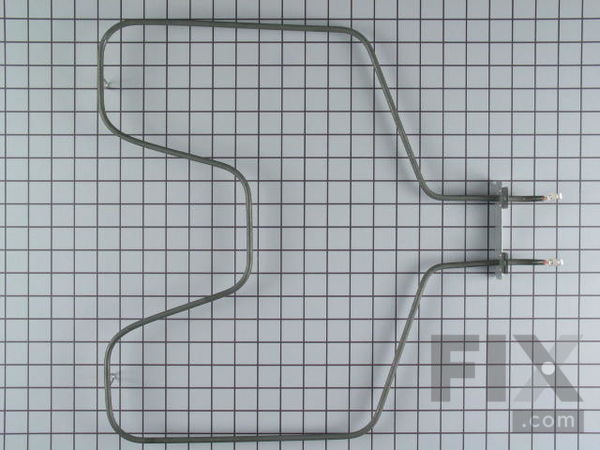
Bake Element - Push On Terminals - 240V
- Fix Number:
- FIX249285
- Manufacturer #:
- WB44T10010
- Manufactured by:
- GE
- Product Description
- If your oven is not coming up to temperature, is not heating at all, or has inconsistent temperatures, it may be time to replace your bake element. The bake element is found at the bottom of your oven and is responsible for providing the heat in order to cook your food. When replacing this OEM part, you will want to disconnect power to your appliance, and pull it out from the wall so that you can access the back panel. Removing the oven racks, and even the oven door will make accessing the screws at the back of the oven easier. You will need to use pliers to disconnect the wires from the bake element terminal at the panel in the back of your range. You can then unscrew the element inside the oven to remove it. Replace it with the new bake element and install the screws back in place. The wires can then be reattached along with the back panel, and your oven should heat up properly again.
- Works with the following brands:
- General Electric, Kenmore
- Works with the following products
- Range
- Fixes the following symptoms
- Little to no heat when baking, Element will not heat, Oven not heating evenly, Will Not Start
- Part# WB44T10010 replaces these:
- AP2030996, 770549, WB44T10010
Product Description
If your oven is not coming up to temperature, is not heating at all, or has inconsistent temperatures, it may be time to replace your bake element. The bake element is found at the bottom of your oven and is responsible for providing the heat in order to cook your food. When replacing this OEM part, you will want to disconnect power to your appliance, and pull it out from the wall so that you can access the back panel. Removing the oven racks, and even the oven door will make accessing the screws at the back of the oven easier. You will need to use pliers to disconnect the wires from the bake element terminal at the panel in the back of your range. You can then unscrew the element inside the oven to remove it. Replace it with the new bake element and install the screws back in place. The wires can then be reattached along with the back panel, and your oven should heat up properly again.
-
Works with the following brands:General Electric, Kenmore
-
Works with the following products:Range
-
Fixes the following symptoms:Little to no heat when baking, Element will not heat, Oven not heating evenly, Will Not Start
-
Part# WB44T10010 replaces these:AP2030996, 770549, WB44T10010
Questions and Answers
We're sorry, but our Q&A experts are temporarily unavailable.
Please check back later if you still haven't found the answer you need.
Installation Instructions Provided by Fix customers like you.
- < Prev
- 1
- 2
- Next >
- Customer:
- Jeffrey from SEATTLE, WA
- Parts Used:
- WB44T10010, WB31T10011, WB31T10010, WB30T10076, 40A15
- Difficulty Level:
- Really Easy
- Total Repair Time:
- 15 - 30 mins
- Tools:
- Nutdriver
2. Remove bake element cover. There's 2 quarter inch nuts.
3. Disconnect old element. For me there was not much play in the wires so when I disconnected the old element I lost the wire in the insulation. If this happened you can remove the central plate cover on the back of the oven and you ... Read more can easily find the wires again.
4. Connect the replacement element.
5. Screw the bake element cover back in.
6. Turn power back on.
- Customer:
- Keith from Reading, PA
- Parts Used:
- WB44T10010
- Difficulty Level:
- Very Easy
- Total Repair Time:
- Less than 15 mins
- Tools:
- Nutdriver
- Customer:
- Nancy from Martins Ferry, OH
- Parts Used:
- WB44T10010
- Difficulty Level:
- Really Easy
- Total Repair Time:
- Less than 15 mins
- Tools:
- Screw drivers
- Customer:
- Juan from Easton, PA
- Parts Used:
- WB44T10010
- Difficulty Level:
- Difficult
- Total Repair Time:
- 15 - 30 mins
- Customer:
- Isaac from Olympia, WA
- Parts Used:
- WB44T10010
- Difficulty Level:
- Very Easy
- Total Repair Time:
- Less than 15 mins
- Tools:
- Nutdriver
- Customer:
- peggy from kirksville, MO
- Parts Used:
- WB44T10010
- Difficulty Level:
- Easy
- Total Repair Time:
- 15 - 30 mins
- Tools:
- Nutdriver
- Customer:
- JAMES from HOMER, LA
- Parts Used:
- WB44T10010
- Difficulty Level:
- Very Easy
- Total Repair Time:
- Less than 15 mins
- Tools:
- Nutdriver
- Customer:
- Toni from Osyka, MS
- Parts Used:
- WB44T10010
- Difficulty Level:
- Really Easy
- Total Repair Time:
- 30 - 60 mins
- Tools:
- Nutdriver
- Customer:
- John from Fort Worth, TX
- Parts Used:
- WB44T10010
- Difficulty Level:
- Very Easy
- Total Repair Time:
- Less than 15 mins
- Tools:
- Nutdriver
- Customer:
- Robert from Denver, CO
- Parts Used:
- WB44T10010
- Difficulty Level:
- Really Easy
- Total Repair Time:
- 30 - 60 mins
- Tools:
- Socket set
- < Prev
- 1
- 2
- Next >
- < Prev
- 1
- Next >
Model Compatibility
Manufacturer Part Number: WB44T10010


