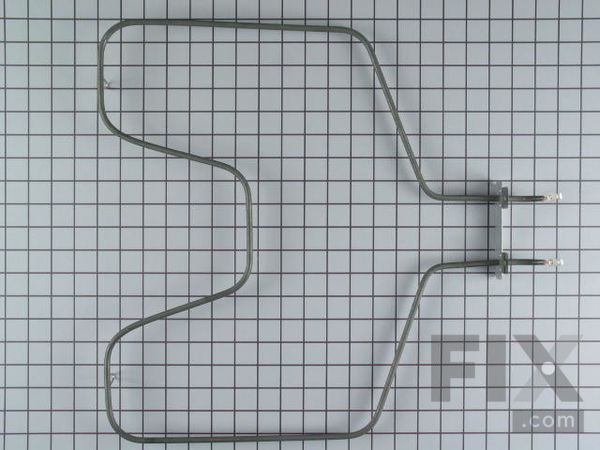
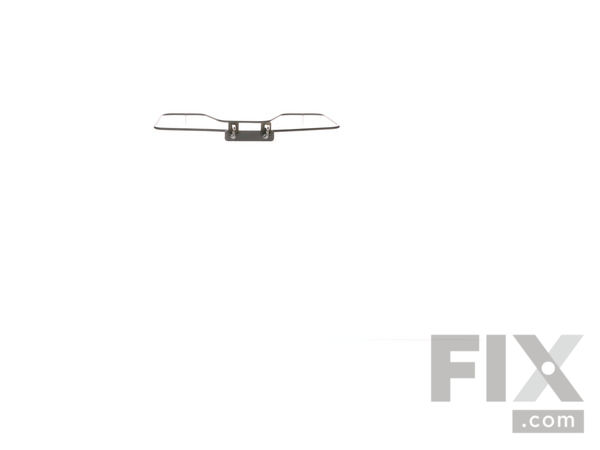
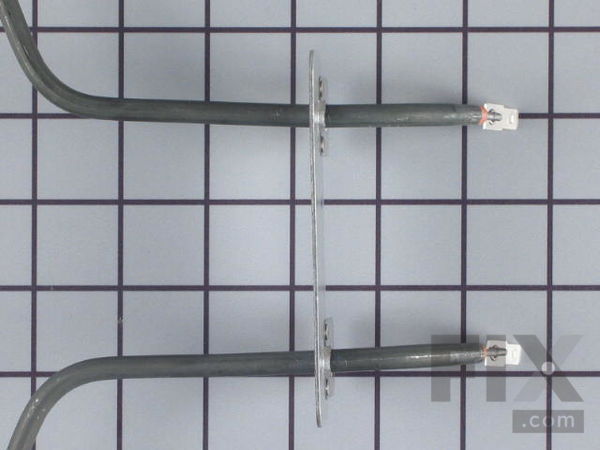
Part Location Diagram of WB44T10010 GE Bake Element - Push On Terminals - 240V
See part 251 in the diagram
( Grid squares measure 1x1 inch )

Bake Element - Push On Terminals - 240V WB44T10010

★★★★★
★★★★★
1 Review

Rated by 20 customers 

?

Really Easy 

15 - 30 mins 

Ratings submitted by customers like you who bought this part.

?
$86.98
In Stock
Fix Number:
FIX249285
Manufacturer #:
WB44T10010
Manufactured by:
GE

Product Description

If your oven is not coming up to temperature, is not heating at all, or has inconsistent temperatures, it may be time to replace your bake element. The bake element is found at the bottom of your oven and is responsible for providing the heat in order to cook your food. When replacing this OEM part, you will want to disconnect power to your appliance, and pull it out from the wall so that you can access the back panel. Removing the oven racks, and even the oven door will make accessing the screws at the back of the oven easier. You will need to use pliers to disconnect the wires from the bake element terminal at the panel in the back of your range. You can then unscrew the element inside the oven to remove it. Replace it with the new bake element and install the screws back in place. The wires can then be reattached along with the back panel, and your oven should heat up properly again.

Questions and Answers

Be the first to ask our experts a question about this part!

Installation Instructions Provided by Fix customers like you.

Average Repair Rating: 4.3 / 5.0, 20 reviews.
  • 1
  • 2
Sort by:
Sorry, we couldn't find any existing installation instruction that matched.
Customer:
Jeffrey from SEATTLE, WA
Parts Used:
WB44T10010, WB31T10011, WB31T10010, WB30T10076, 40A15
Difficulty Level:
Really Easy
Total Repair Time:
15 - 30 mins
Tools:
Nutdriver
Bake element replacement
1. Turn of over power at the breaker.
2. Remove bake element cover. There's 2 quarter inch nuts.
3. Disconnect old element. For me there was not much play in the wires so when I disconnected the old element I lost the wire in the insulation. If this happened you can remove the central plate cover on the back of the oven and you can easily find the wires again.
4. Connect the replacement element.
5. Screw the bake element cover back in.
6. Turn power back on.
10 of 13 people found this instruction helpful.
Was this instruction helpful to you?
Thank you for voting!
Customer:
Keith from Reading, PA
Parts Used:
WB44T10010
Difficulty Level:
Very Easy
Total Repair Time:
Less than 15 mins
Tools:
Nutdriver
Replace Baking Element
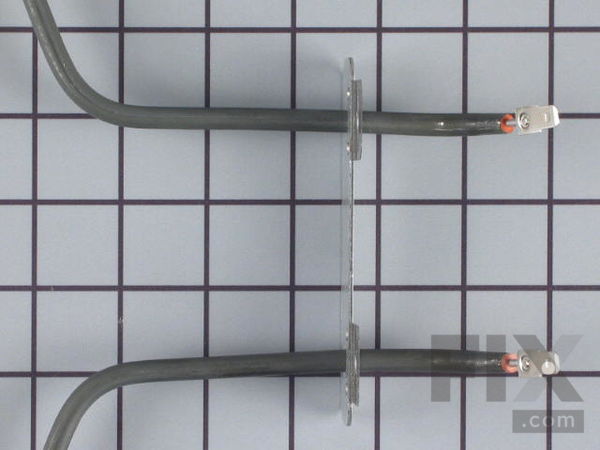
Turn off electric for range at fuse box. Open oven door and remove 2 screws holding baking element. Remove 5 screws from the center rear cover and then remove the 2 push on terminals. Remove old baking unit from oven and replace it with new one.
2 of 2 people found this instruction helpful.
Was this instruction helpful to you?
Thank you for voting!
Customer:
Nancy from Martins Ferry, OH
Parts Used:
WB44T10010
Difficulty Level:
Really Easy
Total Repair Time:
Less than 15 mins
Tools:
Screw drivers
Oven wouldn't work
New oven element
0 of 1 people found this instruction helpful.
Was this instruction helpful to you?
Thank you for voting!
Customer:
James from Shawnee, KS
Parts Used:
WB44T10010
Difficulty Level:
A Bit Difficult
Total Repair Time:
15 - 30 mins
Tools:
Pliers, Screw drivers, Socket set
Wires.connectors typically don't protrude far enough out to make a clean connection.
Alligator clamps held the connectors/wires in place but even they eventually slipped. Remove four screws on back panel to remove protective cover and reveal wiring harness. Have a co-worker gently push the connector/wires into the oven opening while a sceond worker makes the connection. Much easier.
0 of 1 people found this instruction helpful.
Was this instruction helpful to you?
Thank you for voting!
Customer:
Robert from Burnsville, NC
Parts Used:
WB44T10010
Difficulty Level:
Easy
Total Repair Time:
15 - 30 mins
Tools:
Nutdriver
Be very careful pulling out the old element.
If you pull too hard on the removal of the old element, the connections will pull off. I had too pull out the range and remove the back of the unit. I was able then to connect the wires back on to the new bake element. This added about 15 minutes to the installation. I like the old way (30-40 years ago) when you were able to push the new element right into the porcelain receptacle. That was very, very easy. Perhaps we can tell the GE Range manufacturer to go back to the old way. Other wise it was an easy installation.
0 of 1 people found this instruction helpful.
Was this instruction helpful to you?
Thank you for voting!
Customer:
Kathy from Auburn Hills, MI
Parts Used:
WB44T10010
Difficulty Level:
Very Easy
Total Repair Time:
Less than 15 mins
Tools:
Pliers, Screw drivers
The bake element sparked, caught fire (a little), and broke apart.
The repair was very easy, especially after reading other reviews here. Moved the stove away from the wall, unplugged it, took the back off, disconnected the wires, unscrewed the broken element from inside the oven, put the new one in, connected the wires, put the back on, plugged the stove back in and cooked delicious bacon. Thank you. The part was delivered extremely fast too!
0 of 1 people found this instruction helpful.
Was this instruction helpful to you?
Thank you for voting!
Customer:
Dana from ASHLAND, PA
Parts Used:
WB44T10010
Difficulty Level:
Easy
Total Repair Time:
15 - 30 mins
The old element burned out
Took out old element and put in new element
0 of 1 people found this instruction helpful.
Was this instruction helpful to you?
Thank you for voting!
Customer:
Paul from Ludlow, MA
Parts Used:
WB44T10010
Difficulty Level:
Easy
Total Repair Time:
Less than 15 mins
Tools:
Nutdriver
Burnt out baking element
I removed the shield on the back of the unit, removed the push on terminals and from inside the oven removed two screws that hold the element to the back of the oven. To install the new element you just reverse these steps and then plug the oven back in and you are ready to cook. If I can do it anyone can.
0 of 1 people found this instruction helpful.
Was this instruction helpful to you?
Thank you for voting!
Customer:
Debby from Friendswood, TX
Parts Used:
WB44T10010
Difficulty Level:
Easy
Total Repair Time:
15 - 30 mins
Tools:
Pliers
Element was broken
Disconnected the power to oven. Removed old element and disconnected 2 wires from inside the oven. Plugged in new element but wires were too short to connect to new element inside the oven. Pulled the oven out from wall and removed back panel and the wires were easily available to connect to the new element wires.
0 of 1 people found this instruction helpful.
Was this instruction helpful to you?
Thank you for voting!
Customer:
Denise from Kirkland, WA
Parts Used:
WB44T10010
Difficulty Level:
A Bit Difficult
Total Repair Time:
15 - 30 mins
Tools:
Pliers, Screw drivers
Reaching the attachment terminals is harder than expected
I followed someone's previous directions, to do the repair from the front of the oven, but kept losing the terminals up into the insulation. Out of complete frustration I removed the back of the unit, and discovered that it was very easy to reach the terminals from the rear, and wished I had done that from the start. Removing the back w as quite easy (four screws), and the wires are very easy to see and reach from there. I would recommend starting by removing the back and then removing the old element, attach the new one by the screws inside the oven and then attach to the wires at the rear. You'll save yourself a lot of frustration and sweat.
0 of 1 people found this instruction helpful.
Was this instruction helpful to you?
Thank you for voting!
  • 1
  • 2
Customer Reviews
Average Rating: (1 Review)
5.0
★★★★★
★★★★★
Filter By Rating:
  • 1
Sort by:
Sorry, we couldn't find any existing reviews that matched. Try using some different or simpler keywords.

Model Compatibility

This part works with the following models:
Fix Number: FIX249285
Manufacturer Part Number: WB44T10010
Brand Model Number Description
Kenmore 91192090300 Range
Kenmore 91192090301 Range
Kenmore 91192091300 Range
Kenmore 91192091301 Range
Kenmore 91192401990 Range
Kenmore 91192401991 Range
Kenmore 91192401992 Range
Kenmore 91192408990 Range
Kenmore 91192408991 Range
Kenmore 91192408992 Range
Kenmore 91192481990 Range
Kenmore 91192481991 Range
Kenmore 91192481992 Range
Kenmore 91192488990 Range
Kenmore 91192488991 Range
Kenmore 91192488992 Range
Kenmore 91192502990 Range
Kenmore 91192502991 Range
Kenmore 91192502992 Range
Kenmore 9119250799 Range - Kenmore Range/Stove/Oven Model 911.9250799 (9119250799, 911 9250799) Parts
Kenmore 91192507990 Range
Kenmore 91192507991 Range
Kenmore 91192507992 Range
Kenmore 91192712020 Range
Kenmore 91192714020 Range
Kenmore 91192812300 Range
Kenmore 91192812301 Range
Kenmore 91192814300 Range
Kenmore 91192814301 Range
Kenmore 91193090300 Range