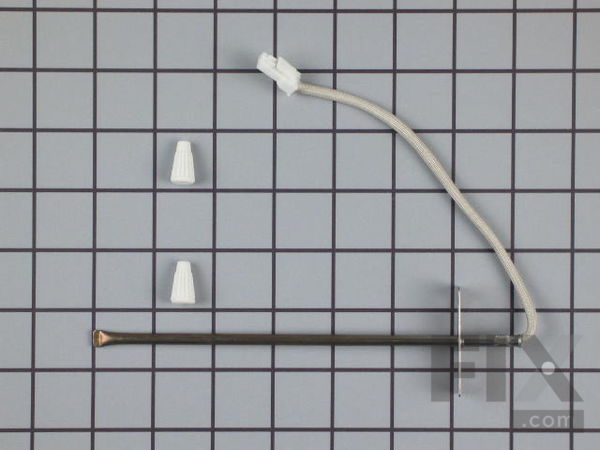
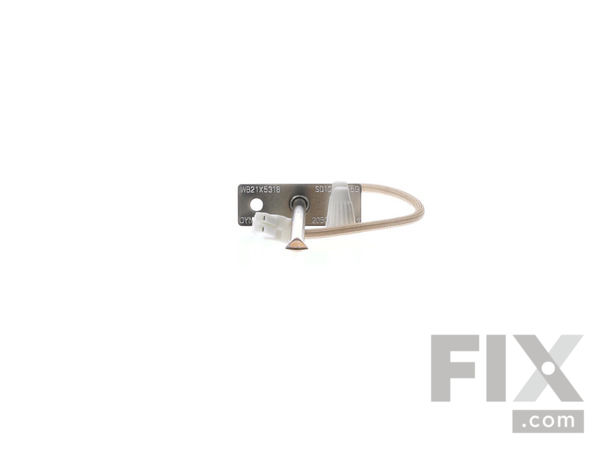
Part Location Diagram of WB21X5301 GE Oven Sensor
See part 95 in the diagram
Replacing your General Electric Range Oven Sensor
( Grid squares measure 1x1 inch )

Oven Sensor

Rated by 6 customers 

?

Really Easy 

30 - 60 mins 

Ratings submitted by customers like you who bought this part.

?
$151.71
In Stock
Fix Number:
FIX236043
Manufacturer #:
WB21X5301
Manufactured by:
GE

Product Description

This sensor detects the temperature within the oven cavity.

Videos For installing this part.

Replacing your Oven Sensor

Replacing your Oven Sensor

Questions and Answers

We're sorry, but our Q&A experts are temporarily unavailable.
Please check back later if you still haven't found the answer you need.

Installation Instructions Provided by Fix customers like you.

Average Repair Rating: 3.9 / 5.0, 6 reviews.
  • 1
Sort by:
Sorry, we couldn't find any existing installation instruction that matched.
Customer:
Timothy from Gurnee, IL
Parts Used:
WB21X5301
Difficulty Level:
Easy
Total Repair Time:
30 - 60 mins
Tools:
Nutdriver, Pliers, Screw drivers
F2 Error - Temp Probe Failed
Watched a U-Tube video and it went just like the video. Clear stove of racks etc. Move stove away from wall, unplug electric, remove access cover on back of stove. Remove old probe. Snap together fitting did not match. Slip new probe wires through insulated access hole. Clip and strip all wires. Wire nut probe wires to range wires with insulated nuts provided. Replace access cover. Slide stove back. The fix went fast. Moving the stove and getting in and out from behind it and cleaning under it (the floor and back/side walls since no one ever moves it to clean there) took far longer than replacing the probe.
2 of 2 people found this instruction helpful.
Was this instruction helpful to you?
Thank you for voting!
Customer:
Joel from Mukwonago, WI
Parts Used:
WB2X9154, WB21X5301
Difficulty Level:
Really Easy
Total Repair Time:
30 - 60 mins
Tools:
Nutdriver, Screw drivers, Socket set
Oven would not lite or turn on. Temp control was off buy more than 50 degrees
I followed the instructions given and removed the igniter and replaced it with the new one. It was not hard at all.the temp control was even simpler. I have ms.and if I could do it. Anyone can.the oven now works like new. The cost to repair was low compared to a new stove.i ordered the parts and received them the next day, outstanding.
1 person found this instruction helpful.
Was this instruction helpful to you?
Thank you for voting!
Customer:
edward from Southington, CT
Parts Used:
WB21X5301
Difficulty Level:
Really Easy
Total Repair Time:
30 - 60 mins
Tools:
Nutdriver, Pliers
code f2. oven shut off
Filled directions given with part. Worked perfect!!!
1 person found this instruction helpful.
Was this instruction helpful to you?
Thank you for voting!
Customer:
Stephen from Rancho Cucamonga, CA
Parts Used:
WB21X5301
Difficulty Level:
Really Easy
Total Repair Time:
30 - 60 mins
Tools:
Pliers, Screw drivers
F2 code on display
Built in self cleaning oven. Removed racks,drawers and door. Set oven on 2 chairs with 2x4s for height. Removed the back panel and saw the wire nuts. Removed the connector plug and cut the wire on the old sensor. Duct taped the new sensor wires together and pushed through. Connected new sensor and closed the box. Oven is back on without the f2.
0 of 1 people found this instruction helpful.
Was this instruction helpful to you?
Thank you for voting!
Customer:
Jeff from Hendersonville, TN
Parts Used:
WB21X5301
Difficulty Level:
Really Easy
Total Repair Time:
15 - 30 mins
Tools:
Pliers, Screw drivers, Socket set
Oven sensor failure, temps would swing from high to low
FIRST I disconnected the power, then I pulled the oven from the wall. I took the back off of the oven, removed the two screws from the inside holding the sensor in place, cut the wires on the back, pulled them thru when I removed the sensor, then fed the new wires through the back in the oven and reconnected as shown on the repair instruc tions with the ceramic nuts making sure they didnt touch the back of the cabinet. Then I pushed the insulation back around the wires, put the back on it, reinstalled in the wall, and turned the power back on--works like it did when it was new
0 of 1 people found this instruction helpful.
Was this instruction helpful to you?
Thank you for voting!
Customer:
Mark from Casa Grande, AZ
Parts Used:
WB21X5301
Difficulty Level:
Really Easy
Total Repair Time:
15 - 30 mins
Tools:
Nutdriver, Screw drivers
Oven temperature was a minimum of 50 degrees off - cooler
The heat sensor was a direct replacement of the old sensor. I taped a piece of string on the old plug before removing the old sensor, I was able to easily pull the new wire/plug through the insulation and to the back of the stove.
0 of 1 people found this instruction helpful.
Was this instruction helpful to you?
Thank you for voting!
  • 1

Model Compatibility

This part works with the following models:
Fix Number: FIX236043
Manufacturer Part Number: WB21X5301
Brand
Model Number
Description
Kenmore
1034688610
Range
General Electric
10451-1
Range
General Electric
10451-2
Range
General Electric
10451-3
Range
General Electric
10461-1
Range
General Electric
10461-2
Range
General Electric
10461-3
Range
General Electric
10470-1
Range
General Electric
10470-2
Range
General Electric
10470-3
Range
General Electric
10471-1
Range
General Electric
10471-2
Range
General Electric
10471-3
Range
General Electric
10477-1
Range
General Electric
10477-2
Range
General Electric
10478-1
Range
General Electric
10478-2
Range
General Electric
10481-1
Range
General Electric
10481-2
Range
General Electric
10481-3
Range
General Electric
10551-1
Range
General Electric
10551-2
Range
General Electric
10551-3
Range
General Electric
10561-1
Range
General Electric
10561-2
Range
General Electric
10561-3
Range
General Electric
10570-1
Range
General Electric
10570-2
Range
General Electric
10570-3
Range
General Electric
10571-1
Range