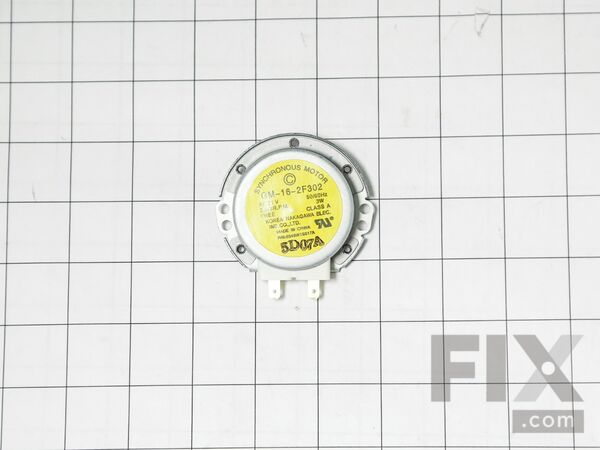
Part Location Diagram of 6549W1S011B LG Motor, AC Synchronous
See part 36549S in the diagram
( Grid squares measure 1x1 inch )

Motor, AC Synchronous

Rated by 2 customers 

?

Really Easy 

Less than 15 mins 

Ratings submitted by customers like you who bought this part.

?
$29.38
In Stock
Fix Number:
FIX3529208
Manufacturer #:
6549W1S011B
Manufactured by:
LG

Product Description

Questions and Answers

We're sorry, but our Q&A experts are temporarily unavailable.
Please check back later if you still haven't found the answer you need.

Installation Instructions Provided by Fix customers like you.

Average Repair Rating: 4.7 / 5.0, 2 reviews.
  • 1
Sort by:
Sorry, we couldn't find any existing installation instruction that matched.
Customer:
Elizabeth T from AIKEN, SC
Parts Used:
6549W1S011B
Difficulty Level:
Really Easy
Total Repair Time:
15 - 30 mins
Tools:
Pliers, Screw drivers
The turntable wouldn't turn, and replacing the plastic arm didn't solve it. The problem turned out to be the post coming up from the motor to which the plastic arm connected. It was badly corroded.
Step 1. I took out the glass turntable and the plastic arm under it and taped the door shut. Step 2. Unplugged the unit and had husband place it door side down on a soft surface. Step 3. I had watched several videos which made me decide to take the case off to access the motor on the bottom. This was because I did not have the proper tool to snip open the little metal door on the bottom of the unit. The motor is housed behind this little door. However, it turned out I did not have the correct screwdriver to loosen all the screws on the case. So I found a small needle-nose pliers that worked to open the little door. (Steps 3 and 5 are the only hard parts.) Step 4. Unplugged the connections to the motor, removed the two screws, installed the new motor. Step 5. Bent the tabs of the little door into the slots so the door would remain shut. Step 6. Put everything back together. Surprised husband by having it back up on the counter and working perfectly.
1 person found this instruction helpful.
Was this instruction helpful to you?
Thank you for voting!
Customer:
Shelli from Adams Center, NY
Parts Used:
6549W1S011B
Difficulty Level:
Really Easy
Total Repair Time:
Less than 15 mins
Tools:
Screw drivers
The tray stop turning while microwave was still on
Just pop off the small pre-stamped plate on the bottom of the microwave and unplug the synchronous motor. There also should be a small screw that holds it in to place. Simply replace with new motor by plugging in first then setting it into the opening. There are two small groves on each side it fits into following a one small screw that h olds it into place. Then last thing is the lower base plate with one small screw.
0 of 1 people found this instruction helpful.
Was this instruction helpful to you?
Thank you for voting!
  • 1

Model Compatibility

This part works with the following models:
Fix Number: FIX3529208
Manufacturer Part Number: 6549W1S011B
Brand
Model Number
Description
LG
295
Range - Oven-Range
Kenmore
29589998
Microwave - Kenmore Microwave Model 295.89998 (29589998, 295 89998) Parts
Kenmore
29589999
Microwave - Kenmore Microwave Model 295.89999 (29589999, 295 89999) Parts
LG
60102
Range - Oven-Range
LG
60109
Range - Oven-Range
LG
61282
Range - Oven-Range
LG
61283
Range - Oven-Range
LG
61289
Range - Oven-Range
LG
62002
Range - Oven-Range
LG
62002201
Range - Oven-Range
LG
62102
Range - Oven-Range
LG
62102201
Range - Oven-Range
LG
62109
Range - Oven-Range
LG
62109201
Range - Oven-Range
LG
62223
Range - Oven-Range
LG
62223201
Microwave - Microwave
LG
62252
Wall Oven
LG
62253
Range - Oven-Range
LG
62259
Wall Oven
LG
62342
Range - Oven-Range
LG
62344
Wall Oven
LG
62349
Range - Oven-Range
LG
62362
Range - Oven-Range
LG
62364
Range - Oven-Range
LG
62365
Range - Oven-Range
LG
62369
Range - Oven-Range
LG
62462
Wall Oven
LG
62463
Wall Oven
LG
62464
Wall Oven
LG
62469
Wall Oven