Some of the parts we sell are eligible for mail-in rebates since we can recycle them. We will display any applicable rebates in your shopping cart. To redeem your rebate, contact Customer Service after you have received your part.
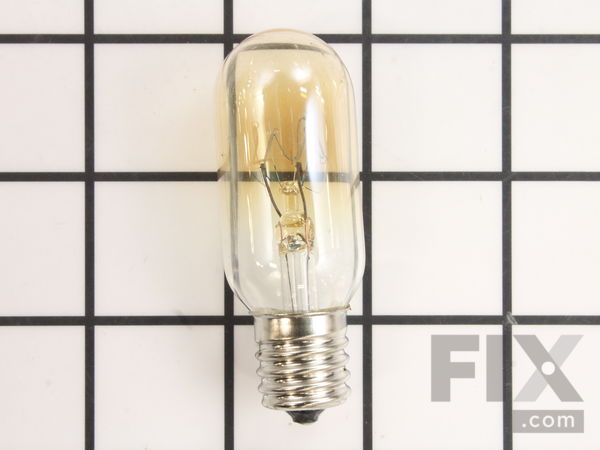
Light Bulb - 40W 130V
- Fix Number:
- FIX247209
- Manufacturer #:
- WB36X10003
- Manufactured by:
- GE
- Product Description
- This 40-Watt 130-Volt lightbulb is a genuine OEM replacement for your microwave. The bulb is used either inside the microwave and turns on when the door is open, or the appliance is running. Or it can be found in the bottom of the microwave and is used to illuminate the cooktop of your range. If one of the bulbs has burnt out or broken, it will need to be replaced. Please be sure to disconnect the power supply to your microwave before replacing the lightbulb, and if the glass has shattered safety gloves should be worn.
- Works with the following brands:
- General Electric, Hotpoint, Kenmore
- Works with the following products
- Microwave, Freezer, Range
- Part# WB36X10003 replaces these:
- AP2029997, 259682, WB36X10003, 40S11N, 65985, WB02X4235, WB02X4253, WB06X0015, WB06X015, WB2X4235, WB2X4253, WB36X0003, WB36X0821, WB36X0822, WB36X0898, WB36X0936, WB36X10306, WB36X3, WB36X821, WB36X822 ... Show more , WB36X898, WB36X936, WB6X15, WB6X15R Show less
Product Description
This 40-Watt 130-Volt lightbulb is a genuine OEM replacement for your microwave. The bulb is used either inside the microwave and turns on when the door is open, or the appliance is running. Or it can be found in the bottom of the microwave and is used to illuminate the cooktop of your range. If one of the bulbs has burnt out or broken, it will need to be replaced. Please be sure to disconnect the power supply to your microwave before replacing the lightbulb, and if the glass has shattered safety gloves should be worn.
-
Works with the following brands:General Electric, Hotpoint, Kenmore
-
Works with the following products:Microwave, Freezer, Range
-
Part# WB36X10003 replaces these:AP2029997, 259682, WB36X10003, 40S11N, 65985, WB02X4235 ... Show more , WB02X4253, WB06X0015, WB06X015, WB2X4235, WB2X4253, WB36X0003, WB36X0821, WB36X0822, WB36X0898, WB36X0936, WB36X10306, WB36X3, WB36X821, WB36X822, WB36X898, WB36X936, WB6X15, WB6X15R Show less
Questions and Answers
We're sorry, but our Q&A experts are temporarily unavailable.
Please check back later if you still haven't found the answer you need.
- < Prev
- 1
- Next >
Try using some different or simpler keywords, or submit your new question by using the "Ask a Question" button above!

Related Parts Additional or alternate parts to consider.
Installation Instructions Provided by Fix customers like you.
- < Prev
- 1
- Next >
- Customer:
- Mary Ann from Wyomissing, PA
- Parts Used:
- WB36X10003, WB08X10016
- Difficulty Level:
- Really Easy
- Total Repair Time:
- 15 - 30 mins
- Tools:
- Screw drivers
- Customer:
- Ronald from Susquehanna, PA
- Parts Used:
- WB36X10003
- Difficulty Level:
- Really Easy
- Total Repair Time:
- Less than 15 mins
- Customer:
- Janet from Charlotte, NC
- Parts Used:
- WB36X10003, WB08X10016
- Difficulty Level:
- Very Easy
- Total Repair Time:
- Less than 15 mins
- Tools:
- Screw drivers
- Customer:
- Cliff from Saugerties, NY
- Parts Used:
- WB36X10003, WB08X10016
- Difficulty Level:
- Very Easy
- Total Repair Time:
- Less than 15 mins
- Tools:
- Screw drivers
- Customer:
- Richard from roy, UT
- Parts Used:
- WB36X10071, WB36X10003
- Difficulty Level:
- Really Easy
- Total Repair Time:
- Less than 15 mins
- Tools:
- Screw drivers
- Customer:
- Gloria from Williamsport, PA
- Parts Used:
- WB36X10003
- Difficulty Level:
- Easy
- Total Repair Time:
- 15 - 30 mins
- Tools:
- Screw drivers
- Customer:
- John from Eagan, MN
- Parts Used:
- WB36X10003, WB08X10016
- Difficulty Level:
- Really Easy
- Total Repair Time:
- Less than 15 mins
- Tools:
- Screw drivers
- Customer:
- Dale from Henderson, NV
- Parts Used:
- WB36X10003
- Difficulty Level:
- Really Easy
- Total Repair Time:
- Less than 15 mins
- Tools:
- Screw drivers
- Customer:
- Chantal from Castro Valley, CA
- Parts Used:
- WB36X10003
- Difficulty Level:
- A Bit Difficult
- Total Repair Time:
- 15 - 30 mins
- Tools:
- Pliers, Screw drivers
- < Prev
- 1
- Next >
Model Compatibility
Manufacturer Part Number: WB36X10003


