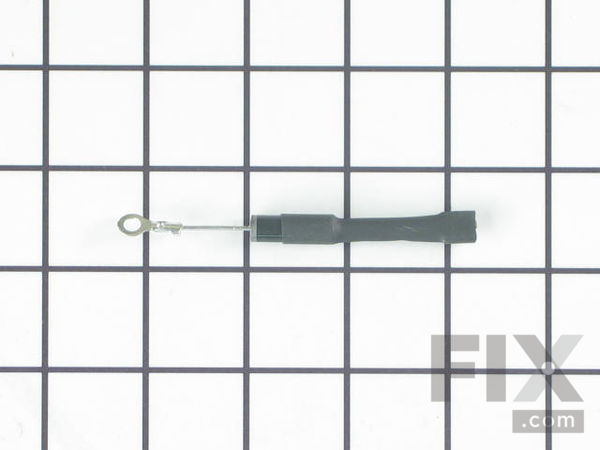
Part Location Diagram of WB27X1160 GE High Voltage Diode
See part 108 in the diagram
( Grid squares measure 1x1 inch )

High Voltage Diode WB27X1160

Rated by 3 customers 

?

Easy 

1- 2 hours 

Ratings submitted by customers like you who bought this part.

?
$123.62
In Stock
Fix Number:
FIX239843
Manufacturer #:
WB27X1160
Manufactured by:
GE

Product Description

This diode has a 1/4" female connection and an eyelet.

Questions and Answers

Be the first to ask our experts a question about this part!

Affresh Washing Machine Cleaner - 3 pack
$12.58
In Stock
Produce Preserver Filter
$21.50
In Stock
Affresh Dishwasher Cleaner Tablets - 6
$19.09
In Stock
Cooktop Cleaning Cream
$15.57
In Stock
Cooktop Cleaner
$17.74
In Stock
Affresh Cleaner
$19.09
In Stock

Installation Instructions Provided by Fix customers like you.

Average Repair Rating: 2.8 / 5.0, 3 reviews.
  • 1
Sort by:
Sorry, we couldn't find any existing installation instruction that matched.
Customer:
carl from snellville, GA
Parts Used:
WB27X1160, WB27X10516
Difficulty Level:
Easy
Total Repair Time:
30 - 60 mins
Tools:
Nutdriver, Pliers, Screw drivers
Microwave stopped heating
We pulled the unit out of the wall, removed the metal shroud by removing the screws, discharged the capacitor with a set of insulated long nose pliers. I replaced the magnetron and diode. The magnetron is just 4 screws and a couple plugs. On the magnetron you also need to remove the temp sensor that is screwed to it and put it on the n ew magnetron. The diode is connected to the capacitor and connected to the frame with a screw. Just unscrew and replace. This did not fix our problem though. It still did not heat so I decided to replace the fuse and door switches. When I pulled the door switches, one of the switches, which as a little button on the top that gets pushed in by the door, was stuck down. I replaced it and that fixed it. So $400 for $20 fix...lesson learned. Check the fuse and door switches first if your microwave stops heating.
4 of 4 people found this instruction helpful.
Was this instruction helpful to you?
Thank you for voting!
Customer:
Mark from San Antonio, TX
Parts Used:
WB27X1160, WB27X10017
Difficulty Level:
A Bit Difficult
Total Repair Time:
More than 2 hours
Tools:
Screw drivers, Socket set
18-year-old Magnetron was inoperative; black charring around connector
Removed outside cover (more than a dozen screws) including top-rear plate and 120V cable strain relief. Swung control panel aside (one screw at top, then lift, pull, and tilt down). Removed inner magnetron volume cover, about a dozen more screws in truly random-seeming locations, and swung aside leaving cables connected. Loosen top-side plastic duct work (about 3 screws) to access magnetron nuts and bottom-side plastic duct work (about 2 more screws and a clip to provide clearance for magnetron removal). Disconnect thermostat (2 screws) and power cable to magnetron. Used small socket wrench for 4 nuts to release magnetron and bracket. Changed bracket to new magnetron (2 screws). Replaced magnetron and diode, reassembled everything. Unit seems perfectly functional now. If I were doing it again I'd take pictures so I'd know where all the screws came from.
3 of 3 people found this instruction helpful.
Was this instruction helpful to you?
Thank you for voting!
Customer:
Richard from Dallas, TX
Parts Used:
WB27X1160, WB27X10928, WB27X10240, WB27X10194
Difficulty Level:
Really Easy
Total Repair Time:
30 - 60 mins
Tools:
Pliers, Screw drivers
The microwave would turn on, but provide no heat.
I had to pull the unit from the wall by removing all of the mounting screws. Also removed the front panel of the unit to expose all of the parts. That was the longest part of the repair. The rest; replacing part by part was easy. The only thing that held up the progress was the polarity of the thermostat. I either guessed right, or it didn't matter. Once all of the parts were replaced, I powered up the unit, put a glass of water in the microwave to make sure it worked. Then I reinstalled the unit in its original spot and replaced all of the mounting screws, front key panel. It was a good hour in total, most of that removing and reinstalling the unit above the stove.
3 of 4 people found this instruction helpful.
Was this instruction helpful to you?
Thank you for voting!
  • 1

Model Compatibility

This part works with the following models:
Fix Number: FIX239843
Manufacturer Part Number: WB27X1160
Brand
Model Number
Description
Kenmore
21331
Range - Kenmore Range/Stove/Oven Model 21331(1988) Parts
Kenmore
21332
Range - Kenmore Range/Stove/Oven Model 213.32 (21332, 213 32) Parts
Kenmore
21333
Range - Kenmore Range/Stove/Oven Model 21333 (1988) (21333(1988)) Parts
Kenmore
36362702200
Microwave
Kenmore
36362709200
Microwave
Kenmore
36362709300
Microwave
Kenmore
3639878810
Microwave Oven Combo
Kenmore
3639888810
Microwave Oven Combo
General Electric
56-289610-02
Microwave - Ge Microwave 56-289610-02
General Electric
56-2899-10
Microwave - GE Microwave Model 56-2899-10 (56289910, 56 2899 10) Parts
Kenmore
91141485890
Microwave Oven Combo
Kenmore
91141485991
Microwave Oven Combo
Kenmore
91141485992
Microwave Oven Combo
Kenmore
91141485993
Microwave Oven Combo
Kenmore
91141485994
Microwave Oven Combo
Kenmore
91141485995
Microwave Oven Combo
Kenmore
91141485996
Microwave Oven Combo
Kenmore
91141489890
Microwave Oven Combo
Kenmore
91141489991
Microwave Oven Combo
Kenmore
91141489992
Microwave Oven Combo
Kenmore
91141489993
Microwave Oven Combo
Kenmore
91141489994
Microwave Oven Combo
Kenmore
91141489995
Microwave Oven Combo
Kenmore
91141489996
Microwave Oven Combo
Kenmore
91147692100
Microwave Oven Combo
Kenmore
91147699100
Microwave - 27" ELECTRIC BUILT-IN OVEN
Kenmore
91147862100
Microwave Oven Combo
Kenmore
91147869100
Microwave Oven Combo
Kenmore
91149485992
Microwave Oven Combo
Kenmore
91149489992
Microwave Oven Combo