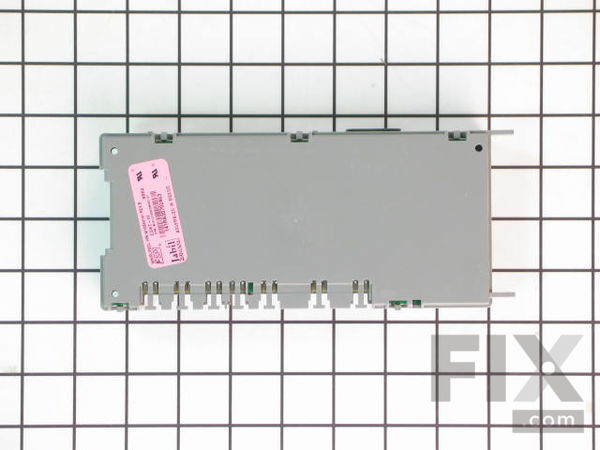
Part Location Diagram of WPW10084141 Whirlpool Electronic Control Board
See part 11 in the diagram
Replacing your KitchenAid Dishwasher Electronic Control Board
( Grid squares measure 1x1 inch )

Electronic Control Board

Rated by 2 customers 

?

Really Easy 

30 - 60 mins 

Ratings submitted by customers like you who bought this part.

?
$362.58
In Stock
Fix Number:
FIX11748220
Manufacturer #:
WPW10084141
Manufactured by:
Whirlpool

Product Description

This board is located in the control panel of the dishwasher.Thermal fuse is NOT included.

Videos For installing this part.

Replacing your Electronic Control Board

Replacing your Electronic Control Board

Questions and Answers

We're sorry, but our Q&A experts are temporarily unavailable.
Please check back later if you still haven't found the answer you need.

Installation Instructions Provided by Fix customers like you.

Average Repair Rating: 3.8 / 5.0, 2 reviews.
  • 1
Sort by:
Sorry, we couldn't find any existing installation instruction that matched.
Customer:
Robert from Ardmore, PA
Parts Used:
WPW10084141
Difficulty Level:
Easy
Total Repair Time:
30 - 60 mins
Tools:
Pliers, Screw drivers
Replace control board PS11748220
I am not handy but I was able to replace the control board. First, watch the video showing how to replace the bi-metal fuse, even if you are not replacing the bi-metal fuse. You will it helpful to gain familiarity with opening the dishwasher panel and with pulling out the bi-metal fuse from the old control panel and inserting it into th e new control panel. Turn off the circuit breaker to the hard-wired, or unplug, the dishwasher. After opening the panel, hold the tray in which the control board sits. Note how two plastic prongs secure the control board at the outside edge. Don't break any plastic on the tray. Using a screwdriver and pliers, push with the screwdriver, and pull with the pliers, to shift the control board toward you until you can free it from those prongs one prong at a time. After that, raise that side, and lift the board our from under the two smaller prongs on the inside edge. Don't put the new control board in place until you insert the wires. Hold the new one in front of you so you can see the old and new at the same time. Remove each electronic connection, one at a time, from the old one, and snap it into the corresponding location in the new one. More specifically, remove (pull out) the strip connected to the pins on the inside edge of the old one and insert that into the new one. Then, one at a time, remove (by pushing the small plastic piece holding it in place and unplugging the small plastic piece holding it place) each small plastic housing, which has several wires of all the same color in it, and place that in the corresponding location in the new control board. If you look closely at the board, you will see the name of the wire color printed on the board, yellow, brown, etc., to confirm where to install the plastic piece with those color wires. Snap the bi-metal fuse in place. At this point, you can turn back on the electric to take a quick look to see if a dishwasher light is on. If you see a dishwasher light on, you can secure the board at the four points by which it is secured in the tray, then place the tray in the dishwasher panel and re-install the panel. If you did not get a dishwasher light on, check each connection to see if it is securely in place. If that does not get a light on, replace the bi-metal fuse as shown in the video mentioned above. The above steps were done in less than an hour by someone who has not done anything like that before.
1 person found this instruction helpful.
Was this instruction helpful to you?
Thank you for voting!
Customer:
Elizabeth from Merion Station, PA
Parts Used:
WPW10084141
Difficulty Level:
Really Easy
Total Repair Time:
15 - 30 mins
Tools:
Screw drivers
would not start no lights on front console
The repair went easily removing the screws on the sides of the door to access the electronic control board. Simple to remove board and replace with new one after watching instruction video on this site . It was nice to have an extra set of hands to help get the door aligned and get screwed back in place. It did not fix our problem and had to call an appliance guy to come in an he replaced the thermal fuse for the heating element. So now we have an electronic control board if it ever breaks down since it can't be returned.
1 person found this instruction helpful.
Was this instruction helpful to you?
Thank you for voting!
  • 1

Model Compatibility

This part works with the following models:
Fix Number: FIX11748220
Manufacturer Part Number: WPW10084141
Brand
Model Number
Description
Kenmore
66513112K700
Dishwasher
Kenmore
66513112K701
Dishwasher
Kenmore
66513112K702
Dishwasher
Kenmore
66513113K701
Dishwasher
Kenmore
66513113K702
Dishwasher
Kenmore
66513114K700
Dishwasher
Kenmore
66513114K702
Dishwasher
Kenmore
66513119K701
Dishwasher
Kenmore
66513119K702
Dishwasher
Kenmore
66513222K600
Dishwasher
Kenmore
66513222K601
Dishwasher
Kenmore
66513223K600
Dishwasher
Kenmore
66513223K601
Dishwasher
Kenmore
66513229K600
Dishwasher
Kenmore
66513229K601
Dishwasher
Kenmore
66513412K700
Dishwasher
Kenmore
66513412K701
Dishwasher
Kenmore
66513412K702
Dishwasher
Kenmore
66513413K701
Dishwasher
Kenmore
66513413K702
Dishwasher
Kenmore
66513419K700
Dishwasher
Kenmore
66513419K702
Dishwasher
Kenmore
66513482K900
Dishwasher
Kenmore
66513483K900
Dishwasher
Kenmore
66513484K900
Dishwasher
Kenmore
66513489K900
Dishwasher
Kenmore
66513672K600
Dishwasher
Kenmore
66513672K601
Dishwasher
Kenmore
66513672K602
Dishwasher
Kenmore
66513673K600
Dishwasher