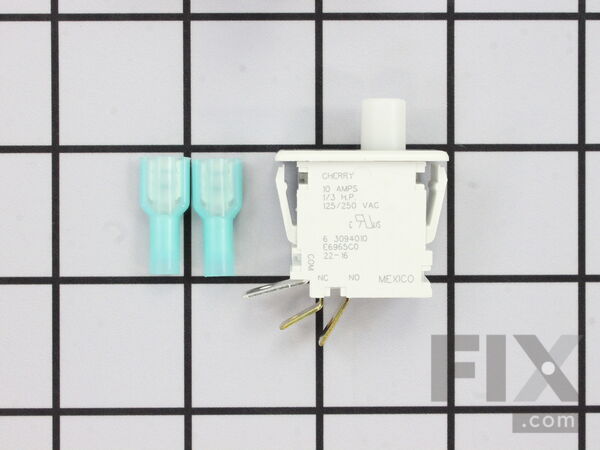
Door Switch Kit
$29.21
In Stock
Fix Number: FIX1964648
Manufacturer #: W10169313
Manufactured by:
Whirlpool
-
Product Description
This part replaces older two terminal switches.
-
Works with the following brandsMaytag, Speed Queen, Amana, Crosley
-
Works with the following productsDryer, Washer, Washer Dryer Combo, Refrigerator
-
Fixes the following symptomsNoisy
-
Part Number Cross ReferencePart# W10169313 replaces these:AP4319999, 1378530, 3-4575, 3-4576, 3-5753, 3-5754, 304575, 304576, 305753, 305754, 33001508, 33001509, 5-4570, 504570, 56052, 57012, 62872, R0602515, W10169313, W10169313VP ... Show more , WPY304575, Y304575, Y304576, Y305753, Y305754, Y504570, Y62872 Show less
Product Description
This part replaces older two terminal switches.
-
Works with the following brands:Maytag, Speed Queen, Amana, Crosley
-
Works with the following products:Dryer, Washer, Washer Dryer Combo, Refrigerator
-
Fixes the following symptoms:Noisy
-
Part# W10169313 replaces these:AP4319999, 1378530, 3-4575, 3-4576, 3-5753, 3-5754 ... Show more , 304575, 304576, 305753, 305754, 33001508, 33001509, 5-4570, 504570, 56052, 57012, 62872, R0602515, W10169313, W10169313VP, WPY304575, Y304575, Y304576, Y305753, Y305754, Y504570, Y62872 Show less
Videos For installing this part.
Replacing your Door Switch Kit

Questions and Answers
We're sorry, but our Q&A experts are temporarily unavailable.
Please check back later if you still haven't found the answer you need.
Installation Instructions Provided by Fix customers like you.
- < Prev
- 1
- Next >
Sort by:
Search filter:
Clear Filter
Your search term must have 3 or more characters.
Keep searches simple. Use keywords, e.g. "leaking", "pump", "broken" or "fit".
Sorry, we couldn't find any existing installation instruction that matched.
-
Customer:Thomas from Glenwood Springs, CO
-
Parts Used:W10169313
-
Difficulty Level:Really Easy
-
Total Repair Time:Less than 15 mins
-
Tools:
Dryer would not start
removed screws holding top panel in place. Disconnected 2 wires from switch and pressed expansion clips in and pushed switch out front of panel. pressed new switch into place, connected terminals, placed panel back in place replaced screws, tested dryer and done.
Was this instruction helpful to you?
Thank you for voting!
-
Customer:MATTHEW from TRION, GA
-
Difficulty Level:Really Easy
-
Total Repair Time:30 - 60 mins
-
Tools:Nutdriver, Screw drivers
Loud Squealling While Drying
Take time to examine your machine before ordering parts, I did not need to expensive roller wheel kits , I needed two washers for the roller wheels. I pulled it apart and used the snap ring pliers to pull the roller wheels off,put the washer behind the wheel , I added a dab of hi temp grease to inside of roller and shaft. Put it back together. Quite as a new one. . The rest of the parts are straight forward . . Good luck
Was this instruction helpful to you?
Thank you for voting!
-
Customer:Julia from Honey Brook, PA
-
Parts Used:W10169313
-
Difficulty Level:Really Easy
-
Total Repair Time:More than 2 hours
-
Tools:Pliers, Screw drivers, Socket set
I accidentally broke the door switch when I was taking the door off
I popped the top of the dryer off by sticking a flathead screwdriver in where the clamps hold it in place, then I used a socket wrench to unscrew the door. I couldn't figure out how to get the switch off without taking it apart (should have left it connected, would have saved me some trouble). I took a picture of where the wires were connected. When I got the new switch, I removed the nodes from the wires by using an eyeglasses screwdriver to release the clip holding it in place under the plastic. One of the wires' covers was too small to fit on the new switch, so I stripped the wire carefully and replaced the end with the one provided. The fit wasn't very good, so I'll probably have to put some electrical tape on it at some point. Then I reattached everything and voila, dryer turns on :)
Was this instruction helpful to you?
Thank you for voting!
-
Customer:MITCHELL from BROOKFIELD, MA
-
Difficulty Level:Really Easy
-
Total Repair Time:15 - 30 mins
-
Tools:Nutdriver
Drum sounded like a cat was thrown in with the cloths.
Having repaired it before, I knew what it needed. ordered all new rollers and because of age a new drive belt. Needed a new door switch, had bypassed it a while ago. finding the parts on the site was a snap, great setup. FIRST, DISCONNECT THE POWER!!! VERY EASY FIX. Lean the unit against the wall at about 30-40 degrees and start removing the screws from the bottom and lift each panel off by pivoting. Take care when removing door frame, unplug the wires. Remove drive belt before removing the drum. Check roller shafts for excessive wear or just replace them with the rollers. make sure you put the spacer back behind the rollers and the rollers facing the right way. Use caution with the felt drum sealers when replacing the drum and the door frame. CLEAN OUT THE LINT BUILDUP WHILE YOU HAVE IT APART. VAC THE MOTOR CLEAN TO PREVENT OVERHEATING.
Was this instruction helpful to you?
Thank you for voting!
- < Prev
- 1
- Next >
★
Customer Reviews
Filter By Rating:
- < Prev
- 1
- Next >
Sort by:
Search filter:
Clear Filter
Your search term must have 3 or more characters.
Keep searches simple. Use keywords, e.g. "leaking", "pump", "broken" or "fit".
Sorry, we couldn't find any existing reviews that matched. Try using some different or simpler keywords.
David R B - December 26, 2019
Verified Purchase
door switch
item is what is pictured, only problem is it took over a week to get thus the 4 star
- < Prev
- 1
- Next >
Model Compatibility
This part works with the following models:
Fix Number: FIX1964648
Manufacturer Part Number: W10169313
Brand
Model Number
Description