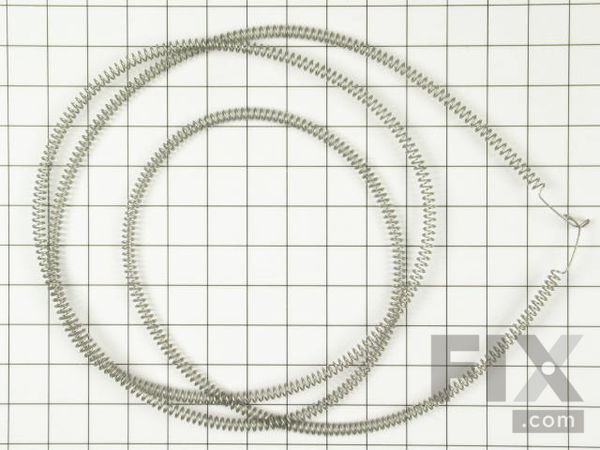
Part Location Diagram of WPY313538 Whirlpool Heater Element - 240V
See part 8 in the diagram
Replacing your Maytag Dryer Heater Element - 240V
( Grid squares measure 1x1 inch )

Heater Element - 240V WPY313538

★★★★★
★★★★★
1 Review

Rated by 3 customers 

?

Easy 

30 - 60 mins 

Ratings submitted by customers like you who bought this part.

?
$69.29
In Stock
Fix Number:
FIX11757544
Manufacturer #:
WPY313538
Manufactured by:
Whirlpool

Product Description

Made for use with series 08 and later gas and electric clothes dryers, this pre-stretched heating element coil carries 240 volts.

Videos For installing this part.

Replacing your Heater Element - 240V

Replacing your Heater Element - 240V

Questions and Answers

We're sorry, but our Q&A experts are temporarily unavailable.
Please check back later if you still haven't found the answer you need.

Affresh Washing Machine Cleaner - 3 pack
$12.58
In Stock
Produce Preserver Filter
$21.50
In Stock
Affresh Dishwasher Cleaner Tablets - 6
$19.09
In Stock
Cooktop Cleaning Cream
$15.57
In Stock
Cooktop Cleaner
$17.74
In Stock
Affresh Cleaner
$19.09
In Stock

Installation Instructions Provided by Fix customers like you.

Average Repair Rating: 3.0 / 5.0, 3 reviews.
  • 1
Sort by:
Sorry, we couldn't find any existing installation instruction that matched.
Customer:
Gerald from Woodstock, AL
Parts Used:
WPY313538, WP303396
Difficulty Level:
Really Easy
Total Repair Time:
30 - 60 mins
Tools:
Nutdriver, Pliers, Socket set
Dryer was not heating
replaced heater coil and thermostat ..
5 of 6 people found this instruction helpful.
Was this instruction helpful to you?
Thank you for voting!
Customer:
michael from arizona city, AZ
Parts Used:
WPY313538
Difficulty Level:
Really Easy
Total Repair Time:
30 - 60 mins
Tools:
Nutdriver, Pliers, Screw drivers
Heating element failed (open circuit)
Set unit for drying time ( checked exhaust for heat). Air remained cool after several minutes. This was a very good indicator that the limits were working properly. Unplugged unit. (never work on unit plugged in). Then pulled off front door panel. Disconnected loading door safety switch wiring.(2 wires note where each wire attaches to swi tch). Then remove heating element front cover. Use a flash light and inspected heating element. (looking for signs of burning and open heating element wire). Removed wiring to limit switch. (again note which wire is on both terminals). Removed heating element housing. Attached with 3 - 1/4 inch hex head screws. Pulled heating element housing. Then unscrewed the housing(splits in half exposing the entire heating element) Removed open heating element (break in the wire). Re strung new heating element (while restringing make sure no part of the element are touching any part of the housing will cause a direct short). Screw the 2 half's back together. (making sure element is not caught between the 2 half's. (again can cause a direct short). reinstall heating element housing, re wire limits (correctly) Reinstall loading door and wire correctly. Plug unit in and set for heat. After a few minutes check the discharge air (note !! at first it may smell like its burning but this is normal) If discharge air is hot you are ready to go. Note while you have the unit apart it is a good practice to vacuum out the unit removing as much of the lint as possible. (will increase the longevity of the unit and could prevent it from catching on fire. It is also a good practice to clean out flu piping. I use a blower to clear out all the built up lint trapped in the pipe. Again this is a good safety precaution and is always over looked.
1 person found this instruction helpful.
Was this instruction helpful to you?
Thank you for voting!
Customer:
Judy from Casa Grande, AZ
Parts Used:
WPY313538
Difficulty Level:
Difficult
Total Repair Time:
1- 2 hours
Tools:
Nutdriver, Pliers, Screw drivers
Heater Elemant Burned out.
Removed front door and took the Heating element out. Split the outer shell apart and removed coil. Putting the new coil in was not easy. If had it to do again would have bought the whole assembly. My only real grip is the part was suppose to be here in two day's and it took a week to get here.
1 person found this instruction helpful.
Was this instruction helpful to you?
Thank you for voting!
  • 1
Customer Reviews
Average Rating: (1 Review)
5.0
★★★★★
★★★★★
Filter By Rating:
  • 5
    1
  • 4
    0
  • 3
    0
  • 2
    0
  • 1
    0
  • 1
Sort by:
Sorry, we couldn't find any existing reviews that matched. Try using some different or simpler keywords.

Model Compatibility

This part works with the following models:
Fix Number: FIX11757544
Manufacturer Part Number: WPY313538
Brand
Model Number
Description
Maytag
BDE7500
Dryer - Residential
Maytag
DE106
Dryer - Electric
Maytag
DE107
Dryer - Electric
Maytag
DE110
Dryer - Electric
Maytag
DE180
Dryer - Maytag Dryer Model DE180 Parts
Maytag
DE210
Dryer - Electric
Maytag
DE212
Dryer - Residential
Maytag
DE303
Dryer - Residential
Maytag
DE308
Dryer - Electric
Maytag
DE309
Dryer - Electric
Maytag
DE312
Dryer - Residential
Maytag
DE313
Dryer - Residential
Maytag
DE382
Dryer - Electric
Maytag
DE4000
Dryer - Residential
Maytag
DE408
Dryer - Electric
Maytag
DE409
Dryer - Residential
Maytag
DE410
Dryer - Residential
Maytag
DE412
Dryer - Residential
Maytag
DE482
Dryer - Residential
Maytag
DE490
Dryer - Residential
Maytag
DE4910
Dryer - Residential
Maytag
DE510
Dryer - Residential
Maytag
DE512
Dryer - Residential
Maytag
DE590
Dryer - Residential
Maytag
DE5910
Dryer - Residential
Maytag
DE608
Dryer - Residential
Maytag
DE610
Dryer - Residential
Maytag
DE612
Dryer - Residential
Maytag
DE710
Dryer - Residential
Maytag
DE712
Dryer - Residential