Some of the parts we sell are eligible for mail-in rebates since we can recycle them. We will display any applicable rebates in your shopping cart. To redeem your rebate, contact Customer Service after you have received your part.
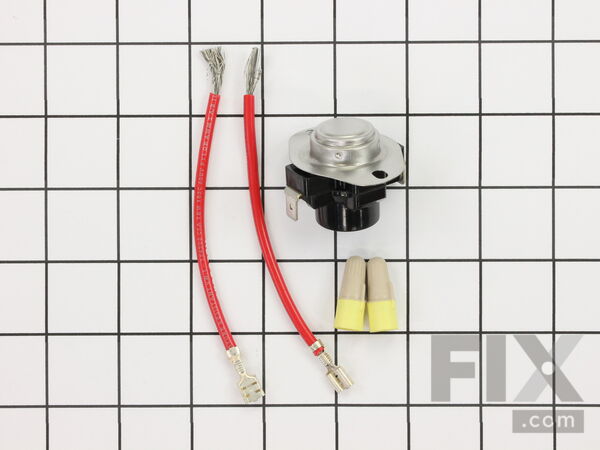
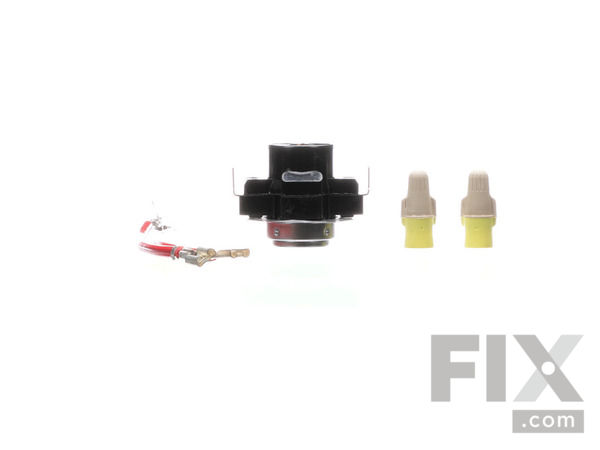
Cycling Thermostat - Limit 135/155
$57.32
In Stock
- Fix Number:
- FIX11743793
- Manufacturer #:
- WP694674
- Manufactured by:
- Whirlpool
- Product Description
- Cycling themostats continually cycle the heating element off and on to maintain a constant inner temperature within the dryer. This particular cycling thermostat can be adjusted between 135 and 155 degrees Fahrenheit. The differential of this thermostat is 20 degrees, meaning that with this thermostat, the heating element will cycle back on once the internal temperature drops by 20 degrees.
- Works with the following brands:
- Kenmore, Whirlpool, Maytag, KitchenAid
- Works with the following products
- Dryer, Washer Dryer Combo
- Fixes the following symptoms
- Too hot
- Part# WP694674 replaces these:
- AP6010610, 15-10-592, 20010046, 229420, 231563, 232960, 233155, 237440, 237932, 238879, 238919, 238951, 24519, 24704, 26000694674, 291047, 291056, 291824, 295338, 295419 ... Show more , 295420, 295421, 29542100, 295427, 295431, 295721, 295728, 297078, 297086, 298254, 298566, 298722, 298857, 299008, 299009, 299620, 299621, 299833, 3-3035, 3-3392, 3-3773, 303035, 303392, 303773, 33002409, 33002567, 341146, 341147, 341199, 341200, 341201, 342812, 342813, 348895, 348896, 348897, 4319380, 512181, 65202, 65204, 660039, 660040, 660067, 660073, 660074, 68171, 68172, 68173, 68174, 688467, 688468, 688472, 688473, 688837, 688838, 689927, 689930, 690032, 694674, 8132, 868581, WP694674VP Show less
Part Number Cross Reference
Product Description
Cycling themostats continually cycle the heating element off and on to maintain a constant inner temperature within the dryer. This particular cycling thermostat can be adjusted between 135 and 155 degrees Fahrenheit. The differential of this thermostat is 20 degrees, meaning that with this thermostat, the heating element will cycle back on once the internal temperature drops by 20 degrees.
-
Works with the following brands:Kenmore, Whirlpool, Maytag, KitchenAid
-
Works with the following products:Dryer, Washer Dryer Combo
-
Fixes the following symptoms:Too hot
-
Part# WP694674 replaces these:AP6010610, 15-10-592, 20010046, 229420, 231563, 232960 ... Show more , 233155, 237440, 237932, 238879, 238919, 238951, 24519, 24704, 26000694674, 291047, 291056, 291824, 295338, 295419, 295420, 295421, 29542100, 295427, 295431, 295721, 295728, 297078, 297086, 298254, 298566, 298722, 298857, 299008, 299009, 299620, 299621, 299833, 3-3035, 3-3392, 3-3773, 303035, 303392, 303773, 33002409, 33002567, 341146, 341147, 341199, 341200, 341201, 342812, 342813, 348895, 348896, 348897, 4319380, 512181, 65202, 65204, 660039, 660040, 660067, 660073, 660074, 68171, 68172, 68173, 68174, 688467, 688468, 688472, 688473, 688837, 688838, 689927, 689930, 690032, 694674, 8132, 868581, WP694674VP Show less
Videos For installing this part.
Replacing your Cycling Thermostat - Limit 135/155

Questions and Answers
We're sorry, but our Q&A experts are temporarily unavailable.
Please check back later if you still haven't found the answer you need.
Related Parts Additional or alternate parts to consider.
Installation Instructions Provided by Fix customers like you.
- < Prev
- 1
- Next >
Sort by:
Search filter:
Clear Filter
Your search term must have 3 or more characters.
Keep searches simple. Use keywords, e.g. "leaking", "pump", "broken" or "fit".
Sorry, we couldn't find any existing installation instruction that matched.
no heat
to make sure that i solved the problem 100%,i replaced all 3 componets.works like new now.
5 of 6 people
found this instruction helpful.
Was this instruction helpful to you?
Thank you for voting!
Dryer Would Not Start
Referred to YouTube for diagnostic instructions After I determined the parts required, I went to Whirlpool for the part numbers, then ordered from this site because you had the best prices. When parts arrived, I followed the directions in the YouTube video because the links in the email would not work. I had no problems with the repair;
... Read more
it took less than 15 minutes, and my dryer is fully operational.
Read less
1 of 2 people
found this instruction helpful.
Was this instruction helpful to you?
Thank you for voting!
Dryer did not turn on.
I removed the back plate. I checked for continuity across the thermal fuse terminals. I found no continuity and swapped out the fuse.
0 of 1 people
found this instruction helpful.
Was this instruction helpful to you?
Thank you for voting!
Dryer wouldn't start or run.
After finding this site and the "probable causes" for not running relating to my model, I got to work on the "most likely suspect". Of course I unplugged the appliance first! I then removed the back panel and located the Thermal Fuse (bottom left side). I don't own a volt meter to check the fuse and if it had tripped or not, but becaus
... Read more
e I understand that a fuse is designed to trip if the load becomes too much, I decided to test the appliance by temporarily bypassing the fuse. I disconnected the 2 wire's attached to the Thermal fuse and connected them together and wrapped them with a small piece of electrical tape. I plugged the unit back in and it worked. I immediately knew that the fuse had tripped and needed replacing. I also deducted that the Cycling Thermostat had probably contributed to the fuse blowing, so I decided to replace that part also. It was probably the simplest repair that I have done in my life. I was even able to get the original part #'s off of the parts and double check them in a parts lookup search. I removed a handful of screw-nuts, a total of 4 wires by hand and replaced them with a bit of a squeeze with needle nose pliers, and the machine is running like it always has. I even used the opportunity to vacuum out all the exhaust areas of lint and what not. Make sure to follow that you properly set the Cycling Thermostat (Instructions are very clear) to your Make/model limits, and your good to go. I could not have been happier. I ordered the part on Wednesday and received it the following day (helps that I'm in CA).
Read less
0 of 1 people
found this instruction helpful.
Was this instruction helpful to you?
Thank you for voting!
dryer quit heating.
used the trouble shoot section to determine probable problem and ordered the parts. Used the repair video for instructions to do the repair.
0 of 1 people
found this instruction helpful.
Was this instruction helpful to you?
Thank you for voting!
Very noisy, needed new rollers
Had difficulties removing tri rings and replacing new ones. I hope you will show me how to easily remove and replace the tri rings. Once I had them in place the rest was very easy as per your video instructions.
0 of 1 people
found this instruction helpful.
Was this instruction helpful to you?
Thank you for voting!
Take too long to dry clothes.
I took the back cover off, removed old heating element, old thermostats and installed the new parts where the old parts were. Replaced rear cover, plugged dryer cord in outlet, just like new. About 25 to 30 minutes.
0 of 1 people
found this instruction helpful.
Was this instruction helpful to you?
Thank you for voting!
- < Prev
- 1
- Next >
Model Compatibility
This part works with the following models:
Fix Number: FIX11743793
Manufacturer Part Number: WP694674
Manufacturer Part Number: WP694674
Brand
Model Number
Description
✖
Mail-In Recycling Rebate


