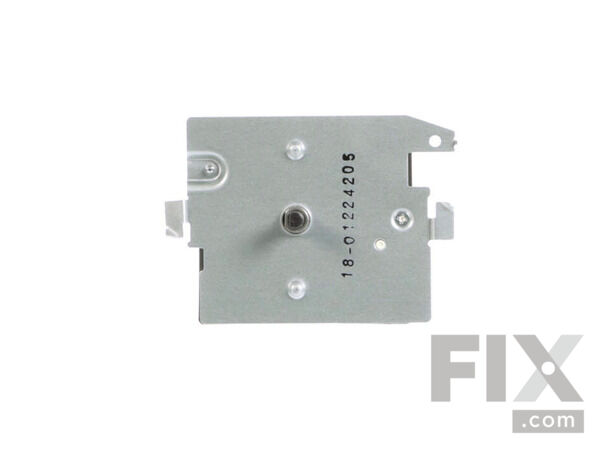
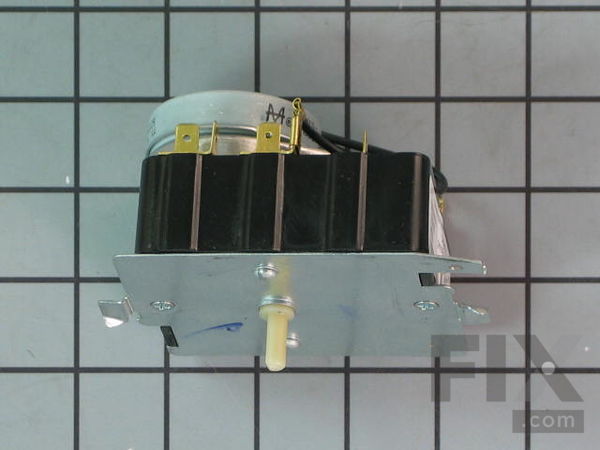
Part Location Diagram of WE4M527 GE Dryer Timer
See part 100 in the diagram
( Grid squares measure 1x1 inch )

Dryer Timer WE4M527

Rated by 8 customers 

?

Really Easy 

15 - 30 mins 

Ratings submitted by customers like you who bought this part.

?
$148.18
In Stock
Fix Number:
FIX3654187
Manufacturer #:
WE4M527
Manufactured by:
GE

Product Description

This is a genuinely sourced dryer timer, sold individually. It keeps track of the desired time, making sure the dryer turns on and off at the proper time in that cycle. Some indications that it is time to replace the dryer timer are if the timer will not start or stop, it is not ticking down during the cycle, or it shuts off in the middle of a cycle. For this repair, started by disconnecting the power. Remove the timer knob and control panel. Lift the plastic tab on the old timer and rotate it counter-clockwise, leaving the wires connected. This will give you a reference when it comes time to connect the wires in the new timer (you could also snap a photo). To install the new timer, rotate it clockwise until it locks into place. Transfer the wires from the old timer to the new one, matching each connection. Reassemble the dryer, and you are all done with your repair.

Questions and Answers

We're sorry, but our Q&A experts are temporarily unavailable.
Please check back later if you still haven't found the answer you need.

View More View Less
Knob, Gray
$14.40
In Stock
Control Knob - Grey
$29.07
In Stock
Affresh Washing Machine Cleaner - 3 pack
$12.58
In Stock
Produce Preserver Filter
$21.50
In Stock
Affresh Dishwasher Cleaner Tablets - 6
$19.09
In Stock
Cooktop Cleaning Cream
$15.57
In Stock
Cooktop Cleaner
$17.74
In Stock
Affresh Cleaner
$19.09
In Stock

Installation Instructions Provided by Fix customers like you.

Average Repair Rating: 4.5 / 5.0, 8 reviews.
  • 1
Sort by:
Sorry, we couldn't find any existing installation instruction that matched.
Customer:
JOSE from Mamaroneck, NY
Parts Used:
WE4M527
Difficulty Level:
Very Easy
Total Repair Time:
15 - 30 mins
Tools:
Screw drivers
Stripped knob steam.
I changed the knob on the control timer and it keep striping, the problem was not the knob but the control it self.All you need to do is remove the 5 Philip screws in the back of the control panel. When rewiring the control transfer one wire at the time so you don't loose mix cable connections.Good luck.
3 of 3 people found this instruction helpful.
Was this instruction helpful to you?
Thank you for voting!
Customer:
Sandra from Hudson, OH
Parts Used:
WE4M527
Difficulty Level:
Really Easy
Total Repair Time:
Less than 15 mins
Tools:
Pliers, Screw drivers
The timer switch on the dryer wasn't clicking into different modes
I am a mother of 3 young ones. Researched the problem online. Found a YouTube video. Pulled of knob. Unscrewed 3 screws in back to expose wiring unit. Turned timer and clicked it out of its spot. Took each wire out one by one and put in new timer as I went. Pushed them all in tight when I was done. Clicked timer back in place. Put cover b ack on dryer. Put knob back on and wha-la. Working dryer again. (Unplugged electricity before starting). Easy!
3 of 4 people found this instruction helpful.
Was this instruction helpful to you?
Thank you for voting!
Customer:
James from Dickinson, TX
Parts Used:
WE4M527
Difficulty Level:
Really Easy
Total Repair Time:
15 - 30 mins
Tools:
Pliers, Screw drivers
Timer not functioning
Replaced bad timer by unplugging dryer then removing back control panel cover and replacing bad timer by moving one wire at a time to new timer.
1 person found this instruction helpful.
Was this instruction helpful to you?
Thank you for voting!
Customer:
Paul from Carmel Valley, CA
Parts Used:
WE4M527
Difficulty Level:
Really Easy
Total Repair Time:
15 - 30 mins
Tools:
Pliers, Screw drivers
Timer failed to stop at various drying settings
Pulled the dryer out from the wall to access the three screws that hold the front, top panel. Removed those screws, slid the panel over and out, rotated the old timer out from its holding slots on the inside of the panel, (this is critical!)- put the new timer in place in the panel BEFORE removing any of the wiring connectors, ONE BY ONE, pulled the wires from the old timer and connected them to the new one. Double checked all wire connections for all the other switches, put the panel back in place, plugged the dryer back in and tested the timer, unplugged the dryer and put the three screws that hole the panel in place back in. NOTE: DO NOT pull all the wires off your old timer and try to then connect them to the timer; you will never figure out which goes where without a wiring diagram, and even with one, you'll likely get them wrong.
1 person found this instruction helpful.
Was this instruction helpful to you?
Thank you for voting!
Customer:
Gloria from Fairview Park, OH
Parts Used:
WE4M527, WH01X10462
Difficulty Level:
Easy
Total Repair Time:
15 - 30 mins
Tools:
Pliers
Dryer timer replacement
Easy job, but take your time and work carefully. Twist the old timer off keeping the wire connections. Twist on the new timer and transfer the wires one at a time. Wires are on tight so you might need pliers.
0 of 1 people found this instruction helpful.
Was this instruction helpful to you?
Thank you for voting!
Customer:
michael from flemington, NJ
Parts Used:
WE4M527, WH01X10462
Difficulty Level:
Very Easy
Total Repair Time:
15 - 30 mins
Tools:
Screw drivers
gas dryer wouldn't stay on for the required time
First unplug power cord. I removed three Philips screws at top rear of control panel and tilted it forward. Then facing front of machine slide panel to the right to free bottom tabs. Twist out timer switch counter clockwise by releasing the locking tab.Install new timer switch by rotating it clockwise. Then careful remove wires one at a time from old timer to new installed timer. I used a small screw driver to pry up wire connectors. Its much easier to swap wires one at a time so as not to get confused about location positioning. Then with all wires firmly in place place control panel bottom back into slots tilt in place reinstall three screws, plug power cord back in.JOB DONE
0 of 1 people found this instruction helpful.
Was this instruction helpful to you?
Thank you for voting!
Customer:
Craig from Orange, MA
Parts Used:
WE4M527
Difficulty Level:
Really Easy
Total Repair Time:
Less than 15 mins
Tools:
Pliers, Screw drivers
Broken Timer
With needle nose pliers took off 1 wire at a time connecting wire to new timer before moving on.
0 of 1 people found this instruction helpful.
Was this instruction helpful to you?
Thank you for voting!
Customer:
Eileen from Coral Springs, FL
Parts Used:
WE4M527
Difficulty Level:
A Bit Difficult
Total Repair Time:
15 - 30 mins
Tools:
Pliers, Screw drivers
Dryer Timer & Knob
I read posts on this site and I also watched YouTube video hand this video explained and showed how to change it. I said it was a bit difficult because I had never done something like this before, but with watching the video, I knew I could do it.
0 of 1 people found this instruction helpful.
Was this instruction helpful to you?
Thank you for voting!
  • 1

Model Compatibility

This part works with the following models:
Fix Number: FIX3654187
Manufacturer Part Number: WE4M527
Brand
Model Number
Description
General Electric
677511
Air Conditioner
General Electric
677512
Dryer
General Electric
677513
Dryer
General Electric
677514
Dryer
General Electric
677515
Dryer
General Electric
677517
Dryer
General Electric
DPSR610EG6WT
Dryer
General Electric
DPSR610EG7WT
Dryer
General Electric
DPSR610EG8WT
Dryer
General Electric
DPSR610GG7WT
Dryer - Ge Dryer Dpsr610gg7wt
General Electric
DPSR610GG8WT
Dryer
General Electric
DPSR610GG9WT
Dryer
General Electric
DRSR495EG1WW
Dryer - Electric
General Electric
DRSR495EG2WW
Dryer - Electric
General Electric
DRSR495EG3WW
Dryer
General Electric
DRSR495EG4WW
Dryer
General Electric
DRSR495EG5WW
Dryer
General Electric
DRSR495EG6WW
Dryer
General Electric
DRSR495EG7WW
Dryer
General Electric
DRSR495EG8WW
Dryer
General Electric
DRSR495GG1WW
Dryer - Gas
General Electric
DRSR495GG2WW
Dryer - Gas
General Electric
DRSR495GG3WW
Dryer
General Electric
DRSR495GG4WW
Dryer
General Electric
DRSR495GG5WW
Dryer
General Electric
DRSR495GG6WW
Dryer
General Electric
DRSR495GG7WW
Dryer
General Electric
DRSR495GG8WW
Dryer
General Electric
DRSR495GG9WW
Dryer
General Electric
GHDP490EF0WW
Dryer