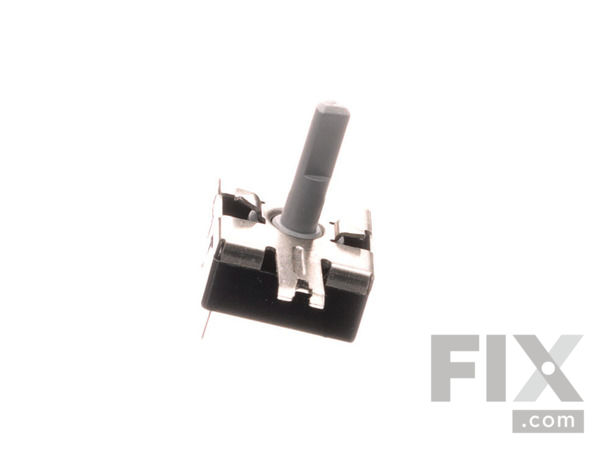
Part Location Diagram of WE4M519 GE Rotary Start Switch
See part 35 in the diagram
Replacing your General Electric Dryer Rotary Start Switch
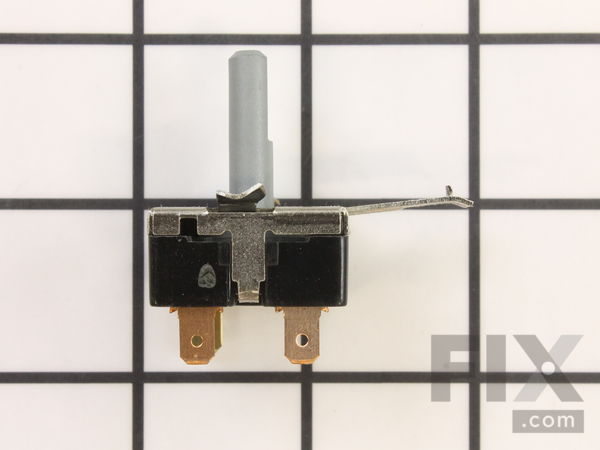
( Grid squares measure 1x1 inch )

Rotary Start Switch WE4M519

★★★★★
★★★★★
1 Review

Rated by 20 customers 

?

Really Easy 

15 - 30 mins 

Ratings submitted by customers like you who bought this part.

?
$21.42
In Stock
Fix Number:
FIX3487203
Manufacturer #:
WE4M519
Manufactured by:
GE

Product Description

This is a genuine OEM rotary start switch for your dryer. If your dryer will not start, turns off too soon, or the timer will not advance, it may be time to replace the start switch. Replacing this part is a simple repair that requires the use of a Phillips screwdriver and a pair of needle nose pliers. Be sure to disconnect the power supply to your dryer before beginning this repair, as you will be working with the electrical components. Once the new switch is connected to the wiring, be sure that the locking tabs on the switch are properly engaged with the dryer console before reassembling the back panel.

Videos For installing this part.

Replacing your Rotary Start Switch

Replacing your Rotary Start Switch

Questions and Answers

We're sorry, but our Q&A experts are temporarily unavailable.
Please check back later if you still haven't found the answer you need.

Affresh Washing Machine Cleaner - 3 pack
$12.58
In Stock
Produce Preserver Filter
$21.50
In Stock
Affresh Dishwasher Cleaner Tablets - 6
$19.09
In Stock
Cooktop Cleaning Cream
$15.57
In Stock
Cooktop Cleaner
$17.74
In Stock
Affresh Cleaner
$19.09
In Stock

Installation Instructions Provided by Fix customers like you.

Average Repair Rating: 4.6 / 5.0, 20 reviews.
  • 1
  • 2
Sort by:
Sorry, we couldn't find any existing installation instruction that matched.
Customer:
Dennis from Hoover, AL
Parts Used:
WE4M519
Difficulty Level:
Very Easy
Total Repair Time:
Less than 15 mins
Tools:
Screw drivers
Rotary switch inop
Remove and replace.
2 of 2 people found this instruction helpful.
Was this instruction helpful to you?
Thank you for voting!
Customer:
JAVIER from RICHMOND, CA
Parts Used:
WE4M519
Difficulty Level:
Very Easy
Total Repair Time:
Less than 15 mins
Tools:
Pliers, Screw drivers
Failed Start/Reset Switch
1- Unplug the power cord from the wall outlet. 2- Remove the control knobs by gently pulling it out towards you. Locate the 4 screws on top of the controls housing and remove the 4 screws at the top of the controls console using a #2 Star Screw Driver. Place a towel on the top surface of the washer to prevent scratches. 4- Pull the front panel of the controls console away from the washer towards your body. Don't pull to hard. Lay down the console on the towel face up. 5- Locate the start/reset switch (on the far left side of the open console) lay down the new part (start/reset switch) in front of the console and line it up in the same way as the console lays in the console panel. 6- It's a good idea to take photos of the wire connection with you cell phone for reference when reconnecting the wires. But you will notice that there are numbers on the back of the switch next to the wire connectors. 7- Proceed to disconnect all 3 wire connectors that are attached to the control switch and connect them to the new switch in s the same numerical order. 8- With a small flat screw driver lift slightly the long metal clip on the old switch (which is still attached to the console) and at the same time grab the switch box and twist it counter-clock wise.The old switch should come loose. Put the old switch away from the work area. Remove the old switch out from the console and put it away from the work area. 9- Take the new switch and put it in place of the old switch ensure the 2 locking wings line up with the 2 holes on the console housing. Press down on the witch firmly but gently and at the same time turn the switch clock wise, the switch should lock in place and the locking clip should lock onto the console housing. 10- Reinstall the controls console panel back onto console housing. -install the 4 screws that hold the console to the console housing. Replace the control knob back on the front control panel. Plug the dryer power cord back in the wall electrical outlet. You are ready to use your dryer, Run it thru a short cycle to ensure it works properly. It actually takes less than 15 minutes once you have all the tools and equipment you need for the installation. The part only cost me $9.59, and I saved a lot of money, It would have been at least $150 for a service technician to do what I did in 15 minutes. Any one who has opened a desk top computer and has done the slightest work inside a desktop computer can do this. It's just that simple, even a geek (me) can do it. You don't have to be a mechanic.
1 person found this instruction helpful.
Was this instruction helpful to you?
Thank you for voting!
Customer:
Cheryl from Pensacola, FL
Parts Used:
WE4M519
Difficulty Level:
Very Easy
Total Repair Time:
Less than 15 mins
Tools:
Screw drivers
Start switch not working
Unscrewed casing front, took out old switch, replaced with new one, replaced casing. Took about 10 minutes.
1 person found this instruction helpful.
Was this instruction helpful to you?
Thank you for voting!
Customer:
George from Brooklyn, NY
Parts Used:
WE4M519, WE19M1490
Difficulty Level:
A Bit Difficult
Total Repair Time:
30 - 60 mins
Tools:
Screw drivers
Plastic backslash holding start busted and switch finicky
set time aside, watched U tube repair video 2X first, cleared work area, had new parts ready, "unscrewed back panel and removed, gently removed backslash sliding gently but firmly as directed by video, removed knobs, then switches and other apparatus's, turning counter clockwise to remove, again there's a small arm that clicks parts into place you made have to lift into place UN-installing and installing, install turning clockwise into new back splash, discard old backsplash and the new switch just unplug wires from old following the same pattern installing new.
0 of 1 people found this instruction helpful.
Was this instruction helpful to you?
Thank you for voting!
Customer:
John from Oswego, IL
Parts Used:
WE4M519
Difficulty Level:
Very Easy
Total Repair Time:
Less than 15 mins
Tools:
Pliers, Screw drivers
Dryer on/off button would not work
Remove 3-4 screws on top of hood.
Remove hood and use needle nose pliers to lift up long end of switch while rotating counter clockwise.
Remove 3 wires from original switch an hookup to new switch. Set switch in place and rotate clockwise into place and you will hear the switch snap or click. Replac e hood to original position and screw in screws and enjoy the feeling of fixing something yourself whole saving a few hundred dollars from a repairman visit.
0 of 1 people found this instruction helpful.
Was this instruction helpful to you?
Thank you for voting!
Customer:
walter from stratford, CT
Parts Used:
WE4M519
Difficulty Level:
Very Easy
Total Repair Time:
15 - 30 mins
Tools:
Screw drivers
The dryer didn't tumbled
I watched the video for belt repair from this site it was very helpful only took about 30 minutes the dryer is now working
0 of 1 people found this instruction helpful.
Was this instruction helpful to you?
Thank you for voting!
Customer:
Richard from Keller, TX
Parts Used:
WE4M519
Difficulty Level:
Really Easy
Total Repair Time:
15 - 30 mins
Tools:
Pliers, Screw drivers
Start switch was stuck in the START position, electronically. Dryer would start automatically, as soon as the timer was moved to a cycle.
Unplugged the dryer from the power source. I removed the back plate of the control panel by removing 6 screws. and removed the knob. Using my phone, I took a picture of the switch just to ensure all the wires were reconnected to the appropriate terminals on the new switch. The front of the control panel will now lean forward, giving easie r access to the switch. Removing the old switch was a little confusing, and it took a bit to figure that out. Finally, I figured out that you rotate the switch counter-clockwise, about 1/4 of a turn, releasing it from it's mount. I removed the wires from the old switch, and connected them to the new switch. I suggest removing one wire at a time, just to ensure each wire is reconnected correctly. I reinstalled the new switch, by turning it clockwise, 1/4 turn. Reinstalled the know, connected the power, and tested. Overall task was very easy.
0 of 1 people found this instruction helpful.
Was this instruction helpful to you?
Thank you for voting!
Customer:
jose from Mount Dora, FL
Parts Used:
WE4M519
Difficulty Level:
Really Easy
Total Repair Time:
Less than 15 mins
Tools:
Screw drivers
dryier did not turn od was like a shot in the rotaryswitch
unscrew the back side disconect the wires reconect and reatach mew pice put it back together very easy
0 of 1 people found this instruction helpful.
Was this instruction helpful to you?
Thank you for voting!
Customer:
monte from lewisburg, TN
Parts Used:
WE4M519
Difficulty Level:
A Bit Difficult
Total Repair Time:
30 - 60 mins
Tools:
Screw drivers
The switch quit working
I went on you-tube and got a video to show me how to do it. If the appliance would have been in the shape as the one in the video it would have taken two minutes to repair. But when I took the back off the dryer, I discovered that at the factory someone had broken the plastic that held the switch and I had to break off the switch from the glue and change switch and reglue the whole thing again. Your switch worked great and I got it as quickly as anything I had ever ordered!! Thank You
0 of 1 people found this instruction helpful.
Was this instruction helpful to you?
Thank you for voting!
Customer:
Eugene from Shillington, PA
Parts Used:
WE4M519
Difficulty Level:
Very Easy
Total Repair Time:
Less than 15 mins
Tools:
Screw drivers
Dryer would not turn off.
Turn off circuit breaker---Remove 6 phillips head screws holding rear access panel---Remove old switch---Disconnect wires---Connect wires to new switch---Install new switch---Replace screws holding rear access panel---Turn on circuit breaker---Test operation of dryer---OK !
0 of 1 people found this instruction helpful.
Was this instruction helpful to you?
Thank you for voting!
  • 1
  • 2
Customer Reviews
Average Rating: (1 Review)
5.0
★★★★★
★★★★★
Filter By Rating:
  • 5
    1
  • 4
    0
  • 3
    0
  • 2
    0
  • 1
    0
  • 1
Sort by:
Sorry, we couldn't find any existing reviews that matched. Try using some different or simpler keywords.

Model Compatibility

This part works with the following models:
Fix Number: FIX3487203
Manufacturer Part Number: WE4M519
Brand
Model Number
Description
General Electric
662311
Dryer
General Electric
662412
Dryer
General Electric
664110
Dryer
General Electric
664210
Dryer
General Electric
664211
Dryer
General Electric
672412
Dryer
General Electric
672512
Dryer
General Electric
672712
Dryer
General Electric
672812
Dryer
General Electric
674310
Dryer
General Electric
674311
Dryer
General Electric
674410
Dryer
General Electric
674411
Dryer
General Electric
674412
Dryer
General Electric
674810
Dryer
General Electric
674811
Dryer
General Electric
674910
Dryer
General Electric
677310
Dryer
General Electric
677311
Dryer
General Electric
677312
Dryer
General Electric
677313
Dryer
General Electric
677314
Dryer
General Electric
677315
Dryer
General Electric
677317
Dryer
General Electric
BBXR473EH0WW
Dryer
General Electric
BBXR473EH1WW
Dryer
General Electric
BBXR473EH5WW
Dryer
General Electric
BBXR473EH6WW
Dryer
General Electric
DBB5000EF0GG
Dryer - Electric
General Electric
DBB5000GF0GG
Dryer - Gas