


Models
>
MT8116XEB2
MT8116XEB2 Whirlpool Microwave
Jump to:
Find Part by Name
Keep searches simple, eg. "belt" or "pump".
Diagrams for MT8116XEB2
Viewing 5 of 5


Manuals & Guides for MT8116XEB2
Click to downloadKeep searches simple, eg. "belt" or "pump".

$37.49
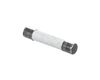
This part protects the microwave by shutting it off if there is an electrical surge.
In Stock
Order now and your part arrives by Apr 11

$48.21
This door interlock switch ensures your microwave operates only when the door is securely closed. It communicates the door’s position to the control board, helping prevent accidental use. It’s often r...
In Stock
Order now and your part arrives by Apr 11

In Stock
Order now and your part arrives by Apr 11


Special Order
Questions and Answers
We're sorry, but our Q&A experts are temporarily unavailable.
Please check back later if you still haven't found the answer you need.
Common Problems and Symptoms for MT8116XEB2
Viewing 3 of 3Won’t turn on
Fixed by these parts

How to fix it
No heat
Fixed by these parts
How to fix it
Door not closing properly
Fixed by these parts
How to fix it
Keep searches simple. Use keywords, e.g. "leaking", "pump", "broken" or "fit".
- Customer:
- Daniel from DECATUR, GA
- Parts Used:
- W11707984
- Difficulty Level:
- Easy
- Total Repair Time:
- 30 - 60 mins
- Tools:
- Pliers, Screw drivers
Microwave wouldn't turn on and found breaker been tripped and then microwave wouldn't turn on at all.
Read some instructions and easily found the fuse. Replaced it. Still didn't work. Took control panel off to check door switches. Nothing I read mentioned a second fuse. Tested and it to had blown. Ordered another one. Popped them in. Done.
Was this instruction helpful to you?
Thank you for voting!
- Customer:
- E G from SILVERDALE, WA
- Parts Used:
- W10211972
- Difficulty Level:
- A Bit Difficult
- Total Repair Time:
- 30 - 60 mins
- Tools:
- Pliers, Screw drivers
The display kept asking me to close the door, even though the door was closed. The interior light stayed on.
I used a Google search to show how to access the area behind the front panel. There was a folded paper copy with a schematic and wiring diagram in that space.Then I used a multi-meter to determine which of the THREE micro-switches was causing the problem. I called your help line and ordered a replacement switch. The switch was delayed
... Read more
in transit so your agent credited me with the cost of shipping.
When the part arrived, it had three terminals instead of two as shown in the on-line picture but that did not cause any difficulty in using it. It took about 20 minutes to remove and replace the old switch.
All seems to be working well now.
Finding which of the THREE switches was the problem was the most difficult part of the repair. All three "clicked" but the defective one did not click as easily. It needed to be depressed more than the door latch can would provide. Old age?
Read less
Was this instruction helpful to you?
Thank you for voting!
- Customer:
- Mark from Smithtown, NY
- Parts Used:
- W11707984
- Difficulty Level:
- A Bit Difficult
- Total Repair Time:
- 1- 2 hours
- Tools:
- Pliers, Screw drivers
machine was dead.
After removing the over-the-range unit (no small feat!) I had to figure out how to open the case (good puzzle!). Capacitor had already discharged, so it was very easy to reach in, pop the old fuse and install the new one! As per your advice, I found out I was a "28%-er"! Upon re-installation, the microwave "sprang to life"!! Thanks, "P
... Read more
art Select"!! I was already shopping around for a new machine! (Now if you could only tell me an easier way to re-mount this heavy beast over the stove!!!)
Read less
Was this instruction helpful to you?
Thank you for voting!