


Models
>
GH7208XRS3
GH7208XRS3 Whirlpool Microwave
Jump to:
Find Part by Name
Keep searches simple, eg. "belt" or "pump".
Diagrams for GH7208XRS3
Viewing 7 of 7


Manuals & Guides for GH7208XRS3
Click to downloadKeep searches simple, eg. "belt" or "pump".

$22.91
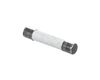
This charcoal filter is a genuine OEM replacement part for your microwave. The filter is used to trap and eliminate food odors that result from cooking. If your exhaust fan is not working properly, or...
In Stock
Order now and your part arrives by Apr 9

On Order

In Stock
Order now and your part arrives by Apr 9

The microwave door interlock switch prevents the microwave from starting if the door is open. If your microwave will not start when the door is closed, or it continues running if the door is opened, t...
In Stock
Order now and your part arrives by Apr 9

$61.55
This part is a replacement glass cooking tray for your microwave. The cooking tray rotates when the microwave is running, and helps your food cook evenly. As it is made of glass, these glass cooking t...
In Stock
Order now and your part arrives by Apr 9

$37.49
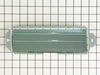
This part protects the microwave by shutting it off if there is an electrical surge.
In Stock
Order now and your part arrives by Apr 9

In Stock
Order now and your part arrives by Apr 9

$28.91
Also known as the coupler. This driver is located directly under the glass turntable, and over the motor. This part helps the glass turntable to rotate.
In Stock
Order now and your part arrives by Apr 9

$48.21
This door interlock switch ensures your microwave operates only when the door is securely closed. It communicates the door’s position to the control board, helping prevent accidental use. It’s often r...
In Stock
Order now and your part arrives by Apr 9

$21.82
This is an authentic OEM replacement part. This screw is commonly used in the assembly of refrigerators, microwaves, ice makers, ranges, and smokers. Due to varied uses we recommend you refer to model...
In Stock
Order now and your part arrives by Apr 9

In Stock
Order now and your part arrives by Apr 9

In Stock
Order now and your part arrives by Apr 9
Questions and Answers
We're sorry, but our Q&A experts are temporarily unavailable.
Please check back later if you still haven't found the answer you need.
- < Prev
- 1
- Next >
Sort by:
Search filter:
Clear Filter
Your search term must have 3 or more characters.
Keep searches simple. Use keywords, e.g. "leaking", "pump", "broken" or "fit".
Sorry, we couldn't find any existing answers that matched.
Try using some different or simpler keywords, or submit your new question by using the "Ask a Question" button above!
Try using some different or simpler keywords, or submit your new question by using the "Ask a Question" button above!
Walt
January 8, 2022
How to place electric control panel
For model number GH7208XRS3
Hi Walt,
Thank you for your question. Before you begin this repair, unplug the microwave from the electrical outlet and use a Phillips head screwdriver to unthread the mounting screws securing the grill. With the screws removed, open the microwave door and slide the grill to the left to remove it. Then remove the control panel mounting screw. Next, lift the control panel up to detach it. Note the orientation of the wires connected to the back of the control board and depress the locking tabs if necessary to disconnect the wires. Then use a screwdriver to remove the screw securing the grounding wire and set the panel on a sturdy surface. Next, release the ribbon connector attached to the electronic control board and unthread the screws securing the electronic control board to the housing and remove the board. Prepare the new control board for installation by removing the protective coverings. Then make sure the switch cable is inserted through the hole in the control panel housing and then place the electronic control board into the housing. Follow the steps in reverse. Plug the microwave back in and your microwave should now work for you. We hope this helps! Good luck with the repair!
Was this helpful?
Thank you for voting!
Related Parts:


Common Problems and Symptoms for GH7208XRS3
Viewing 7 of 7Won’t turn on
Fixed by these parts


How to fix it
Tray won’t turn
Fixed by these parts


How to fix it
No heat
Fixed by these parts

How to fix it
Door not closing properly
Fixed by these parts
How to fix it
Exhaust fan not working
Fixed by these parts

How to fix it
Doesn’t shut off
Fixed by these parts
How to fix it
Noisy
Fixed by these parts
How to fix it
Keep searches simple. Use keywords, e.g. "leaking", "pump", "broken" or "fit".
- Customer:
- Mark from Agua Dulce, CA
- Parts Used:
- 8205992
- Difficulty Level:
- Really Easy
- Total Repair Time:
- Less than 15 mins
Glass cooking tray broke
There was no "fixing" per say but we still could not use the microwave without the plate. This has to be one of the biggest plates for a microwave. We ordered this through your company and we had it three days later. THREE DAYS! We had expected anywhere from 1-2 weeks. My husband was so impressed he bookmarked your site for future re
... Read more
ference. Thank you for being so efficient and prompt. The glass turntable fit like a glove! Sincerely, Mark and Lia Hammond
Read less
Was this instruction helpful to you?
Thank you for voting!
- Customer:
- Cedric from Katy, TX
- Parts Used:
- 8206123
- Difficulty Level:
- Easy
- Total Repair Time:
- 15 - 30 mins
- Tools:
- Screw drivers
Replaced door handle
I removed the screws along the top, side and bottom of the door, stuck a butter knife between the outer door and inner door assemblies, then simply removed the two screws holding the handle.
Was this instruction helpful to you?
Thank you for voting!
- Customer:
- duane from san diego, CA
- Parts Used:
- W11661547, W10120840A, 8206222, 8205994
- Difficulty Level:
- Easy
- Total Repair Time:
- 15 - 30 mins
Fire in microwave melted several parts
Remove the filters and use a Torx driver to remove two screws holding the motor. The wires on on the motor are held in place by a plastic clamp that must be pried open on one side. That's all it takes to replace the drive motor. Everything else that makes the turntable spin lifts off from inside the microwave.
Was this instruction helpful to you?
Thank you for voting!