



Models
>
GXMH31H00
GXMH31H00 General Electric Water Softener
Jump to:
Find Part by Name
Keep searches simple, eg. "belt" or "pump".
Diagrams for GXMH31H00
Viewing 2 of 2

Keep searches simple, eg. "belt" or "pump".
Special Order
Special Order

Special Order

In Stock
Order now and your part arrives by Oct 25

Special Order
Special Order
Special Order

Special Order
In Stock
Order now and your part arrives by Oct 25
$626.80
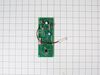
Manage a water softeners settings and regeneration schedule with a replacement electronic control board. The board processes control inputs and helps determine when each operating cycle should begin. ...
In Stock
Order now and your part arrives by Oct 25
$47.14
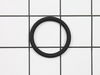
This seal O-ring provides a tight, leak-resistant connection within the water softening system. Designed for durability, it supports proper sealing and efficient operation.
In Stock
Order now and your part arrives by Oct 25
Special Order
Common Problems and Symptoms for GXMH31H00
Viewing 1 of 1
Keep searches simple. Use keywords, e.g. "leaking", "pump", "broken" or "fit".
- Customer:
- John from RICHMOND, TX
- Parts Used:
- WS15X10077
- Difficulty Level:
- Really Easy
- Total Repair Time:
- Less than 15 mins
- Tools:
- Pliers
Using RustOut in the brine tank for years destroyed the seals and salt valve of the brine assembly. Easier to replace entire brine valve assembly.
Remove the top back lid/unlatch 2 clips. Unscrew the small brine tube nut (white) from left side of control unit. Cut the tube to remove nut from old tube with utility knife. Keep nut for use on new assembly. Not included. Remove brine well cover. Pull the tube out of the top and from behind resin tank and remove assembly from brine well
... Read more
. Discarded the old brine valve assembly. Removed the bit of old tube from the nut, w/ utility knife. Careful not to damage the old nut. Snake the new brine tube from front right side through the back of the resin tank to the old hole on the left. Follow the old path. Insert the new brine tube into the top section through the hole the old one came out of. Attached nut to new brine tube. Screw nut/new brine tube to the connector of control unit. Small fingers help. Adjust/slide the float assembly 6-8 inches inches above the valve, e.g. Styrofoam/Metal Weight slides up/down the white stalk. Re-inserted the brine assembly into the brine tank. Replace top. Manually regenerate to make sure new brine assembly is not leaking and filling the brine tank properly. Done.
Read less
Was this instruction helpful to you?
Thank you for voting!
- Customer:
- Dennis from LIBERTY, MO
- Parts Used:
- WS26X10030, WS60X10008
- Difficulty Level:
- Really Easy
- Total Repair Time:
- 30 - 60 mins
The unit was not measuring water as it went thru.had stuck turbin.
Very easy to put softener in bypass and release pressure by starting a regeneration cycle. Clips removed by hand with no force required. Separate bypass from softener. Removed old turbine and slid new turbine into unit. Reconnect bypass valve and install clips by hand. Return softener to service mode. Unit now shows gal / minute in screen
... Read more
.
Read less
Was this instruction helpful to you?
Thank you for voting!
- Customer:
- Lynette from Sidney, MI
- Parts Used:
- WS22X10063, WS03X10017
- Difficulty Level:
- Really Easy
- Total Repair Time:
- Less than 15 mins
- Tools:
- Wrench (Adjustable)
broken nut on incoming water line to water softener
Just slipped the nut on the trimmed-up water tube and tightened it up with an ajustable wrench. This was my Grandson's first attempt at plumbing, we had unhooked the hot water heater and water softener, moved several galv. water lines some of them took a lot of muscle however we used a little to much on the water softener and broke that n
... Read more
ut right in half. I was then able to show him what the by-pass was for and we finished our project. It was a good week-end with my Grandson. Thanks Grandma
Read less
Was this instruction helpful to you?
Thank you for voting!