


Models
>
WA56H9000AW
WA56H9000AW Samsung Washer
Jump to:
Find Part by Name
Keep searches simple, eg. "belt" or "pump".
Models for WA56H9000AW
Click on the best match to narrow your results.
Diagrams for WA56H9000AW
Viewing 17 of 0


Keep searches simple, eg. "belt" or "pump".

This washing machine cleaner includes three time-release tablets designed to remove odor-causing residues, grime, and buildup from high-efficiency and top-load washing machines. The tablets work by cl...
Special Order

In Stock
Order now and your part arrives by Mar 26

In Stock
Order now and your part arrives by Mar 26

In Stock
Order now and your part arrives by Mar 26

$62.17
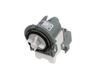
The thermistor monitors and helps regulator the water temperature in the washer.
In Stock
Order now and your part arrives by Mar 26

On Order
 – Part Number: DC97-16931B")
In Stock
Order now and your part arrives by Mar 26

In Stock
Order now and your part arrives by Mar 26

In Stock
Order now and your part arrives by Mar 26
 – Part Number: DC61-00201A")
In Stock
Order now and your part arrives by Mar 26

On Order

Special Order
Common Problems and Symptoms for WA56H9000AW
Viewing 4 of 4Will not drain
Fixed by these parts

How to fix it
Leaking
Fixed by these parts


How to fix it
Water Filling Issues
Fixed by these parts
How to fix it
Not cleaning dishes properly
Fixed by these parts
How to fix it

Keep searches simple. Use keywords, e.g. "leaking", "pump", "broken" or "fit".
- Customer:
- Josh from UNION, MO
- Parts Used:
- DC60-50003A
- Difficulty Level:
- Really Easy
- Total Repair Time:
- 15 - 30 mins
- Tools:
- Nutdriver
The nut (referred to as spin nut or hexagon nut) which holds the tub to the motor broke into multiple pieces.
NOTE: this repair requires OEM part number DC60-50003A and what was originally provided was 6021-001573. This is important as Part Select has this mixed in their Database and I made them aware.
Otherwise once you have the correct part the repair is simple. Open the top of the washer and remove the pulsator cap, there is a 10m ... Read more m bolt which is removed next, the pulsator pan (believe this is correct) can be removed with a flat head screw driver. Do so by placing the screw driver in one of the groves by where the bolt was. Once this is removed that is where this part will be. I didn’t have to remove since mine was in pieces but it comes off/goes on counter clockwise. Repeat steps to put everything back together.
Otherwise once you have the correct part the repair is simple. Open the top of the washer and remove the pulsator cap, there is a 10m ... Read more m bolt which is removed next, the pulsator pan (believe this is correct) can be removed with a flat head screw driver. Do so by placing the screw driver in one of the groves by where the bolt was. Once this is removed that is where this part will be. I didn’t have to remove since mine was in pieces but it comes off/goes on counter clockwise. Repeat steps to put everything back together.
Read less
Was this instruction helpful to you?
Thank you for voting!
- Customer:
- Richard from HERNANDO, MS
- Parts Used:
- DC97-16979A
- Difficulty Level:
- Very Easy
- Total Repair Time:
- Less than 15 mins
Drain hose was cracked and leaking.
Squeezed clamp with fingers to remove old drain hose. Put clamp on new replacement hose and slid over drain pipe and released clamp. Less than a minute. Hose was exact replacement part.
Was this instruction helpful to you?
Thank you for voting!