


Models
>
GA108
GA108 Maytag Washer
Jump to:
Find Part by Name
Keep searches simple, eg. "belt" or "pump".
Keep searches simple, eg. "belt" or "pump".

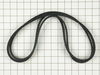
$33.20
Over time, the belts in your washer can either stretch out and sag, or become brittle and snap. When this happens, it can result in the belt losing its grip and will not be able to spin or drain the t...
In Stock
Order now and your part arrives by Apr 13

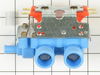
$81.36
This part has two ports for water to enter. It is blue and is intended for use with many washing machines and comes with a multi-mount bracket and an outlet adaptor.
In Stock
Order now and your part arrives by Apr 13

$22.91
This lid or door switch kit helps ensure your washer or dryer only runs when the door is properly closed. It’s a safety feature that prevents spills and keeps your appliance working as it should. The ...
In Stock
Order now and your part arrives by Apr 13

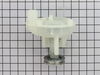
This washing machine drain pump is intended for use with automatic washers that have been manufactured since 1958. The pump itself is made of plastic, though it does come with a metallic belt pulley.
No Longer Available

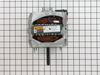
$132.20
This one-speed, 120-volt drive motor is designed for use in top-load washing machines and plays a critical role in operating the wash basket and drain pump. It powers the spinning and agitating functi...
In Stock
Order now and your part arrives by Apr 13

This kit is part of the lid switch mechanism and will stop the spin cycle if the load is unbalanced. When you lift the lid, it resets the plunger and your cycle will resume.
No Longer Available

The timer controls most of the operations of the washer: water level, tub filling and emptying, length of cycles, and cycle setting sequences.
No Longer Available


Questions and Answers
We're sorry, but our Q&A experts are temporarily unavailable.
Please check back later if you still haven't found the answer you need.
Common Problems and Symptoms for GA108
Viewing 13 of 13Burning smell
Fixed by these parts
How to fix it
Will not drain
Fixed by these parts

How to fix it
Leaking
Fixed by these parts
How to fix it
Will not agitate
Fixed by these parts
How to fix it
No hot or cold water
Fixed by these parts
How to fix it
Spins slowly
Fixed by these parts
How to fix it
Will Not Start
Fixed by these parts

How to fix it
Spinning Issues
Fixed by these parts
How to fix it
Water Filling Issues
Fixed by these parts
How to fix it
Won’t Start
Fixed by these parts
How to fix it
Noisy
Fixed by these parts
How to fix it
Noisy and Marks Left on Clothes
Fixed by these parts
How to fix it
Shaking and Moving
Fixed by these parts
How to fix it


Keep searches simple. Use keywords, e.g. "leaking", "pump", "broken" or "fit".
- Customer:
- Brian from El Cajon, CA
- Parts Used:
- 205613
- Difficulty Level:
- Really Easy
- Total Repair Time:
- Less than 15 mins
- Tools:
- Nutdriver, Wrench (Adjustable)
Cold water valve only opened to a trickle
I started by unplugging the appliance and then shut off the hot and cold water faucets then I disconnected and drained the hoses. Next, I removed the two screws that held the valve assembly in place. I then pulled the assembly out about 3 inches and disconnected the two wire plugs. The last step was to loosen the hose clamp on the outl
... Read more
et hose and pull off the outlet hose. I reversed the steps to install the new assembly and the total repair took about 10 minutes.
Read less
Was this instruction helpful to you?
Thank you for voting!
Drum would not drain and there was a banging noise when the drum spun
I removed the 2 phillips screws on the bottom of the front panel. Then checked around to find the belts were actually below the floor panel.
I pulled the washing machine away from the wall and tilted it bacwards and found the pump belt was off the pully and the drive belt was badly damaged. I replaced the 2 belts which took no tools ... Read more and about 3 minutes to accomplish then resecured the front panel, pushed back in place and leveled. Complete repair from diagnosis to back in operation took less than 15 minutes.
I pulled the washing machine away from the wall and tilted it bacwards and found the pump belt was off the pully and the drive belt was badly damaged. I replaced the 2 belts which took no tools ... Read more and about 3 minutes to accomplish then resecured the front panel, pushed back in place and leveled. Complete repair from diagnosis to back in operation took less than 15 minutes.
Read less
Was this instruction helpful to you?
Thank you for voting!
washer would not start
To see if the lid switch was the problem I first jumped it out and tried to start the washer. That was the problem. I removed the main controll so I could get to the lid switch. I made the mistake of removing the screws all the way out and the metal clip fell into the body of the washer, no problem since I was changing the drive beld anyw
... Read more
ay. I realized that you do not remove the screws all the way out, you just have to loosen them and then slide out the lid switch & then replace it.
Read less
Was this instruction helpful to you?
Thank you for voting!