


Models
>
PAV2300AGW
PAV2300AGW Maytag Washer
Jump to:
Find Part by Name
Keep searches simple, eg. "belt" or "pump".
Diagrams for PAV2300AGW
Viewing 10 of 10
 Diagram and Parts List for Maytag Washer")


.gif "SUPPLEMENTAL INFORMATION Diagram and Parts List for Maytag Washer")


 Diagram and Parts List for Maytag Washer")


Manuals & Guides for PAV2300AGW
Click to downloadKeep searches simple, eg. "belt" or "pump".

$7.60
This suspension spring is used with many washing machines. It is made entirely of metal and is seven inches long.
In Stock
Order now and your part arrives by Apr 9

$14.16
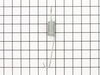
This lid hinge in an inch and a half long and is used for some washing machines. It is all white in color and it is made entirely of plastic.
In Stock
Order now and your part arrives by Apr 9

$19.63
This lid hinge pin is just over an inch long. It is all white in color and is made entirely of plastic. Sold individually.
In Stock
Order now and your part arrives by Apr 9

$96.29
This pump helps expel water from the washing machine and is activated after the spin speed is maintained for a specific period of time. NOTE: This is a redesigned part. The pump now mounts on to the b...
In Stock
Order now and your part arrives by Apr 9

$10.88
This snubber ring fits washers and is located between the leg and dome assembly. The ring has a diameter of 9 inches. It is used to reduce noise and vibration for stability when the washer is operatin...
In Stock
Order now and your part arrives by Apr 9

Also known as Thrust Bearing Kit. This kit includes the pulley, washer, thrust bearing, 2 upper race washers and 1 lower race washer. These parts are NOT available separately - they are ONLY availab...
In Stock
Order now and your part arrives by Apr 9

$7.60
This is a multi-use screw and can be used on a variety of appliances. The measurements of the screw are: 8/18 x 3/8. *Please note: the screw is sold individually. Refer to the manual provided by the m...
In Stock
Order now and your part arrives by Apr 9

$7.60
This hose clamp extends from half an inch to an inch in diameter. It is made entirely of metal and is intended for use with Maytag brand washing machines.
In Stock
Order now and your part arrives by Apr 9

This package contains a new set of six springs. The suspension springs in your washer connect to the bottom of tub, and help to hold it in place. If your washer tub shakes, or moves around a lot durin...
In Stock
Order now and your part arrives by Apr 9

In Stock
Order now and your part arrives by Apr 9

In Stock
Order now and your part arrives by Apr 9

In Stock
Order now and your part arrives by Apr 9
Questions and Answers
We're sorry, but our Q&A experts are temporarily unavailable.
Please check back later if you still haven't found the answer you need.
Common Problems and Symptoms for PAV2300AGW
Viewing 10 of 10Leaking
Fixed by these parts


How to fix it
Lid or door won’t close
Fixed by these parts


How to fix it
Will not drain
Fixed by these parts

How to fix it
Spins slowly
Fixed by these parts


How to fix it
Will not agitate
Fixed by these parts

How to fix it
Burning smell
Fixed by these parts
How to fix it
Shaking and Moving
Fixed by these parts

How to fix it
Will Not Start
Fixed by these parts
How to fix it
Spinning Issues
Fixed by these parts
How to fix it
Noisy
Fixed by these parts
How to fix it


Keep searches simple. Use keywords, e.g. "leaking", "pump", "broken" or "fit".
One of the plastic hinge pins brroke
I used a flat screw driver to push in on the releases so I could raise the top of the machine. I then used a torx tool to remove both parts of the hinge, and then used a #2 phillips screw driver, on the new screws I'd also ordered, to re-attach both of the hinge parts. Every thing went just as anticipated.
Was this instruction helpful to you?
Thank you for voting!
- Customer:
- David from Butler, PA
- Parts Used:
- WP21002026, WP21001598
- Difficulty Level:
- A Bit Difficult
- Total Repair Time:
- 1- 2 hours
- Tools:
- Pliers, Screw drivers, Wrench set
Washer jumping in spin cycle (white flakes under the washer)
Unlug the AC cord,open the top from the front it snaps open with a little force and hinges on the back, remove the 2 screws on the front cover and take it off, tip the washer and remove the belt, take off the pump hose from the back (I removed the back cover also) and the little hose going to the basket. Remove the 6 springs and lift the
... Read more
complete drum out of the waser and turn it upside down. You can see the plastic snubber ring that is worn, loosen the 6 screws just enough to get the old ring out and the new one in. WARNING (DO NOT TAKE THE SCREWS ALL THE WAY OUT OR THE BRAKE ASSEMBLY WILL RELEASE AND A SPECIAL TOOL IS NEEDED TO PUT IT BACK) Install the new ring, tighten the screws and put the tub back in connecting everything back up and use the 6 new springs. It really isn't that hard to do.
Read less
Was this instruction helpful to you?
Thank you for voting!
- Customer:
- robert from simpsonville, SC
- Parts Used:
- WP53-0120, 12002773, WP21002026
- Difficulty Level:
- Easy
- Total Repair Time:
- 30 - 60 mins
- Tools:
- Nutdriver, Pliers
EXCESSIVE Banging, shaking and squeaking while on Spin Cycle
1)Start with empty washing machine.
2)Disconnect Hot, Cold, Power and Drain lines
3)Move machine to open area, open top by popping 2 front retaining clips.
4)Remove Front panel, remove small clear water level hose at lower rear of tub.
5)Remove small Rear access panel, disconnect large tub drain hose from pump and drai ... Read more n into small container, about 4 cups of water will come out.
5)Remove the 6 suspension Springs.
6)Place two large towels next to washer and tip machine onto its side slowly.
7)Remove drive belt from bottom, and slide out wash tub assembly thru top opening, be Careful not to damage large Plastic drive pulley on bottom of tub.
8)With tub upside-down, remove drive pully small plastic cover in center, remove E-Clip and remove pulley.
9)Slowly loosen snubber ring retaining bolts a few turns, DO NOT Remove, just loosen enough until snubber is free to move around.
10)Remove snubber ring by walking it around the retaining ring and install new snubber.
11) Clean machine cabinet and clean machine base where snubber touches with alcohol or Windex.
12) Reassemble in reverse order and Do Not Forget to reattach the small clear Water level sensing HOSE to the tub before closing the top.
13)Place Drive Belt onto the 2 small pulleys First, then slowly turn large pulley while walking belt onto it.
14)Reconnect machine to utilities and test run on small load to ensure no leaks and propper operation.
15)Enjoy Quiet free operation once again :)
Read less
Was this instruction helpful to you?
Thank you for voting!