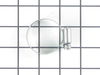
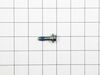
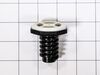
This is a multi-use screw and can be used on a variety of appliances. The measurements of the screw are: 8/18 x 3/8. *Please note: the screw is sold individually. Refer to the manual provided by the m...
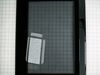
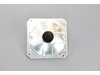
This 18 ml bottle of white appliance touch-up paint is used to cover scratches or marks on your appliance. The white touch-up paint can be used on refrigerators, microwaves, ranges, clothes dryers, an...
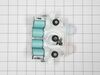
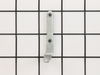
If your washer isn’t filling properly or is leaking near the back, this inlet valve might be the problem. It controls how hot and cold water enter your machine during the wash cycle. With two inlets a...
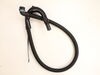
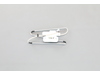
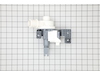
This lid lock assembly is a safety-critical component found in many top-load washing machines. Positioned beneath the washer lid, it includes both the locking mechanism and the wiring harness needed t...
This washing machine cleaner includes three time-release tablets designed to remove odor-causing residues, grime, and buildup from high-efficiency and top-load washing machines. The tablets work by cl...
This OEM glass lid assembly fits select top-load washing machines and includes the lid lock feature. Made from tempered glass and durable plastic in a chrome shadow finish, it replaces broken or malfu...
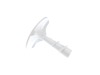
If your washer isn’t cleaning clothes like it used to, the agitator might be the issue. This part spins back and forth to help scrub dirt from fabrics, using a central shaft and fins to move clothes a...
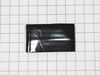
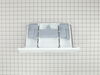
This is a dispenser drawer assembly direct from the manufacturer and used in washing machines. This drawer is made of plastic and features the compartments for bleach, detergent, and softener, for you...
Ask our experts a question about this part and we'll get back to you as soon as possible!
4 questions answered by our experts.
< Prev
1
Next >
Sort by:
Search filter:
Clear Filter
Your search term must have 3 or more characters.
Keep searches simple. Use keywords, e.g. "leaking", "pump", "broken" or "fit".
Sorry, we couldn't find any existing answers that matched. Try using some different or simpler keywords, or submit your new question by using the "Ask a Question" button above!
Linda
February 8, 2023
Sounds like out of balance but it's not
For model number MVWB765FW3
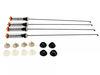
Hello Linda, thank you for contacting us. It looks like the suspension rod assembly, part number FIX12347544, is damaged on your washer. It helps in keeping the washer stable during the spin operation. We hope this sorts out your problem!
Get an FOE5 code at start of the cycle with minimum load eg: some lingerie. Is there a sensor that causes this code and where is it located? If not a sensor, what would cause it. Have done a hard reset to no avail. Thank you for any assistance you can provide.
For model number MVWB765FW3
Hello Robert, thank you for getting in touch. A F0E5 error code indicates an unbalanced or overloaded load or a drain pump issue. Manually redistribute the load and ensure it's not too tight or single-item heavy. If the issue persists, check and clear the drain pump, part number FIX11738156, and its filter for clogs, as the error can also point to a drainage problem preventing the cycle from starting. We hope this helps.
Hello Robert, thank you for getting in touch. The clutch assembly or the shift actuator for your model is part number FIX10064562. You can see the image on the part page for the shift actuator. We hope this helps.
Washer plays an ascending tone, drains and spins then shuts down cycle without completing cycle.
For model number MVWB765FW3
Hello Chris, thank you for contacting us. Based on the problem description, the issue is probably because of a faulty console, part number FIX12347690, and/or the electronic control board, part number FIX16217891. Customer service is always available to help you place an order if you are having trouble doing so. Good luck with your repair.
1.) disconnect power to your washer. Turn off water supply and disconnect from the washer.
open the washer top and remove plastic cap from the wash plate
2.) using 7/16 socket, remove bolt from the wash plate. If you can't remove it with a socket , I recommend using impact wrench.
3.) remove wash plate
... Read more( you might need to spray penetrating oil or wd40 inside the bolt hole to loosen it. Check to make sure the wash plate gear grooves are not worn down, if they are, replace it.
4.) using your Maytag specific spaner nut wrench, remove the spaner nut from the shaft of the gear case. This should be right underneath where the wash plate was. If you can't turn it by hand , use a rubber mallet or hammer to encourage it.
5.) some people remove the wash basket at this point. I don't think it is necessary.
6.) close your washing machine. Tape the top closed to keep it from flying open. Tilt your washer back and prop it up where you have access to the underside of the washing machine.
7) remove motor rotor bolt and pull rotor off of the motor.
8.) disconnect the two wire connectors that supply power to motor. using a socket, remove bolts that are keeping motor attached to the gear case.
9.) Now that the gear case is all the is remaining on the underside, you can remove the 4 bolts that are holding the gear case to the washer. Now try to pull gear case out.
10.) if gearcase will not pull out, lower washer back to upright position. Spray penetrating oil or wd40 around the shaft of the gearcase and allow it to sit for 5-10 minutes. Using a hammer, lightly tap on the shaft of the gearcase and it should now fall out. ( you might have to apply penetrating oil again, or apply more force with the hammer.
11.) reinstall motor to new gearcase. Insert new gear case to the washer. Reinstall bolts and reconnect power supply wires.
12. ReInstall spaner nut inside the washer, reinstall wash plate.
Raised lid to remove two Torx head screws from each hinge. Lid will then lift off of hinges. Installation of new lid was the reverse of the removal procedure. It is best to install one hinge to the lid by removing that hinge from the washer. The lid can then be installed by inserting that hinge into it's spot and then over the other hinge
... Read more. Install the hinge screws into the second hinge and the job is complete. The lid now closes properly allowing the automatic lid lock to function properly.
Removed the old lid by removing the two screws on both sides of the lid holding it to the hinge. Then pull upon the lid to remove. Slide the new lid back on the hinges being careful to slide in the right slot in the lid. Replace the screws through the lid into the hinges and your done