


Models
>
WSM27TCAWWW
WSM27TCAWWW General Electric Washer
Jump to:
Find Part by Name
Keep searches simple, eg. "belt" or "pump".
Diagrams for WSM27TCAWWW
Viewing 6 of 6


Keep searches simple, eg. "belt" or "pump".

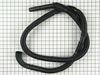
If your dryer is noisy while tumbling, you may need to replace the drum glides. This genuine OEM part is found attached to the front panel of your dryer. It is used to reduce friction and allows the d...
No Longer Available

$54.12
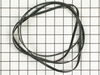
This 89.5-inch drive belt is for dryers. It has a 4-rib design on the inside for a better grip. If comparing the size of your current belt to the new one, keep in mind that a small amount of stretchin...
In Stock
Order now and your part arrives by Apr 9

In Stock
Order now and your part arrives by Apr 9

In Stock
Order now and your part arrives by Apr 9

In Stock
Order now and your part arrives by Apr 9


Mounting bracket on this part replaces old style ( You may need to drill off old bracket before mounting new lock).
No Longer Available

$52.50
This idler pulley assembly is a manufacturer-approved replacement part for your washer/dryer. The assembly includes the idler pulley and arm. The idler pulley provides tension for the belt to rotate t...
In Stock
Order now and your part arrives by Apr 9

This is the replacement lint filter for your dryer. The lint filter traps unwanted lint and debris so your dryer can effectively dry your clothes.
No Longer Available

In Stock
Order now and your part arrives by Apr 9

$192.34
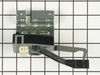
This dryer timer is used to control the unit's cycles by regulating the length of time that power is directed to each setting.
In Stock
Order now and your part arrives by Apr 9
Questions and Answers
We're sorry, but our Q&A experts are temporarily unavailable.
Please check back later if you still haven't found the answer you need.
Common Problems and Symptoms for WSM27TCAWWW
Viewing 15 of 15Noisy
Fixed by these parts


How to fix it
Marks left on clothes
Fixed by these parts
How to fix it
Drum Not Spinning
Fixed by these parts
How to fix it
Door won’t close
Fixed by these parts
How to fix it
Leaking
Fixed by these parts

How to fix it
Will not drain
Fixed by these parts

How to fix it
Won’t Start
Fixed by these parts

How to fix it
Burning smell
Fixed by these parts
How to fix it
Will not agitate
Fixed by these parts

How to fix it
Will Not Start
Fixed by these parts
How to fix it
Not Heating
Fixed by these parts

How to fix it
Spins slowly
Fixed by these parts
How to fix it
Door Pops Open
Fixed by these parts
How to fix it
Heat stays on after drum has stopped
Fixed by these parts
How to fix it
Touchpad does not respond
Fixed by these parts
How to fix it


Keep searches simple. Use keywords, e.g. "leaking", "pump", "broken" or "fit".
- Customer:
- Adrian from Middletown, MD
- Parts Used:
- WE03X29897
- Difficulty Level:
- A Bit Difficult
- Total Repair Time:
- 30 - 60 mins
- Tools:
- Screw drivers
Drum belt broke
Removed the front Dryer panel. Left drum in place and lifted it up slightly to get access to motor drive. Slipped belt in place and put panel back on.
This was a first attempt ever at fixing an appliance and it was no big deal.
This was a first attempt ever at fixing an appliance and it was no big deal.
Was this instruction helpful to you?
Thank you for voting!
- Customer:
- William from Boise, ID
- Parts Used:
- 5303937139
- Difficulty Level:
- Easy
- Total Repair Time:
- 15 - 30 mins
- Tools:
- Pliers, Screw drivers
Drum glide wore down and caused close to get stuck between drum and front panel.
Unpluged dryer. Removed the top of dryer by pushing in a retaining clip on both sides of the front lip with a screw driver. Remove the two screws on both sides of front panel. These screws are square head or phillips #2. Unplugged the wiring harness to front panel (make sure power has been disconnected). Support drum and lean front pa
... Read more
nel away from dryer body. Front panel will pull off of tabs at bottom. The old drum glide is fiberous and hard to remove. I removed most of it with the pliers, but had to carefully scrape the balance of the glide off with the wood chisel. The adhesive that comes with the repair part has an acetone base, so I used acetone (or you could use nail polish remover) to remove the old adhesive. Once the acetone has dried, I applied an 1/8" snaking bead of adhesive to the front panel. There is more adhesive in the tube than you need so do not use too much. Make sure that you get adhesive as close to the base of the lower seal as you can. Follow directions on adhesive tube and then attach the glide. I let it set up for about 30 seconds. Place the front panel back on the tabs of the dryer. Carefully lift the drum an fit it on the front panel and insert the two screws holding the panel to the base. Reconnect the wiring harness and make sure it is not in contact with the drum. Check to make sure that all of the electrical connectors on the timer are still in place. Reassemble the dryer. Reconnect power.
Read less
Was this instruction helpful to you?
Thank you for voting!
- Customer:
- Aaron from Williamson, WV
- Parts Used:
- 134422700
- Difficulty Level:
- Really Easy
- Total Repair Time:
- 30 - 60 mins
- Tools:
- Screw drivers
Leaking washing machine; water would not shut off on fill up and rinse
Replacing the switch is relatively easy, however, I would caution all experiencing similar problems one thing. Before assuming, as I did, that the switch was bad, first remove the panel of the washer that houses the washing tub/basin. On the back of the tub, check to make sure that the tube connecting the tub and switch has not come off
... Read more
from the tub as it did in my situation. The solution to my problem of a leaking washing machine where the water would not stop filling on both wash and rinse cycles was simply reattaching the tube to the tub. If I would have checked that first, total job completion time would have been under 15 minutes. Hope this helps. If you need to replace the actual switch, remove the knobs, screws, and panel. Remove the wires, tube, and screw from the switch and reassemble new switch. That took me about 30-45 minutes.
Read less
Was this instruction helpful to you?
Thank you for voting!