


Models
>
52270-W2
52270-W2 General Electric Washer
Jump to:
Find Part by Name
Keep searches simple, eg. "belt" or "pump".
Diagrams for 52270-W2
Viewing 6 of 6


Keep searches simple, eg. "belt" or "pump".

$54.95
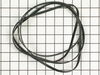
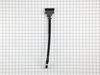
This 89.5-inch drive belt is for dryers. It has a 4-rib design on the inside for a better grip. If comparing the size of your current belt to the new one, keep in mind that a small amount of stretchin...
In Stock
Order now and your part arrives by Jul 31

In Stock
Order now and your part arrives by Jul 31

In Stock
Order now and your part arrives by Jul 31

This screw-in plastic leveling leg supports the washing machine. If your washer loses balance while it is tumbling, or makes loud noises, then it is best to replace the leveling leg to make sure the h...
Special Order

$25.25
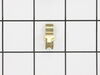
This screw is designed to fit washers and dryers. Refer to the diagram provided by the manufacturer for further installation instructions and accurate application of screw in your tool.
In Stock
Order now and your part arrives by Jul 31


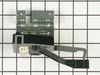
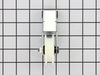
Mounting bracket on this part replaces old style ( You may need to drill off old bracket before mounting new lock).
No Longer Available

On Order

This is the replacement lint filter for your dryer. The lint filter traps unwanted lint and debris so your dryer can effectively dry your clothes.
No Longer Available

In Stock
Order now and your part arrives by Jul 31

$228.63
This dryer timer is used to control the unit's cycles by regulating the length of time that power is directed to each setting.
In Stock
Order now and your part arrives by Jul 31

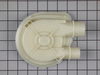
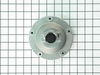
This pump sucks the water out of your washers tub with one of its valves, and drains the water into a drain hose with the other valve.
No Longer Available
Common Problems and Symptoms for 52270-W2
Viewing 13 of 13Noisy
Fixed by these parts
How to fix it
Drum Not Spinning
Fixed by these parts
How to fix it
Door won’t close
Fixed by these parts
How to fix it
Won’t Start
Fixed by these parts

How to fix it
Will not drain
Fixed by these parts
How to fix it
Leaking
Fixed by these parts
How to fix it
Will not agitate
Fixed by these parts

How to fix it
Burning smell
Fixed by these parts
How to fix it
Will Not Start
Fixed by these parts
How to fix it
Spins slowly
Fixed by these parts
How to fix it
Door Pops Open
Fixed by these parts
How to fix it
Heat stays on after drum has stopped
Fixed by these parts
How to fix it
Touchpad does not respond
Fixed by these parts
How to fix it


Keep searches simple. Use keywords, e.g. "leaking", "pump", "broken" or "fit".
- Customer:
- Adrian from Middletown, MD
- Parts Used:
- WE03X29897
- Difficulty Level:
- A Bit Difficult
- Total Repair Time:
- 30 - 60 mins
- Tools:
- Screw drivers
Drum belt broke
Removed the front Dryer panel. Left drum in place and lifted it up slightly to get access to motor drive. Slipped belt in place and put panel back on.
This was a first attempt ever at fixing an appliance and it was no big deal.
This was a first attempt ever at fixing an appliance and it was no big deal.
Was this instruction helpful to you?
Thank you for voting!
- Customer:
- Jenessa from Tacoma, WA
- Parts Used:
- 134101800
- Difficulty Level:
- Easy
- Total Repair Time:
- 15 - 30 mins
- Tools:
- Screw drivers
Lid Lock Assembly broke
The Lid Lock Assembly came super fast! The install would have been flawless, but the "pre-drilled" holes on the new Lid Lock Assembly were way to small. We found that out after we had reconnected the wires and gotten it into place. Aside from that small set back, the install went great! This repair is definitey not one that you would
... Read more
need to pay a repair person to do!
Read less
Was this instruction helpful to you?
Thank you for voting!
- Customer:
- Richard from Ashton, MD
- Parts Used:
- WE03X29897
- Difficulty Level:
- Easy
- Total Repair Time:
- 1- 2 hours
- Tools:
- Nutdriver, Screw drivers
Broken Dryer Belt
I had to take most of the dryer apart because there is no rear access to the motor. It turned out to be easy to dissasembel the dryer. The only problem that I had was that I could not figure out how to route the belt around the motor and the idol pullies. I could not find anywhere that gave instructions on how to properly tension the belt
... Read more
. I finally figured out that the idoler pulley needs to be locked in place on the right side of the engie mount. Then the belt needs to be routed over idoler pulley and under the motor pulley. Finally release the idoler pully from the locked postion to put tension on the belt. It really turned out to be pretty easy.
Read less
Was this instruction helpful to you?
Thank you for voting!