


Models
>
GHDSR209H3WW
GHDSR209H3WW General Electric Washer
Jump to:
Find Part by Name
Keep searches simple, eg. "belt" or "pump".
Diagrams for GHDSR209H3WW
Viewing 4 of 4


Manuals & Guides for GHDSR209H3WW
Click to downloadKeep searches simple, eg. "belt" or "pump".

$14.16
This is a genuine OEM replacement timer knob for your washing machine that is white in color. Replacing this part is a simple repair that only requires a pair of needle nose pliers. We suggest disconn...
In Stock
Order now and your part arrives by Apr 6

This knob and clip set is an OEM replacement part for your washer or dryer timer. It is common for this plastic knob to break around the shaft, or for the retainer clip inside the knob to go missing, ...
In Stock
Order now and your part arrives by Apr 6

This clip fits inside the control knobs for your laundry machines, and helps to securely fasten the knob to the shaft, which allows you to easily turn the knob to select the correct settings. This is ...
No Longer Available

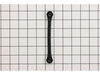
$33.20
This is a genuine OEM drain hose for your top-load washing machine. It is made with a flexible and corrugated black material, and measures 57-inches in length. The purpose of the drain hose is to move...
In Stock
Order now and your part arrives by Apr 6

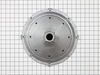
$61.32
This is an authentic agitator for your washer, responsible for moving clothes inside the tub. Please note, it does not come with the fabric dispenser, so you will need to either transfer the old one t...
In Stock
Order now and your part arrives by Apr 6

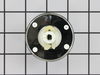
$15.26
This timer dial with compression ring is a genuine OEM part for your washer. The dial is made of plastic and is white in color. It can be found on the timer shaft underneath the timer knob, and it fea...
In Stock
Order now and your part arrives by Apr 6

This pump helps expel water from the washing machine and is activated after the spin speed is maintained for a specific period of time.
In Stock
Order now and your part arrives by Apr 6

$20.72
If your washer is leaking when it is filling or agitating, you may need to replace the tub seal. The tub seal is found between the transmission and the outer tub in your washing machine. This genuine ...
In Stock
Order now and your part arrives by Apr 6


In Stock
Order now and your part arrives by Apr 6

$41.78
The tub bearing secures the spin basket in the tub assembly of a washer. It is located on the bottom of the outer tub. A common symptom of a worn tub bearing is a very loud noise (including a grinding...
In Stock
Order now and your part arrives by Apr 6

$28.91
Bolt not included. This part connects the transmission drive shaft to the agitator base.
In Stock
Order now and your part arrives by Apr 6
Questions and Answers
We're sorry, but our Q&A experts are temporarily unavailable.
Please check back later if you still haven't found the answer you need.
Common Problems and Symptoms for GHDSR209H3WW
Viewing 16 of 16Leaking
Fixed by these parts


How to fix it
Will not drain
Fixed by these parts

How to fix it
Will not agitate
Fixed by these parts


How to fix it
Will Not Start
Fixed by these parts


How to fix it
Marks left on clothes
Fixed by these parts
How to fix it
Shaking and Moving
Fixed by these parts
How to fix it
Burning smell
Fixed by these parts

How to fix it
Touchpad does not respond
Fixed by these parts
How to fix it
Spinning Issues
Fixed by these parts

How to fix it
Noisy and Marks Left on Clothes
Fixed by these parts

How to fix it
No hot or cold water
Fixed by these parts

How to fix it
Timer Not Working
Fixed by these parts
How to fix it
Won’t Start
Fixed by these parts
How to fix it
Cycle Not Advancing
Fixed by these parts
How to fix it
Draining Issues
Fixed by these parts
How to fix it
Noisy
Fixed by these parts
How to fix it


Keep searches simple. Use keywords, e.g. "leaking", "pump", "broken" or "fit".
- Customer:
- Charles from Dallas, GA
- Parts Used:
- WH01X10310
- Difficulty Level:
- Really Easy
- Total Repair Time:
- Less than 15 mins
- Tools:
- Pliers
Control knob teeth were worn
I spoke to a very nice young ladie who took my order and I received my order within two days. I pull the clasp off of the old knob and replace the knob and the clasp with the new part and it now works great. Thank you for helping me find the part I needed.
Was this instruction helpful to you?
Thank you for voting!
- Customer:
- Irina from Englewood, NJ
- Parts Used:
- WE01X20378
- Difficulty Level:
- Really Easy
- Total Repair Time:
- Less than 15 mins
The original Knob just fell apart
The repair was so easy when I got the part, I did it myself without any help in 5 seconds!
Was this instruction helpful to you?
Thank you for voting!
- Customer:
- douglas from danby, VT
- Parts Used:
- WH23X10030
- Difficulty Level:
- Easy
- Total Repair Time:
- 30 - 60 mins
- Tools:
- Socket set
machine would not drain all other functions seemed o.k
Aside from getting the wet clothes and most of the water out,the toughest part of the job for me was to figure out how to get inside the machine. I nearly wrecked the thing trying to lift the top panel. After some frustration I removed the star-type screws on back of the control panel and found, tucked away neatly, the documentation/parts
... Read more
list complete with instructions on how to remove the FRONT panel. Once I got inside it was easy to locate the pump. I ran the drain cycle for a moment to see if the pump turned at all. The original had an exposed fan so it was easy to see that indeed the motor was not turning. I inspected all the hose and electrical connections to make sure I had the tools I'd need and the savvy to replace the part(s) if I could locate them. I'm not much of a web-head, so I was a little surprised when I typed G.E. appliances and the search took me to partselect.com where I was pretty much coached through the procedure before I even ordered the part. The box arrived ahead of schedule (yay) and when I looked at the pump it didn't look much like the one I was replacing. But then I realized it was the same thing just ten years more advanced. I used a small pair of vise grips to pinch and lock the pipe clamps open. I know there is a plier made for this, but... Anyways, after loosening the clamps and sliding them away from the pump I pulled the hoses off and let the last of the rinse water still in them run down my shirt sleeve to my elbow. (optional, not recommended) Thus refreshed I then rummaged through my socket set and found what I needed to remove the 2 sheet metal mounting screws and disconnected the 2 power leads. I removed the faulty pump and proudly showed it to my wife. Unimpressed, she asked how much longer. I quickly reversed the procedure to install the new unit and confidently piled in a load of laundry. The cycle completed just fine and has done so since. I will and have recommmended partselect.com to friends and will use it again for sure.
Read less
Was this instruction helpful to you?
Thank you for voting!