


Models
>
CW3303W
CW3303W (P1128411WW) Amana Washer
Jump to:
Find Part by Name
Keep searches simple, eg. "belt" or "pump".
Diagrams for CW3303W
Viewing 8 of 8


Keep searches simple, eg. "belt" or "pump".

On Order

$13.07
This metal retaining ring is well under an inch long. Use it for your Maytag brand clothes washer or your clothes dryer.
In Stock
Order now and your part arrives by Mar 29

$7.60
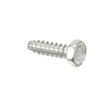
This is a multi-use screw and can be used on a variety of appliances. The measurements of the screw are: 8/18 x 3/8. *Please note: the screw is sold individually. Refer to the manual provided by the m...
In Stock
Order now and your part arrives by Mar 29

$9.79
This front cover spring retaining clip is not quite an inch long. It is made entirely of metal and is used for some washing machines.
In Stock
Order now and your part arrives by Mar 29
 – Part Number: WP28808")
This v-style drive belt is thirty-two and a half inches long and half of an inch wide.
In Stock
Order now and your part arrives by Mar 29

$7.60
Sold individually. NOTE: The color on the screw may not be the same as the image, but will still function the same.
In Stock
Order now and your part arrives by Mar 29

In Stock
Order now and your part arrives by Mar 29

In Stock
Order now and your part arrives by Mar 29

In Stock
Order now and your part arrives by Mar 29

Special Order

This washing machine drive bell and seal kit comes with a seal, a plug, a shoulder screw, a drive bell, and some grease.
No Longer Available
 – Part Number: WP27155")
This V-style cogged tooth pump belt is used in conjunction with the drive belt in your washing machine. This belt is all black in color and is made entirely of rubber. It is twenty-two and a half inch...
No Longer Available
Questions and Answers
We're sorry, but our Q&A experts are temporarily unavailable.
Please check back later if you still haven't found the answer you need.
Common Problems and Symptoms for CW3303W
Viewing 6 of 6Noisy
Fixed by these parts


How to fix it
Leaking
Fixed by these parts


How to fix it
Will not agitate
Fixed by these parts
How to fix it
Burning smell
Fixed by these parts
How to fix it
Will not drain
Fixed by these parts

How to fix it
Spins slowly
Fixed by these parts
How to fix it


Keep searches simple. Use keywords, e.g. "leaking", "pump", "broken" or "fit".
- Customer:
- John from Milton, PA
- Parts Used:
- WP28808
- Difficulty Level:
- Really Easy
- Total Repair Time:
- 15 - 30 mins
- Tools:
- Nutdriver, Screw drivers
Frayed V-belt
VERY EASY!!!
SAFETY FIRST-Always unplug the appliance.
Use 8mm socket to remove front panel screws. Loosened up two hose clamps connected to the pump and removed both lines (Hoses contain water, use a towel) which is located underneath the motor. Disconnect motor electrical connector on the left side of the motor. With socket, r ... Read more emove 4 mounting bracket screws that secure the motor and pump assembly. Pull back the tension/idler pulley to loosen belt off the main pulley to the washer drum. Tilt and pull out motor/pump assembly. Underneath the pump, use star-bit to remove the pump from motor assembly to remove the belt. Install new belt on motor pulley (Good time to check for debris or anything restricing free movement of pump) and re-install pump. Install the motor/pump assembly and loosely secure the motor/pump assembly. Place the belt onto the motor pulley and pull back the tensioner/idler pulley to allow slack of belt to be placed on washer drum pulley. Put the belt on the lip of the drum pulley and rotate while pulling back the tensioner/idler pulley until the belt is seated on the groove of the drum pulley. Tighten the motor/pump assembley. Re-attach the 2 hoses and tighten down the clamps. Re-connect the electrical connector to the motor...Don't forget to plug in the washer and secure the front panel...Piece 'O cake, you're done! About 15 minutes to do the job. Much like changing a belt on most vehicles.
Read less
Was this instruction helpful to you?
Thank you for voting!
- Customer:
- HOWARD from CORTLAND, OH
- Parts Used:
- 495P3
- Difficulty Level:
- Easy
- Total Repair Time:
- 1- 2 hours
- Tools:
- Nutdriver, Screw drivers, Socket set, Wrench (Adjustable)
The Seal On The Bottom Of The Tub Was Leaking
Removed the front of the washer, then lifted the top up and held it up with a prop. Pulled the agitator straight up and started the disasembly. Using the photos in the hub and seal kit was a big help. The large nut on the output shaft had to be cut off with my dremel tool and the hub removed with a wheeler puller. Assembly was pretty
... Read more
much straight forward. Primed the pump and started the machine for the stated time and was a sucess.
Read less
Was this instruction helpful to you?
Thank you for voting!
- Customer:
- Raymond from East Sandwich, MA
- Parts Used:
- 495P3
- Difficulty Level:
- Easy
- Total Repair Time:
- 1- 2 hours
- Tools:
- Socket set, Wrench set
tub leaking water
Took off the agitator, removed inner tub, exposing the hub drive. Found fusion between hub drive and agitator shaft. Rather than using a wheel puller as instructions recommended I got my masonry hammer and removed the drive hub in pieces. Removed debris from the tub. Installed sealant around lower seal as instructed. Re-assembled inne
... Read more
r tub, agitator with new upper seal. Plugged in the washer, turned on the water. No leak. Happy happy.
Read less
Was this instruction helpful to you?
Thank you for voting!