



Models
>
35563
35563 (ASSEEUS) LG Washer Dryer Combo
Jump to:
Find Part by Name
Keep searches simple, eg. "belt" or "pump".
Diagrams for 35563
Viewing 3 of 3


Keep searches simple, eg. "belt" or "pump".

$154.80
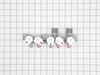
This is an authentic LG water inlet valve for a top-load washer. It is designed to control the flow of water into the washer. If your washer is filling slowly, making loud noises, overflowing, or stop...
In Stock
Order now and your part arrives by Nov 23

$58.25
The motor rotor position sensor monitors the direction and speed of the spinning rotor and communicates this information to the electronic control board. If your washer is displaying an LE error code ...
In Stock
Order now and your part arrives by Nov 23

$49.45
Clothing moves over a covered mounting point with help from this washer pulsator cap. The round plastic cover snaps into the center of the washplate, concealing the mounting bolt and providing a smoot...
In Stock
Order now and your part arrives by Nov 23

$202.55
This is a pulsator assembly, also known as an agitator, for your washing machine. This pulsator sits at the bottom of your washer and is what is used as the main driving force to wash your clothes. If...
In Stock
Order now and your part arrives by Nov 23

$207.48
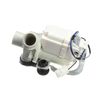
Drain used wash water with this top-load washer drain pump assembly. Its motor drives an internal impeller that pushes water from the tub through the drain hose during drain and spin cycles. This is a...
In Stock
Order now and your part arrives by Nov 23

$42.85
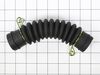
This washer tub-to-pump drain hose is used to carry used water from the outer tub to the drain pump during draining. Its flexible, corrugated design accommodates tub movement while keeping water conta...
In Stock
Order now and your part arrives by Nov 23

$32.95
Restore a washer component?s fastening point with this replacement screw when the original is missing, stripped, or damaged. Secure fastening helps parts stay firmly attached during operation. A worn ...
In Stock
Order now and your part arrives by Nov 23

In Stock
Order now and your part arrives by Nov 23

This pressure sensor assembly measures changes in air pressure through a connected tube as water enters or leaves the tub. Accurate water level sensing helps the washer fill and advance through its cy...
In Stock
Order now and your part arrives by Nov 23

$154.80
This lid switch and lock assembly keeps the washer lid secure during operation. It detects whether the lid is closed and sends that information to the main control board. This is an OEM replacement ob...
In Stock
Order now and your part arrives by Nov 23

$177.23
This washer suspension rod assembly reduces excess tub movement. It supports the tub and cushions its motion during washing and spinning, helping keep the load stable inside the cabinet. The manufactu...
In Stock
Order now and your part arrives by Nov 23

$44.99
This part is the replacement fabric softener cap for your washer. It is also known as the washer dispenser drawer insert. It is made of blue plastic and is approximately 4 1/4 inches by 2 1/4 inches. ...
In Stock
Order now and your part arrives by Nov 23
Common Problems and Symptoms for 35563
Viewing 13 of 13Leaking
Fixed by these parts
How to fix it
Will not agitate
Fixed by these parts
How to fix it
Will not drain
Fixed by these parts
How to fix it
Water Filling Issues
Fixed by these parts
How to fix it
Spinning Issues
Fixed by these parts
How to fix it
Will Not Start
Fixed by these parts
How to fix it
Draining Issues
Fixed by these parts
How to fix it
Marks left on clothes
Fixed by these parts
How to fix it
No hot or cold water
Fixed by these parts
How to fix it
Lid or door won’t close
Fixed by these parts
How to fix it
Spins slowly
Fixed by these parts
How to fix it
Does not dispense fabric softener or detergent
Fixed by these parts
How to fix it
Locking Issues
Fixed by these parts
How to fix it
Keep searches simple. Use keywords, e.g. "leaking", "pump", "broken" or "fit".
- Customer:
- Mark from Harrisburg, PA
- Parts Used:
- 6501KW2002B
- Difficulty Level:
- Easy
- Total Repair Time:
- 30 - 60 mins
- Tools:
- Screw drivers, Socket set
LE Error Message and won't spin drum properly
I first tested the motor per the service manual. I checked the resistance between the terminals of the 3 pin connector. It's supposed to be 5-15 ohms. The motor checked out so I replaced the main electrical board. It turns out that wasn't the problem. After a brief web search I found out that the hall sensor (which is attached to the
... Read more
motor stator) was the likely cause of the failure. I replaced that and everything works great now. And now I have a spare main board in case that ever fails. I also want to mention that I took the time to remove the dispenser box (where the water comes in and is directed to the different cleaning products) and cleaned it with a very strong bleach solution. It got rid of the mildew and funky smell. It seems that the fabric softener caused a lot of mildew to form inside the dispenser directly above the fabric softener tray. The bleach took care of that. This is probably something that should be done routinely to keep the mildew from forming.
Read less
Was this instruction helpful to you?
Thank you for voting!
- Customer:
- scott from GODDARD, KS
- Parts Used:
- 6501KW2002B
- Difficulty Level:
- Really Easy
- Total Repair Time:
- 30 - 60 mins
- Tools:
- Screw drivers, Socket set
LE fail code
Removed back of washer with screw driver, Removed outer motor cover with a 17 mm socket (1 bolt), Removed motor stater using 10 mm socket (8 bolts). Left motor plugged in and and tipped to the side exposing the sensor. Unplug and snap off sensor. Reassembled in opposite order. Machine works great. Very easy fix, and perfect fit on part.
Was this instruction helpful to you?
Thank you for voting!
- Customer:
- Jesus from El Paso, TX
- Parts Used:
- 5859EA1004P
- Difficulty Level:
- Very Easy
- Total Repair Time:
- 15 - 30 mins
- Tools:
- Socket set, Wrench set
It did not drain water, cycle stops at rinse+spin.
1-Take water off manually. 2- Take machine to back yard. 3- lay machine 45 degrees. 4- Located water bump, (rear left side). 5-removed drain black hoses with hand. 6-removed 3 screws from bump frame. 7-Taker off all unit and marked down cable position at plug. 8- installed new pump. 9- Reverse all steps. Note: I did not use new cable su
... Read more
pplied with the new bump, I did not want to mess around on mother board connections, I kept old wire harness which are only two cables blue and gray. It took me less than 30 minutes.
Read less
Was this instruction helpful to you?
Thank you for voting!