


Models
>
11087842700
11087842700 Kenmore Washer Dryer Combo
Jump to:
Find Part by Name
Keep searches simple, eg. "belt" or "pump".
Diagrams for 11087842700
Viewing 14 of 14


Keep searches simple, eg. "belt" or "pump".

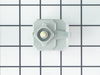
Commonly referred to as dog ears, these agitator directional cogs are manufacturer approved replacement parts that come in a package of 4 and are usually used with direct drive washing machines. We re...
In Stock
Order now and your part arrives by Jul 23

$27.28
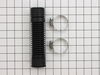
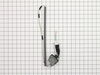
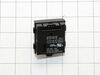
Often referred to as a dryer belt tension pulley wheel, this idler pulley is an OEM approved replacement part for a variety of dryer models. The idler pulley puts tension on the drive belt, and if the...
In Stock
Order now and your part arrives by Jul 23

$25.10
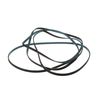
This is a single dryer drum belt that measures 93.5 inches. The belt rotates the dryer drum and is a common wear part that can become brittle over time. It can also stretch and change shape, so keep t...
In Stock
Order now and your part arrives by Jul 23

$11.98
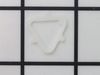
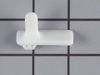
This small but mighty OEM piece is called a tri-ring and is used to support the drum roller shaft and the idler pulley shaft in your dryer. It helps to provide a tight seal between components by evenl...
In Stock
Order now and your part arrives by Jul 23

$6.51
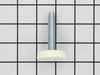
This bolt is a genuine OEM replacement part, used to secure the agitator in your washing machine. Overtime the bolt can become worn out due to the vibrations of the washer, and will need to be replace...
In Stock
Order now and your part arrives by Jul 23

$9.79
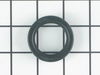
Also known as an O-Ring. This black o-ring seal is three inches in diameter.
In Stock
Order now and your part arrives by Jul 23

In Stock
Order now and your part arrives by Jul 23

$7.60
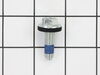
This is a multi-use screw and can be used on a variety of appliances. The measurements of the screw are: 8/18 x 3/8. *Please note: the screw is sold individually. Refer to the manual provided by the m...
In Stock
Order now and your part arrives by Jul 23

$7.60
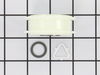
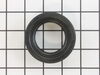
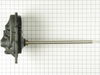
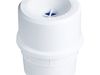
Stop leaks before they start with this outer tub seal. It fits between the tub and base to keep water inside where it belongs. At about 2 inches across, this sturdy black gasket is built to last. Inst...
In Stock
Order now and your part arrives by Jul 23

In Stock
Order now and your part arrives by Jul 23

$7.60
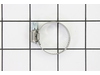
This hose clamp extends from half an inch to an inch in diameter. It is made entirely of metal and is intended for use with Maytag brand washing machines.
In Stock
Order now and your part arrives by Jul 23

$24.15
This 18 ml bottle of white appliance touch-up paint is used to cover scratches or marks on your appliance. The white touch-up paint can be used on refrigerators, microwaves, ranges, clothes dryers, an...
In Stock
Order now and your part arrives by Jul 23
Common Problems and Symptoms for 11087842700
Viewing 17 of 17Will not agitate
Fixed by these parts


How to fix it
Noisy
Fixed by these parts
How to fix it
Leaking
Fixed by these parts
How to fix it
Drum Not Spinning
Fixed by these parts
How to fix it
Spins slowly
Fixed by these parts
How to fix it
Will not drain
Fixed by these parts
How to fix it
Spinning Issues
Fixed by these parts
How to fix it
Won’t Start
Fixed by these parts
How to fix it
Will Not Start
Fixed by these parts
How to fix it
Marks left on clothes
Fixed by these parts
How to fix it
Does not dispense fabric softener or detergent
Fixed by these parts
How to fix it
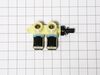
No hot or cold water
Fixed by these parts
How to fix it
Shaking and Moving
Fixed by these parts
How to fix it
Burning smell
Fixed by these parts

How to fix it
Not cleaning dishes properly
Fixed by these parts
How to fix it
Lid or door won’t close
Fixed by these parts

How to fix it
Noisy and Marks Left on Clothes
Fixed by these parts
How to fix it


Keep searches simple. Use keywords, e.g. "leaking", "pump", "broken" or "fit".
- Customer:
- mike from Kent, WA
- Parts Used:
- 80040
- Difficulty Level:
- Easy
- Total Repair Time:
- 15 - 30 mins
- Tools:
- Screw drivers, Socket set
washer wouldn't agitate
First pry off the cap of the agitator. Then using a socket remove the bolt that holds the plastic cup in place. Remove this cup by prying it loose from the two tabs that hold it in place. Once this cup is removed you can get to the broken cogs.
Slip the new cogs into the underside of the cup, and slide the cup back down in the a ... Read more gitator housing using the slots on the side for a guide. (You may want to remove the entire agitator and assemble everything upside down, then flip it all back over to mount, so the cogs don't fall out).
Tighten the bolt, snap the cap back in place on top of the agitator and your'e done. Easy repair.
Read less
Was this instruction helpful to you?
Thank you for voting!
- Customer:
- dennis from new stanton, PA
- Parts Used:
- 80040
- Difficulty Level:
- Really Easy
- Total Repair Time:
- Less than 15 mins
- Tools:
- Socket set
top half of agitator did not move during wash cycle
pull off softner dispenser, pop off agitator cap by inserting straight screw driver into small slot, remove bolt inside agitator with socket wrench and long extension, pull agitator straight up off shaft, place agitator on floor, with feet holding bottom half pull top half apart from bottom half by pulling straight up, note direction of o
... Read more
ld cogs remove and replace with new, reassemble
Read less
Was this instruction helpful to you?
Thank you for voting!
Gearcase oil leak
To replace gearcase seals, first disconnect the power cord. Turn off water supply and remove water inlet hoses at washer (safety first). You may want to have a bucket available to catch water that will drain out of the hot/cold and drain hoses. Next, remove top agitator cap, seal and (7/16”) bolt (see diagrams on PartSelect). This will al
... Read more
low the top agitator and cogs to be removed. Grab the bottom agitator and rock it back and forth until it can be removed.
Suggestion: now is a good time to remove and clean the old soap and junk from drain holes in the top agitator and any junk that may be under the lower agitator.
Lay the washer on its right side. You will now have access to the motor, pump, hoses clutch and gearcase. Place a couple of 2X4X(5?) blocks under the tub to support it. Remove the electrical connector from the motor (this is clipped into place) and the two wires that go to the capacitor on the motor.(TIP: don’t put your finger across these terminals, SHOCK HAZARD) Remove the hose clamps and hoses, the two screws (5/16”) on each strap that holds the motor in place, you may have to use a screw driver to pop the straps off the motor. Remove the motor and pump by pushing the tub to the left and move the motor and pump to the right to clear the coupling. If you have not replaced the drive coupling, now would be a good time to order and replace. With the motor out of the way, remove the three (½”) bolts holding the gearcase to the chassis and pull to remove gearcase and shaft. If you are only replacing the drive shaft seal, you do not need to open the gearcase case. Stand the gearcase so the input shaft is facing up, or what fluid is left in the gearcase will come out. One question I see a lot is how do you remove the seal. One, buy a real expensive tool that you will only use once, or take a screwdriver with about a ¼” blade, stick it between the shaft and the seal, gently leverage the seal out while going around the shaft. After the seal is removed, oil can be added thru the seal hole. Understand that different oils are designed for different applications. That said, I used 90 weight gear oil from the local auto parts store, you can add it thru the seal hole. To install the seal, lightly tape it into the seal cavity, then use a socket that is close to the diameter of the seal and gently drive it in.
If you have to replace the top case seal, it will require you to take the gearcase apart. The advantage of this is, if you have an older washer, you can clean out the contaminated oil and sludge and check for wear on the parts, and replace as needed from PartSelect. Here’s a suggestion: if you have a digital camera, take pictures, this will really help when you put things back together.
Now look at the diagram that is provide by PartSelect, remove the clutch, remove the bolts on the top cover, try to keep it level or you may have a mess on your hands. Lift the cover up over the shaft. I found the top case seal very stubborn to remove. Using a small screwdriver, get between the case and the seal and gently pry it out. Replace the seal, again, by using a socket and gently taping into place. There is also a seal at the top of the drive gear that you may want to replace to keep the oil from going up into the clutch. Now its time to clean all of the years of gunk out of the case and gears. When you are ready, fill the bottom half of the gearcase with oil, about half a quart. To seal the case, I used a ultra blue silicone gasket sealer in a tube from my local auto parts store or sealant can be purchased from PartSelect. I used it on the top half of the gearcase case. Slide the top case over the shaft and evenly tighten the bolts. Reinstall the clutch to the gearcase shaft and install into the washer. I found that the motor bearings needed to be lubed, so I used white lithium grease in an aerosol can. Reinstall motor and don’t forget to put the electrical plug back into the motor and the wires that go to the capacitor and pump h
Read less
Was this instruction helpful to you?
Thank you for voting!