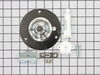
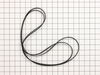
This ball-and-socket style bearing kit is used in your dryer to support the rear of the drum as it tumbles through the dry cycle. The bearing attaches on the inside of the rear panel of the dryer cabi...
The drum support bearing is an authentic OEM replacement part for your dryer. The bearing is used to support the drum and allow it to rotate smoothly and quietly. If your dryer is excessively noisy wh...
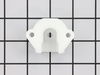
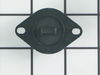
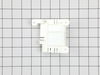
This door catch is an authentic OEM replacement part for your dryer. This part holds the door strike and ensures that the door stays closed while your dryer is running. This prevents hot air or laundr...
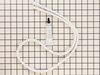
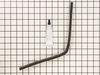
This dryer lint screen is for laundry centers.
Dryer lint screen captures lint and debris from the exhaust air flowing from the dryer.
Follow the instructions in the owner's manual when installing this part.
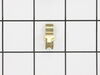
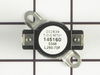
This thermal fuse limiter is used in dryers to monitor the temperature and make sure it does not overheat. The thermal fuse has a limit of 220 degrees Fahrenheit before the heating element and power a...
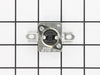
The two-terminal high limit thermostat has a limit of 260 degrees Fahrenheit and acts as a safety mechanism that keeps the dryer from overheating. The thermostat will cut out when the internal dryer t...
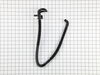
The upper felt seal for your dryer is attached to the top edge of the drum support area, and is held there by a high temperature adhesive. It creates a seal where the dryer door opens and closes, so t...
In Stock
Order now and your part arrives by Jul 24
Questions and Answers
Ask our experts a question about this part and we'll get back to you as soon as possible!
4 questions answered by our experts.
< Prev
1
Next >
Sort by:
Search filter:
Clear Filter
Your search term must have 3 or more characters.
Keep searches simple. Use keywords, e.g. "leaking", "pump", "broken" or "fit".
Sorry, we couldn't find any existing answers that matched. Try using some different or simpler keywords, or submit your new question by using the "Ask a Question" button above!
Cindi
October 6, 2021
Assuming that belt in dryer needs replaced- dryer is heating up no problem- drum just doesn’t spin. Can it be something else?
For model number FFLE3911QW0
Hello Cindi, Thank you for the question. As long as the appliance is not making any unusual noise like a grinding or banging, it is normally the Belt. You can remove the belt and check for wear or damage before replacing. We hope this helps!
My dryer beeps but won't come on. Can anyone tell me what might be wrong.
For model number FFLE3911QW0
Hello Steven, thank you for contacting us. Please check the following parts to diagnose the problem: the thermal fuse, part number FIX2349395, the door switch, part number FIX2330879, the control thermistor, part number FIX1149368, and the main electronic control board, part number FIX12364900. Customer service is available 7 days a week if you require assistance placing an order. Thanks again for reaching out!
The washer cycle of my one piece stackable washer dryer keeps tripping the 60 watt breaker. It’s not a breaker issue, what should i do?
For model number FFLE3911QW0
Hello Kathy, thank you for contacting us. Please check the motor assembly, part number FIX11704123, of the washer and ensure that it is not shorted. In most cases, a shorted motor will draw excessive current which may result in the tripping of the breaker. Also, investigate the motor control board, part number FIX11704388, with a multimeter. A shorted drain pump, part number FIX16218540, can also cause this problem. We hope this sorts out your problem!
Hello Rachael, thank you for reaching out. We would suggest checking the mounting hub, part number FIX11703845. It connects the inner tub to the drive motor. If the hub is damaged or not attached properly to the motor shaft, the washer may not agitate. We hope this information helps!
1. Unplug dryer from outlet 2. Using Lg. flat screwdriver, pry under the front edge of the top and release two spring tabs 3. Lift up top and tilt back out of your way 4. Unscrew two phillips scews on inside of front panel 5. Lift up and out the front panel. Two spring clips at bottom. 6. Rlease tension on drum be
... Read morelt at the motor. Access panel at rear of dryer. 7.Unscrew 3 screws from inside, center rear of drum. 8. Remove drum through the front of the dryer. You may have to spread the sides apart a little bit for it to fit 9. Lift up on the rear drum bearing to remove it from the bearing retainer. ( U shaped plastic socket) 10. unsrew 2 screws and remove the bearing retainer, ground ball. Ball retainer is on outside of dryer. 11. Vacuum everything--duct, blower, lint trap, ect. 12. Intall new bearing retainer and grounding ball, an assistant is helpful at this time, one to hold ball retainer on rear of dryer, one to screw it in from the inside 13. reassemble remainder of parts in reverse order.
Unplugged Dryer. Opened top of Dryer, over the drum. Removed Thermal Limiter. Tested the Thermal Limiter - found it was open. Checked all vents and exhaust tube for lint build-up. Replaced Thermal Limiter. Closed top of dryer. Plugged Dryer back. Tested Dryer - it works.
well, i started at the top and worked my way down. by taking the top off, it gave me more room to get the dryer tub out. took the two screw`s out of the vented plate on the back of the machine to undo the belt. this is a stackable washer-dryer combo, so next i took off the white plate on front between washer & dryer. took off the control
... Read morepanel, unpluged it, then took dryer door front off. then removed the two screw`s that hold that bracket on ,in the back of dryer, pulled the drum out & replaced the belt, but before replacing anything i took the shopvac to it , there was alot of lint in there.when replacing the Grounding Ball Clip & Grounding Ball, i took a one inch by two inch magnet and used it to hold the Grounding Ball & Clip in place so i could get the two screws started in the Drum Support Bearing & Bearing Bracket. after installing that i put the shaft in place & lined the dryer tub up with the 3 screw hole`s ,and boom, bang, pow...nothing to it. it`s easy...parts came very fast....Thx PartsSelect.com...i`ve told all my friend`s about PartsSelect